Actions in Dynamics 365 are a capability to create business logic that can be called in different ways such as through code or a workflow. They are not run on demand or automatically, but rather they are triggered by processes or code. If you wanted to run an action on demand you could call it from an on demand workflow. Actions take input, do something and may produce output.
Let’s go through an example of creating an action. Let’s say when a case is created where the title contains the word “bug”, we want to send an email to a developer, and assign the case record to the developer. Generally, we could write a workflow to perform these steps and run it on creation of the case. However, what if we want to not have it triggered when a case is created, but we want to run it from code as well, say from JavaScript or C#? We can bundle that functionality into an action and have it called from our front end or plugin code.
What are Actions in Dynamics 365?
- By the help of actions, we can extend the functionality of Dynamics 365 Customer Engagement by creating custom messages known as actions.
- Out-of-the-box CRM provides a set of pre-defined messages for each entity (like create, update, delete and others), but there can be cases when you want a custom action.
For example: approve, reject, delegate or any other action that fits your business needs. Through actions, we can create our own messages for any entity type.
What are the Actions considerations?
- Always runs under the security context of the calling user.
- Supports input and output arguments.
- Doesn’t support a scope where the execution is restricted to a user, business unit, or organization. Actions always execute in organization scope.
- Supports auditing of data changes.
What are the ways to invoke Custom Actions?
Actions can be invoked by the following ways:
- Plugin
- JavaScript
- Workflow
- Web API
- Console Applications
Why use Actions?
- Actions provide the ability to define a single verb (or message) that matches an operation you need to perform for your business.
- These new messages are driven by a process or behavior rather than what can be done with an entity.
- These messages can correspond to verbs like Escalate, Convert, Schedule, Route, or Approve whatever you need.
- The addition of these verbs helps provide a richer vocabulary for you to fluently define your business processes.
- This also makes it easier because you can manage and log the success or failure of the entire action as a single unit.
Why does someone want to read about Actions?
- By the help of actions, someone can extend the functionality of Dynamics 365 Customer Engagement (on-premises) by creating custom messages known as actions.
- These actions will have associated request/response classes and a Web API action will be generated.
- Actions are typically used to add new domain specific functionality to the organization web service or to combine multiple organization web service message requests into a single request. For example, in a support call center, you may want to combine the Create, Assign, and Setstate messages into a single new Escalate message.
What is the business need for Actions?
- The main advantage of actions is to provide the ability to modify the logic easily whenever a business process is changed.
- Actions can be run by a plugin, a custom workflow, or while doing integration with another system, a custom client application, or JavaScript.
- Actions open a range of possibilities for composing business logic. Before Actions, the primary way to implement business processes was limited to plug-ins or custom workflow activities for which you need a developer.
- With Actions, you can perform operations, such as Create, Update, Delete, Assign, or Perform Action. Internally, an action creates a custom message.
Who uses Actions?
- A business user can modify this without the help of a developer.
Writing the action itself is straight forward. Go to Processes:

Select new and create a new Action for our case:
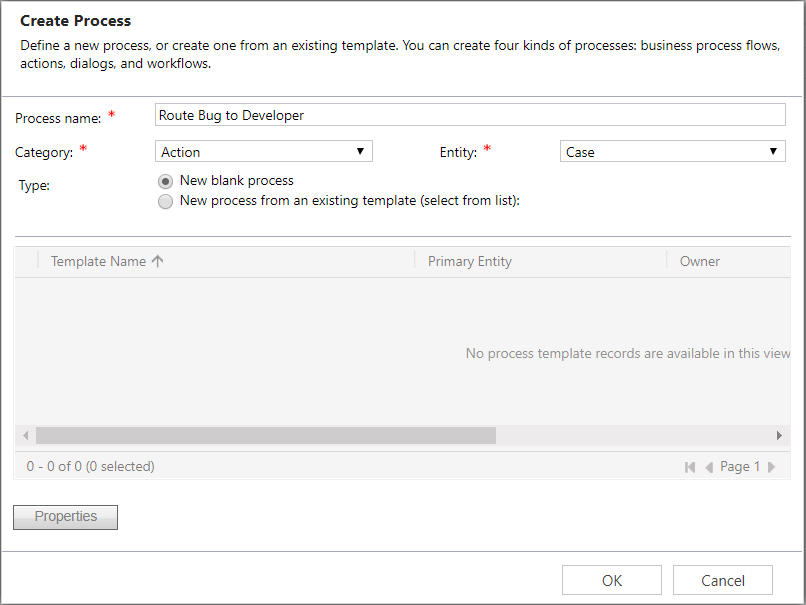
The window will open:
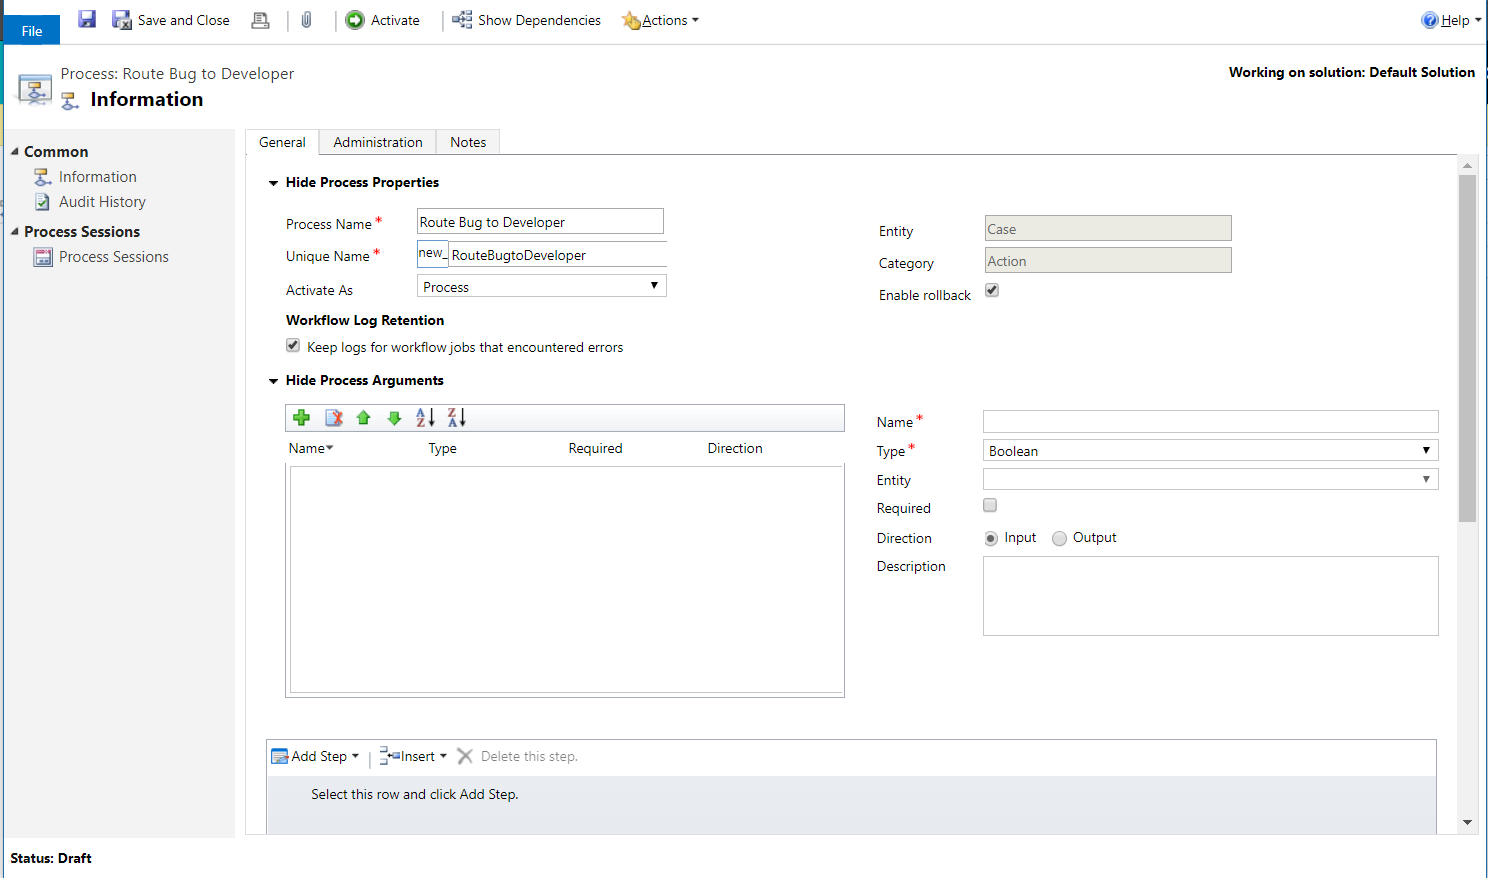
Note the Process Arguments section. This is the input for our action. As we will be sending an email, we can have a to and from email address here. Add a ToEmail and FromEmail field. These will be EntityReference fields to the User entity:

Now we can add some steps:
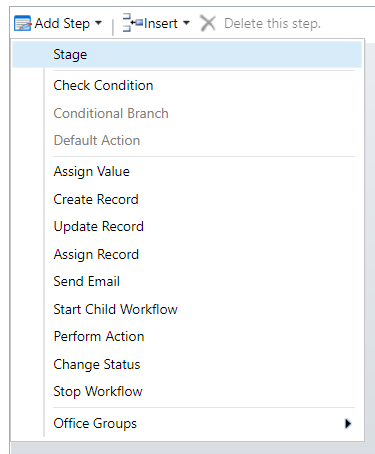
Add a Check Condition for the title:

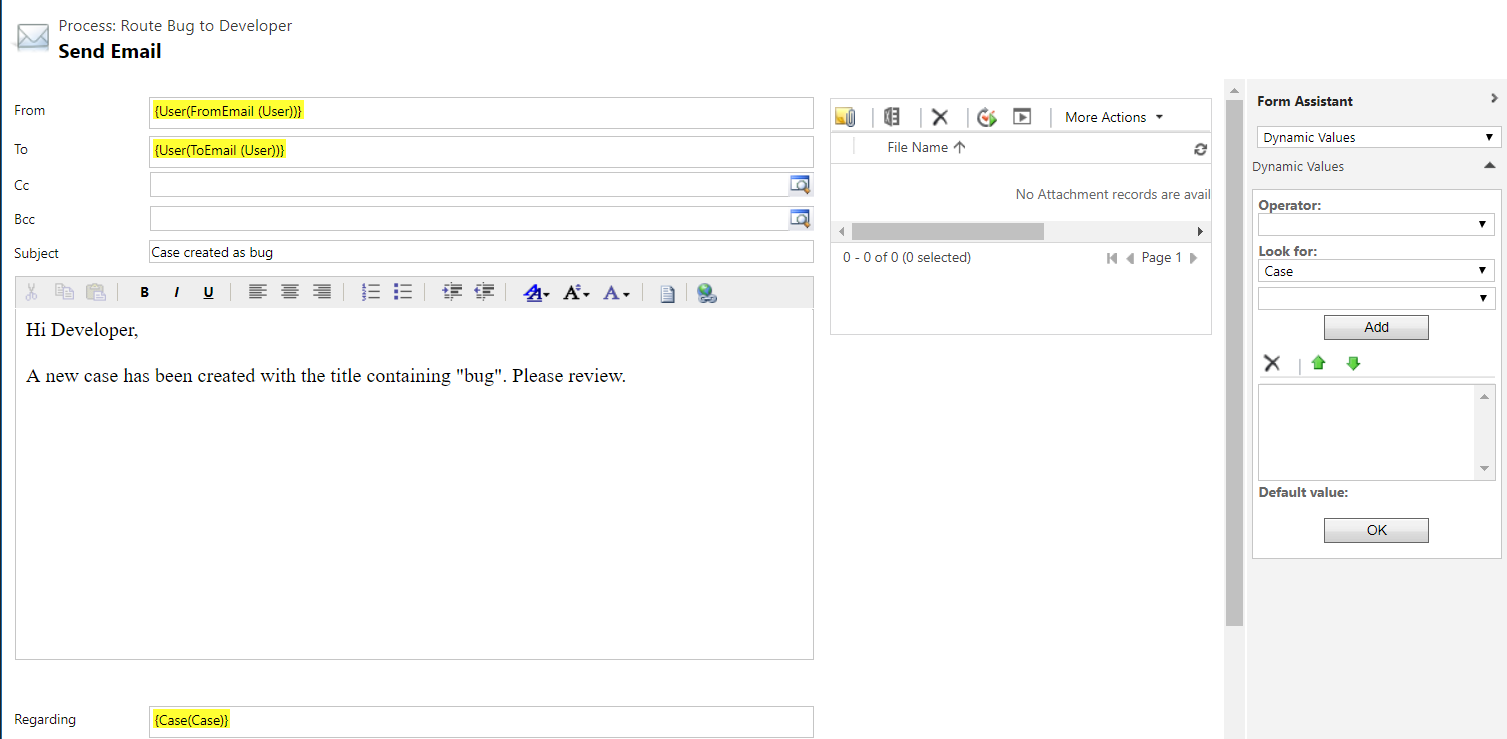
Add the Send Email step and configure the email to use the input parameters:
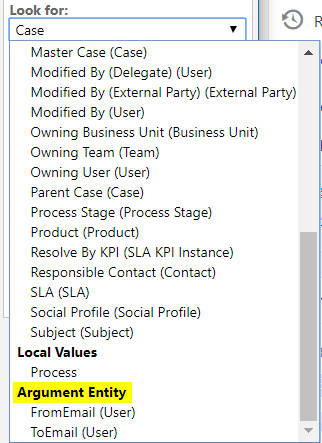
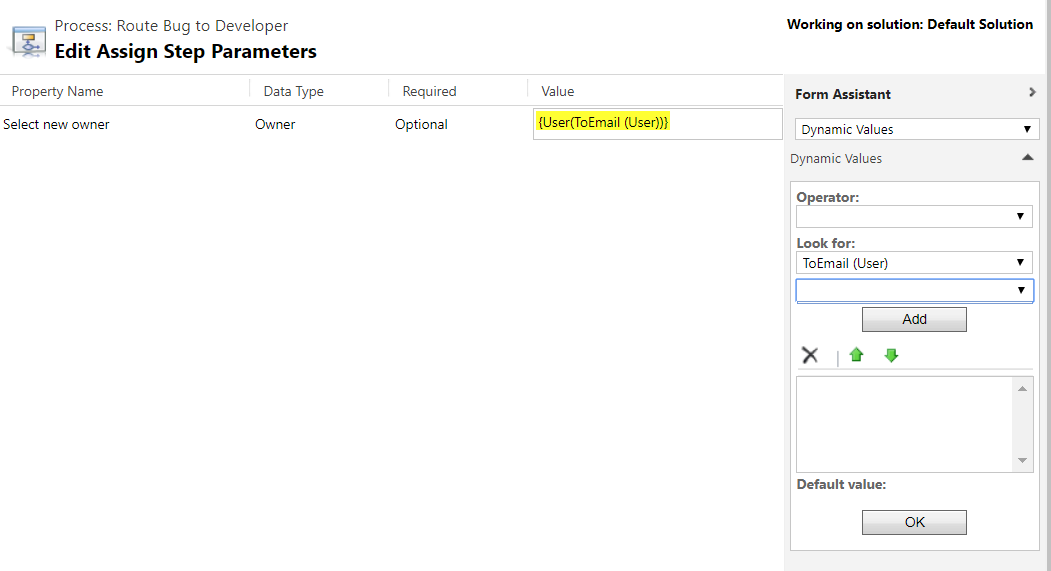
Then assign the case to the developer:
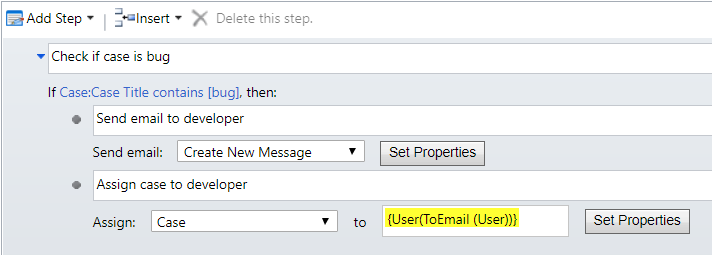
The action should now look like this:
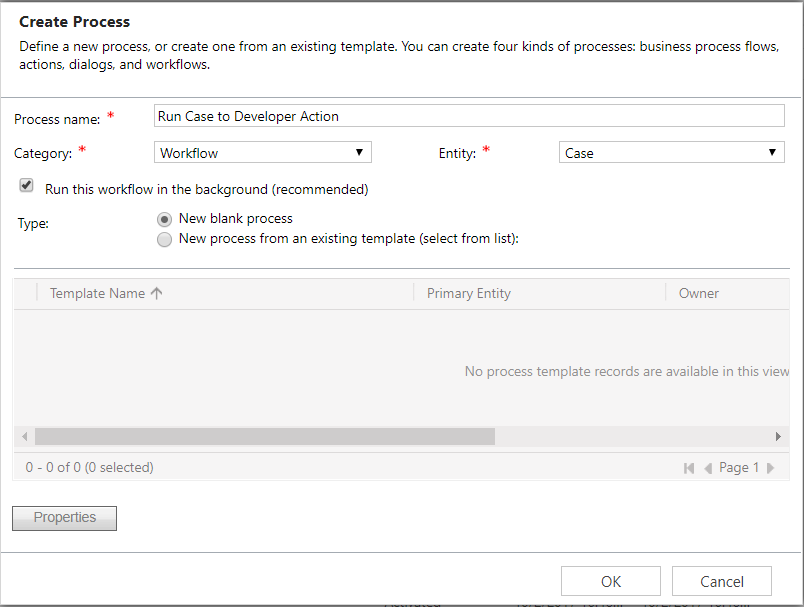
Activate the action. Now, we will create a Workflow to test the action:
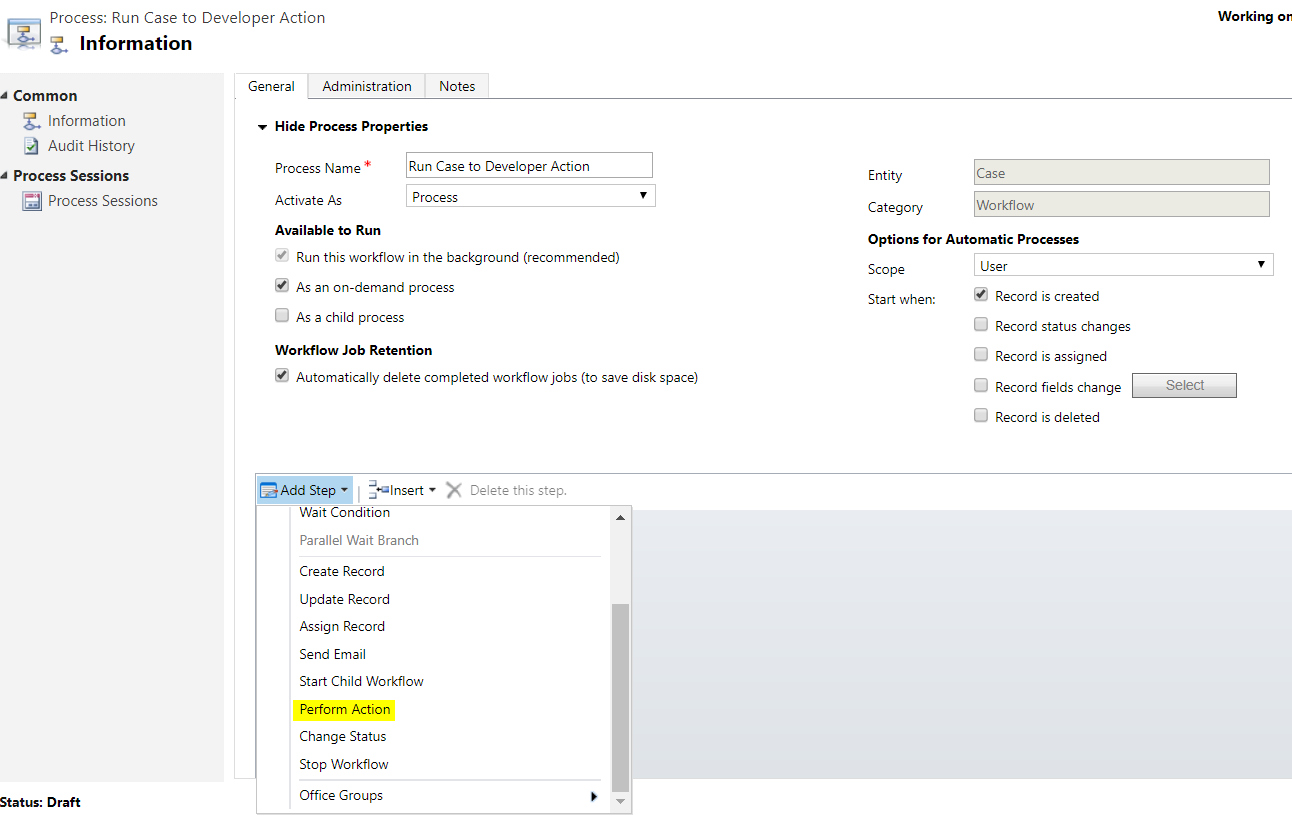
Enter the parameters for the action:
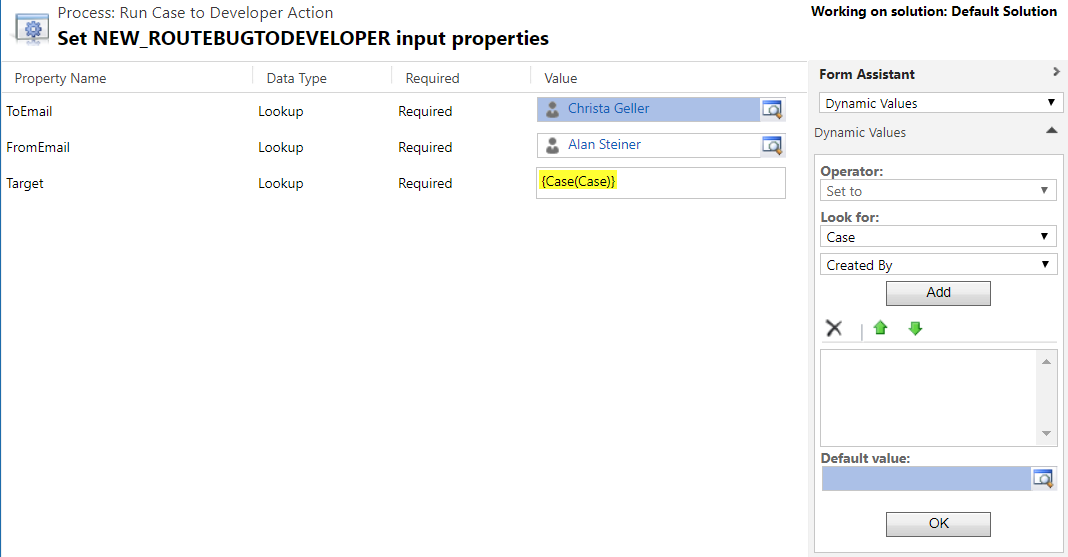

Activate the workflow.
Now, create a case.
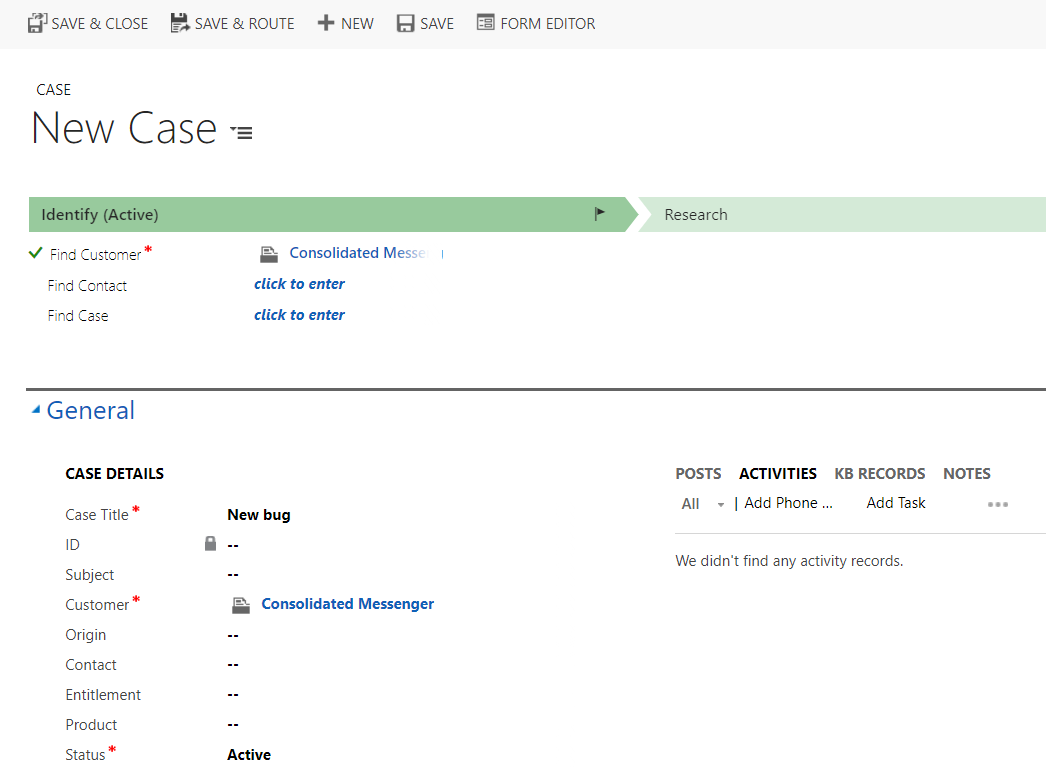
After saving the case, the case is reassigned to the developer and an email is sent:


No comments:
Post a Comment