Moving the developed solutions from dev environment to other environments is as critical (or more critical) as developing solutions without defects. Often dev team focuses more on building solutions in the dev without bugs and tend to make mistakes in the deployment (mostly depends on the pressure during the deployment, time available for pre-deployment activities and also smaller release window for deployment if CRM is already mission critical).
Microsoft CRM has few features to help you with the release management and this post would be helpful if you are unaware of the features or not making the right usage of the features – Clone Patch and Clone Solution.
A usual release management process in an agile [or similar] delivery mode would be:
Dev team develops the deliverables in Dev environment
- To release defect fixes / new changes every day or every week as patches to QA environment
- Move the stable solution [with all the patches] to production in a monthly / bi weekly production release cycle.
CRM solution management features Clone Solution & Clone Patch would help the team in enabling continuous delivery [CI/CD] of the software packages to production.
Multiple Environments
Consider there are three environments [ Dev, UAT and Prod]
Dev: http://<server>/devdemo/main.aspx
UAT: http://<server>/uatdemo/main.aspx
Prod: http://<server>/proddemo/main.aspx
Base Solution
- Create a solution in CRM Dev with all the changes [ Entities/Web resources/Plugins etc.]. For the demo, I have added only the Account entity in the base solution

- Export the solution as a managed solution from dev and import to the UAT environment
Dev:
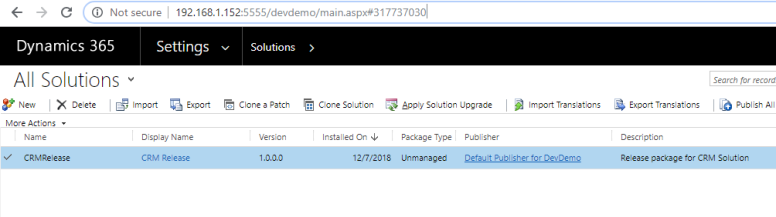
UAT:

Patch (1.0.1.0) on Base Solution – 1st set of changes from UAT
Imagine there is an issue raised in UAT and you need to add the contact entity also to the managed solution, all we need to do is to clone a patch and add Contact entity to the solution.
Let’s clone the patch for exporting only the new change(s)


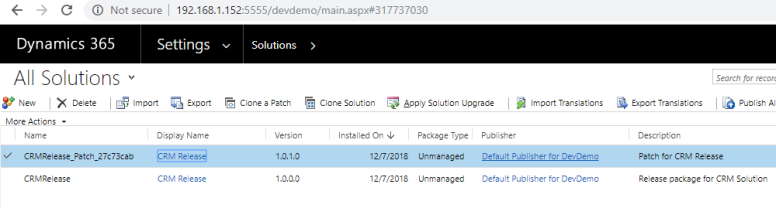
Now open the patch solution and add the additional components to be moved to UAT

Once the components are added, export the patch solution in ‘Managed’ mode
Import the ‘Managed’ patch solution package in to UAT environment

Once a Patch is created, base solution becomes parent solution and components cannot be added or removed from the base solution now. This lock would be released when either the patches are deleted or the solution itself is cloned [we are coming to the ‘Solution Clone’ topic next]
Patch (1.0.2.0) on Base Solution – 2nd Set of changes from UAT
Now imagine if UAT team raises another issue related to Lead entity and we need to release the Lead entity changes to UAT.
Let’s create a patch update of the base solution package by using the Clone Patch feature again and add the Lead entity in the new patch [v1.0.2.0]

Add the Lead entity in the new patch created and export the Patch as a managed solution and import in to UAT. After the Patch is deployed in UAT, there will be 3 solutions [ Base packages and 2 Patch solutions]
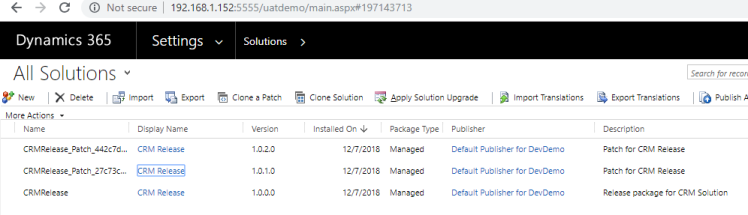
Production Release – Finalize the production release package
Now we got the UAT signoff for the sprint and it’s time for moving the release package with all changes to production. Let’s ‘Clone the Solution’ and make the production package ready with all the patches [remove any patch if not required from the source before cloning the solution if need to remove any changes]
When solution is cloned, Minor version would be incremented by 1 by default and build and revision would be non-editable
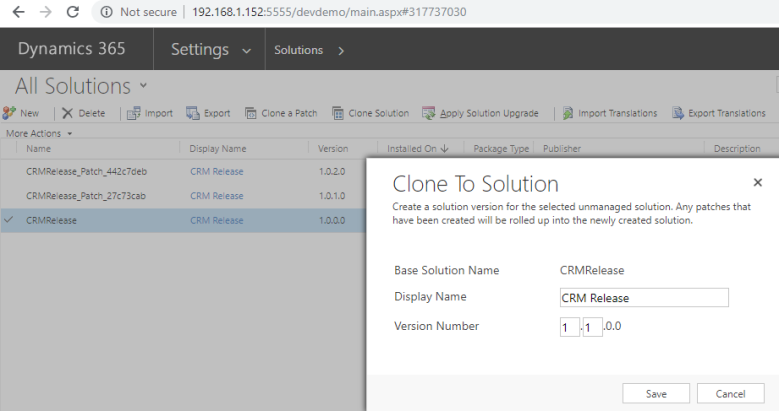
Once the solution is cloned, all the patches are merged in to the new Upgrade solution [ Minor version updated]

Let’s move the solution to UAT


Apply Solution Upgrade – On demand Solution Upgrade if Patches exist in the environment
When an upgraded solution is imported in to the environment which has the patches already deployed [ in our case UAT has the patches and Prod doesn’t have patches] applying the solution upgrade is a manual activity and can be on demand.
Before Solution Upgrade [ Solution packages are not merged until the Solution Upgrade is applied]
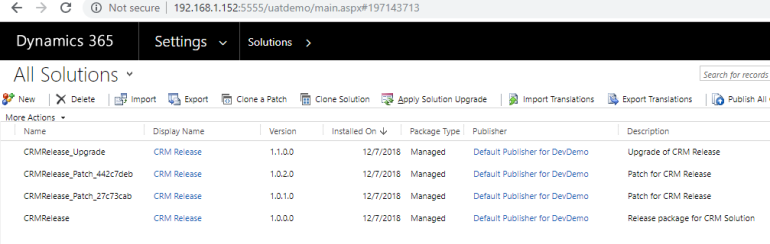
- After Solution Upgrade [Solutions would be merged once the Solution Upgrade is applied]

Let’s move the solution to Prod


Solution Upgrade is applied by default since there was no patch deployed already in the environment

Hope this helps you to understand the different usages of Solution Patch and Solution Clone.
Below image shows the CRM release management strategy [using Clone Solution & Clone Patch] explained in this post in a nutshell:

Please let us know if you have a different view for managing the Solutions/Patches better.
References:
https://docs.microsoft.com/en-us/dynamics365/customer-engagement/developer/work-solutions