Search This Blog

Wednesday, October 5, 2022

HOW PATCHING OF SOLUTIONS WORKS IN THE POWER PLATFORM

In the Microsoft Power Platform, there is a concept of patching solutions. Patches are useful when you want to deploy code from one environment to another. With patches, you would have already released a solution from one environment to another, and then be in a situation where you need to deploy a fix or enhancement to that solution. Instead of updating the original solution and deploying that full solution again, the concept of patches was introduced to enable us to deploy only what has changed. We could create a new small solution with only the code we need to deploy without creating a patch, but the nice feature of patches is they are tracked back to the original solution, so we can ultimately roll these changes back into the base solution.

Patches are also layered on top of the original solution, which is important in terms of predictability of code deployments. This is especially handy if you are creating an app or ISV code, or are keeping a close eye on what is deployed in your production orgs. Patches should be faster to deploy as you are only deploying part of a solution, and individual developers can deploy patches instead of waiting for other devs to complete functionality.

Let’s take a look at how patching works.

In this post, we will:

  1. Export a managed solution 1.0.0.1 from Source
  2. Import the managed solution 1.0.0.1 into the Target
  3. Update source and export managed solution 1.0.0.2
  4. Import managed solution 1.0.0.2 into the Target
  5. Create managed solution patch 1.0.1.2
  6. Update the source org and export 1.0.1.2
  7. Deploy patch 1.0.1.2 into to target
  8. Create patch 1.0.2.2
  9. Import 1.0.2.2 into target
  10. Patch 1.0.3.2
  11. Roll back a patch
  12. Clone solution

Solution Versions

Before we start, Dynamics 365 / Power Apps / Power Platform solution versions are in the format <major>.<minor>.<build>.<revision>. You can read more about the format in my blog post on how solution version numbers work, but for now, we just need to know the main structure.

Solution Layering

To understand patching and upgrades, we need to understand Solution Layering in the Power Platform.

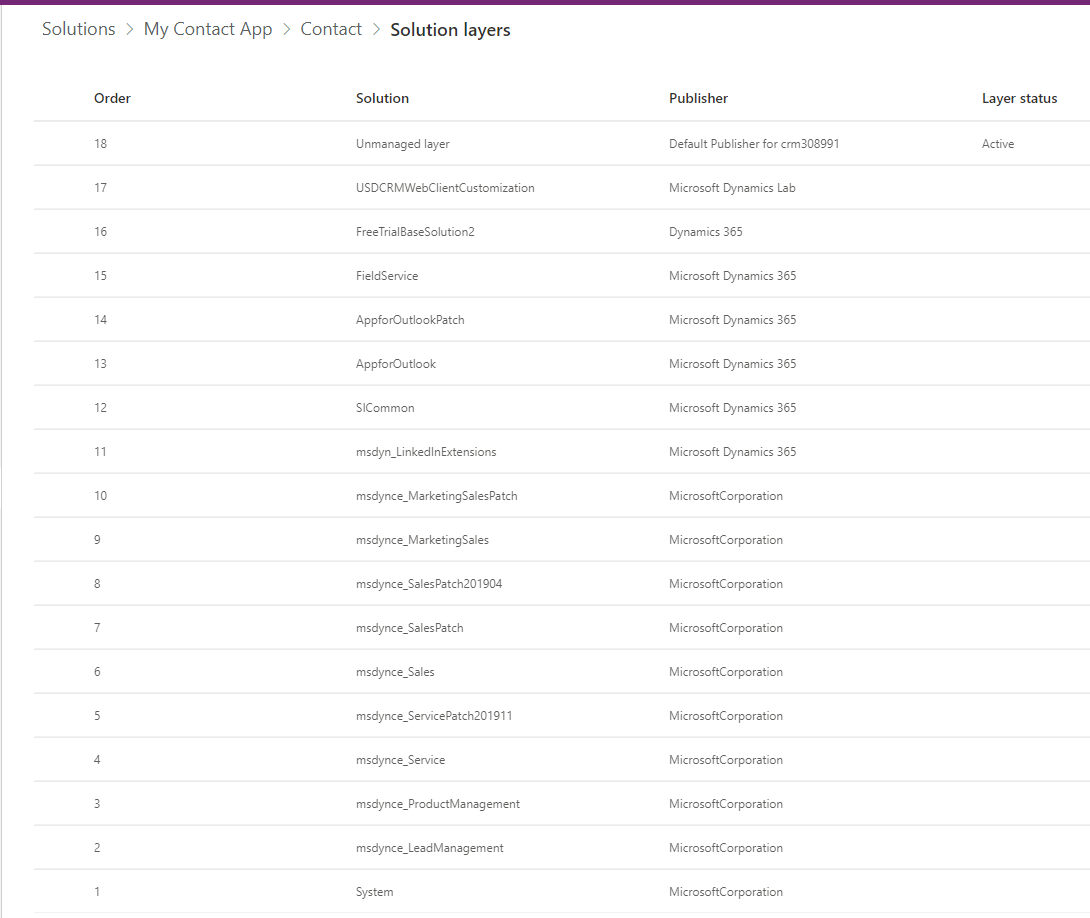
Each solution in the Power Platform sits in a layer. Let’s look at an example. If we create a solution in our target org, and add the Contact entity, we can select the entity and see the solution layers by selecting See Solution Layers:
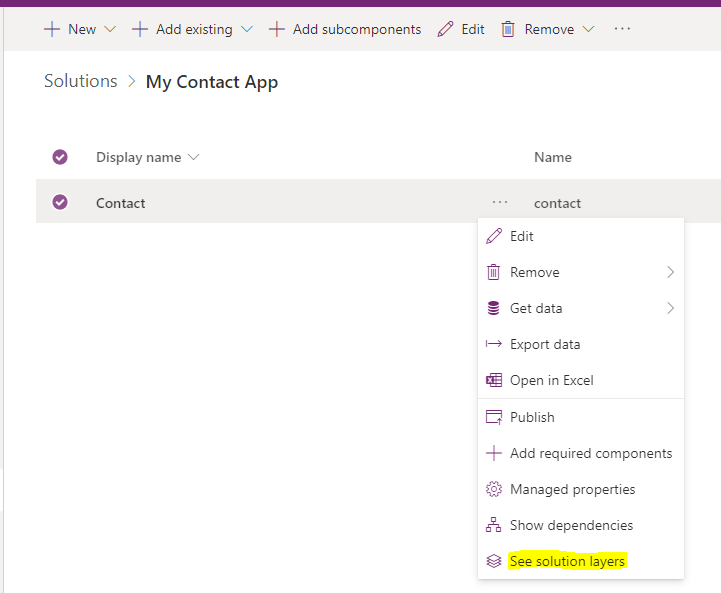
We see the order of each later, starting with the System layer at number 1. Then each solution has a layer number, and at the top we have the active layer, in this case at number 18:
If we look at an entity such as Action Calls, which is part of the Unified Service Desk solution, we see there is only one layer, i.e. it is not used by other solutions:

We will look at what happens when a patch and solution is deployed further along in this post.

Export Managed Solution 1.0.0.1 from Source

In our source environment, we have a solution and some code. The version number of the solution after creating it is set to 1.0.0.0. The solution contains:

  • The Contact entity, with all the assets added. Note in the real world, you should add only the components you need
  • A new JavaScript file called carl_Contact.js
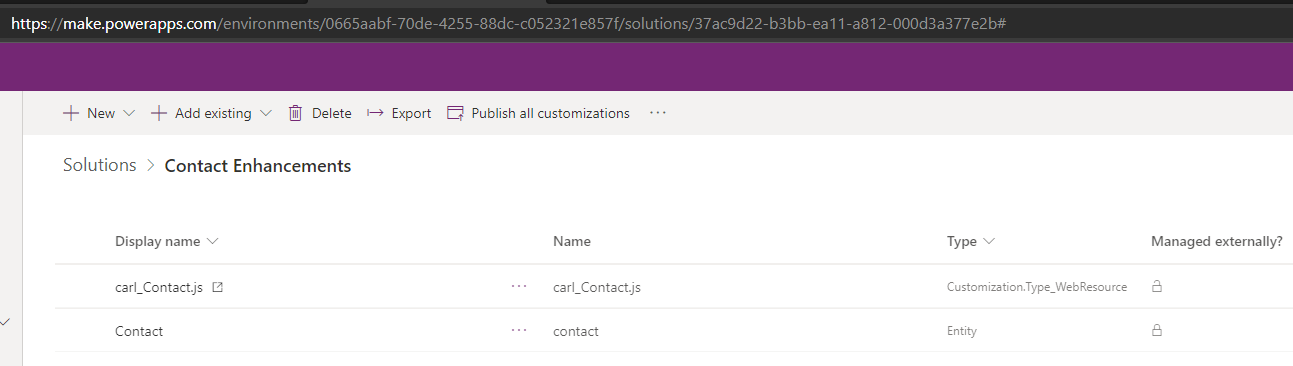
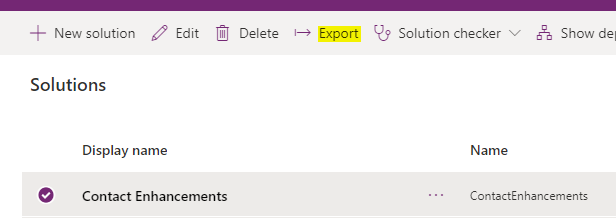
Let’s start with a simple export/import. We will export the solution as a managed solution:
Select Managed:
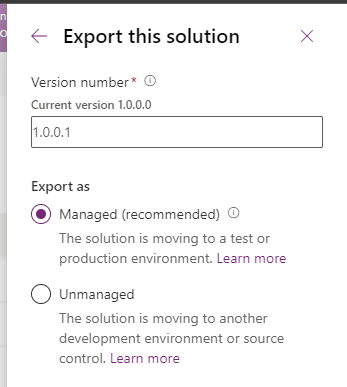
On exporting, the solution version is set to 1.0.0.1. I.e. the revision number has been incremented. We can change this number if we want, but it makes sense to keep this:

Import 1.0.0.1 into Target

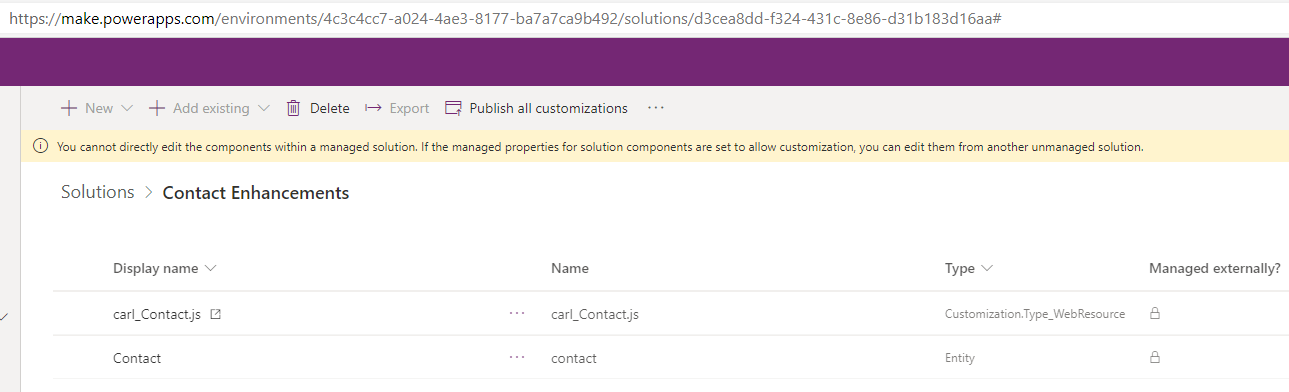
Now let’s import this managed solution into a new environment. We see the solution has been imported, and the solution tells us we cannot make changes to it as it is managed:
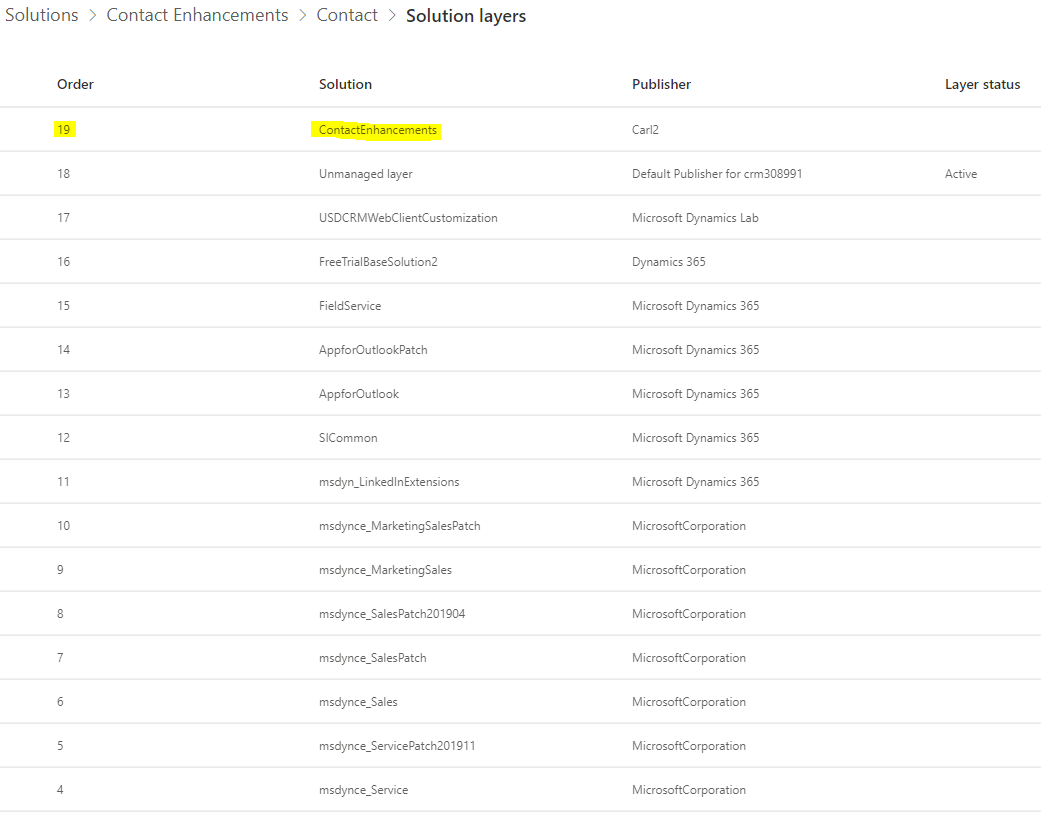
If we look at the solution layers for the Contact, we can see it has been added as a layer right at the top:
Update Source and Export 1.0.0.2

Now, let’s make an update to the solution in our source org. In this case, we are making a change to the solution directly, instead of using patches which we will discuss shortly. In some cases, we may not want to make these changes directly, e.g. if there are multiple developers that don’t have their code ready, but one developer does. Let’s assume that it’s ok to update this solution directly here, to see how this works.

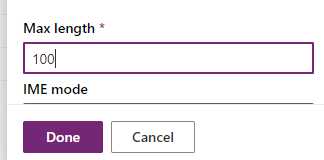
We will change the text in the file carl_Contact.js file, and we will also change the First Name field from the default 50 characters to 100 characters:
On exporting, the revision number of the solution is incremented to 1.0.0.2.

Note we are exporting the original solution with all its assets.

Import 1.0.0.2 into Target

On importing into the target environment, our version will be increased to 1.0.0.2:
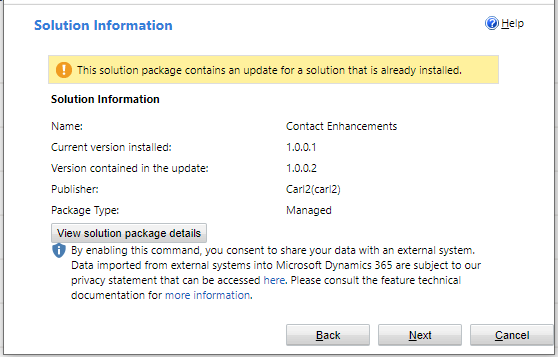
And we are prompted to:

  • Upgrade (recommended). This option upgrades your solution to the latest version and rolls up all previous patches in one step. Any components associated to the previous solution version that are not in the newer solution version will be deleted.
  • Stage for Upgrade. This option upgrades your solution to the higher version, but defers the deletion of the previous version and any related patches until you apply a solution upgrade later.
  • Update (not recommended). This option replaces your solution with this version. Components that are not in the newer solution will not be deleted and will remain in the system.
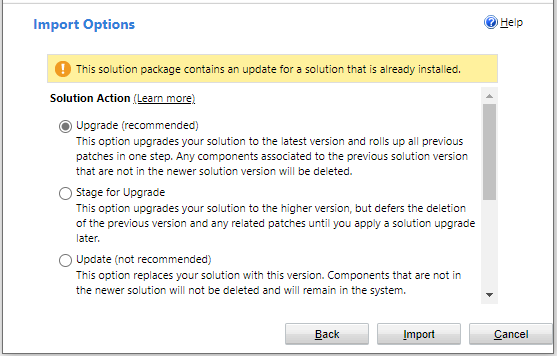
And scrolling down, we see:

  • Maintain customizations (recommended). This option maintains any unmanaged customizations performed on components, but also implies that some of the updates included in this solution will not take effect.
  • Overwrite customizations (not recommended). This option overwrites or removes any unmanaged customizations previously performed on components in this solution. This option does not affect components that support merge behavior (forms, sitemap, ribbon, app modules). Components that have other managed solutions on top of the existing solution you are replacing do also still remain on top and are not affected by this option
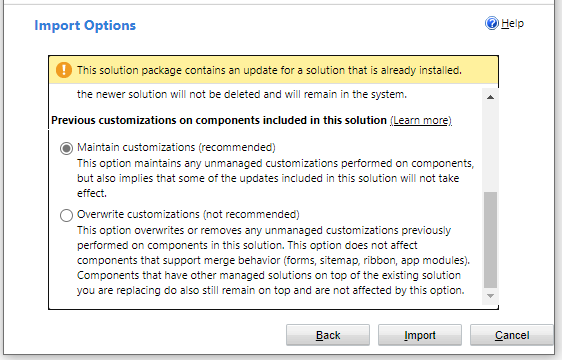
Let’s keep the recommended defaults and select Import. We see there are 2 versions of the solution now imported – 1.0.0.1 and 1.0.0.2:

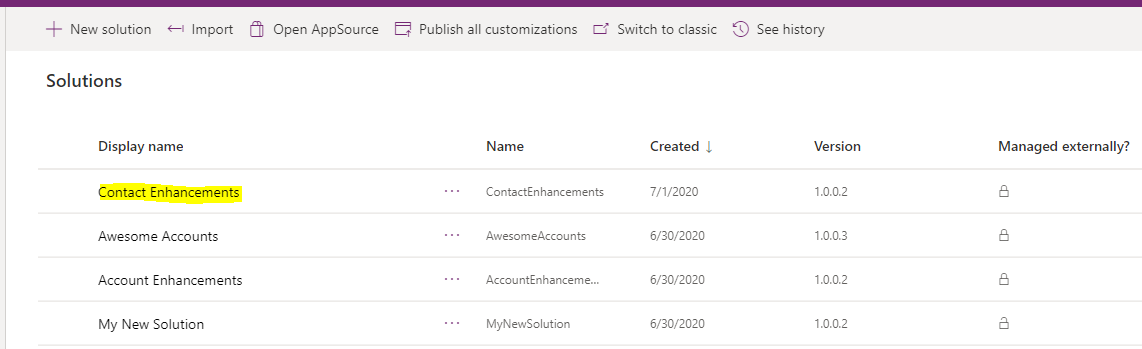
And after refreshing, we see only the one latest Contact Enhancements solution with version 1.0.0.2:
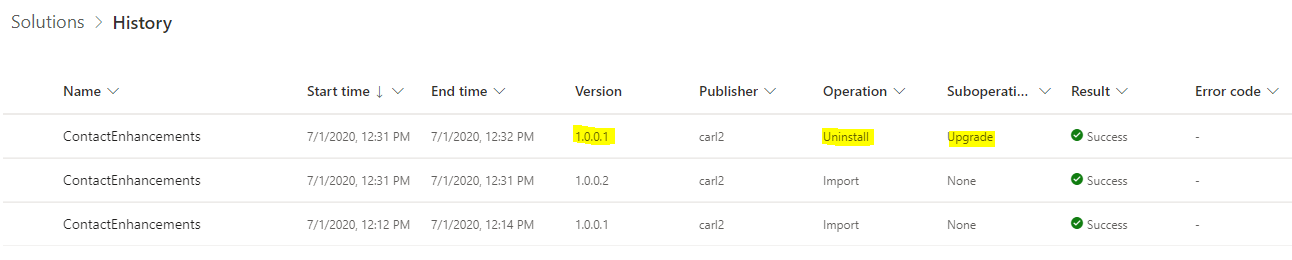
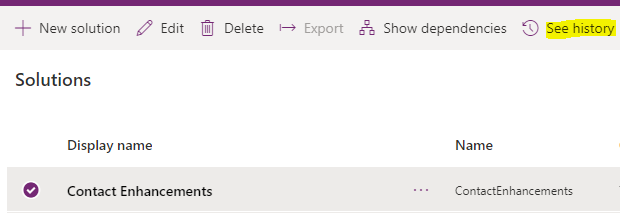
If we check the Solution History, we can see after version 1.0.0.2 was installed, there was an automatic uninstall of solution 1.0.0.1:
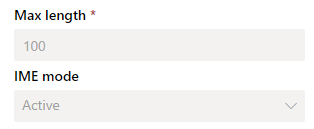
If we were to check our updated carl_Contact.js file, we would see the updated file. The first name has increased to max length of 100:
The solution layers for Contact still look like below:
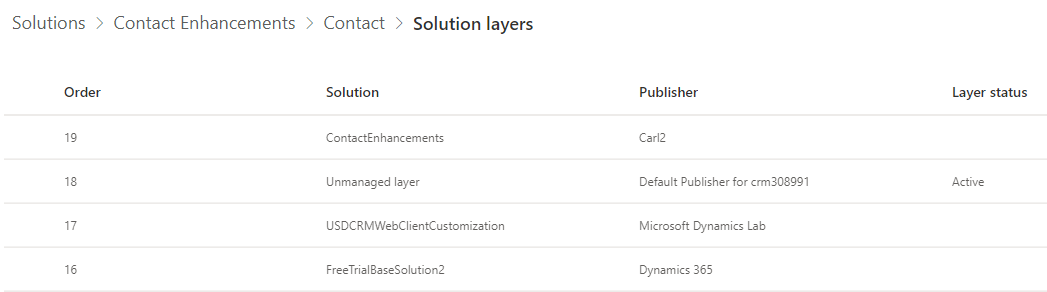
The reason the import removed the previous version, is because we chose option 1 to upgrade, which “upgrades your solution to the latest version and rolls up all previous patches in one step”.

Create Patch Solution 1.0.1.2

Let’s now create a patch. Let’s say we need to change the first name length from 100 now to 120. First thing we will do is create the patch.

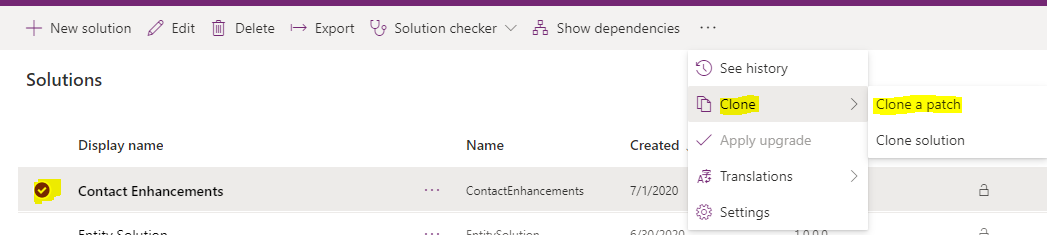
Select the solution, then Clone->Clone a patch:
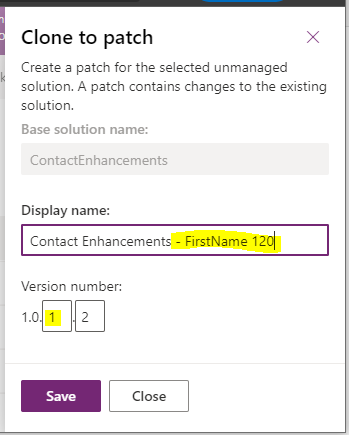
We see the base solution name, which we can overwrite to something more meaningful such as Contact Enhanccements – FirstName 120, and it says “create a patch for the selected unmanaged solution. A patch contains changes to the existing solution”. The version number is automatically incremented to 1.0.1.2. Note the build number has incremented here:
We see the patch solution created:
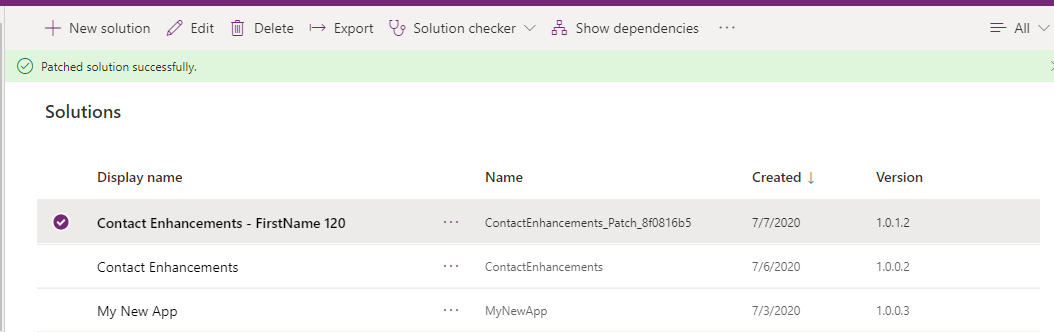
If we were to look at the metadata for these 2 solutions, we would see the Solution Id is the same. Opening the patch solution, there are no components:
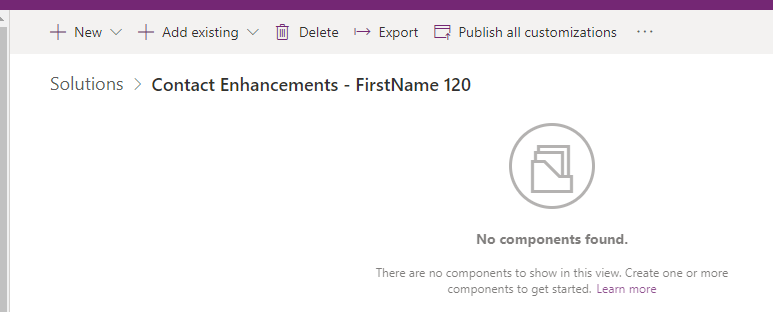
Let’s add our entity into the solution:
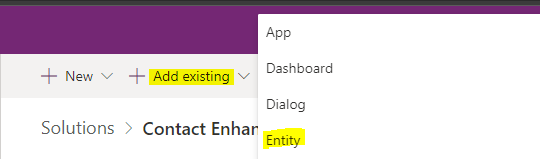
Select Contact:
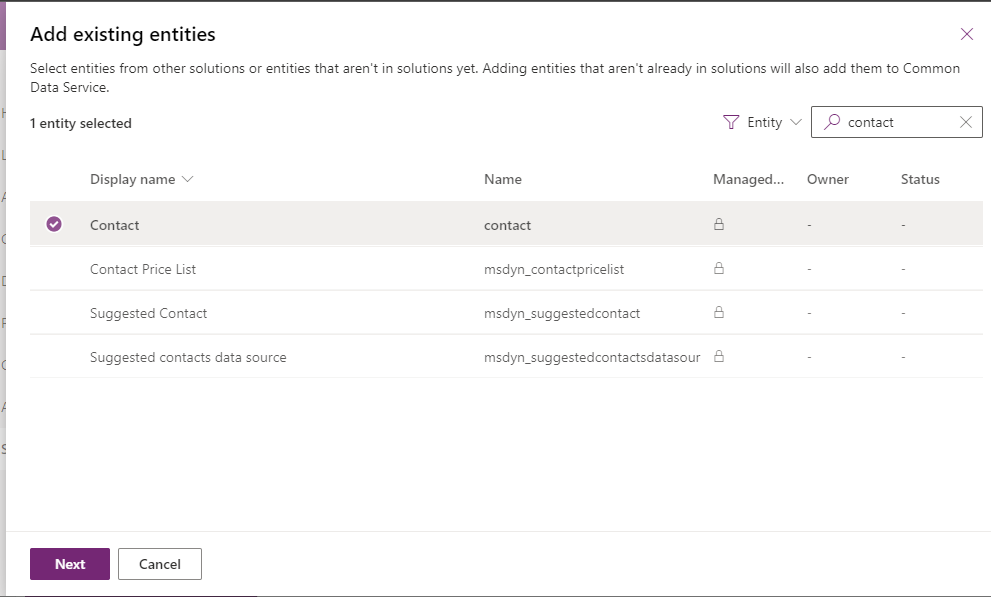
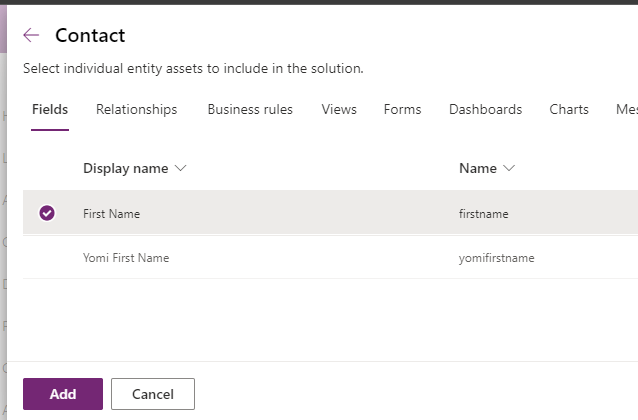
Select the First Name field:
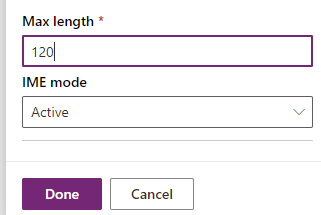
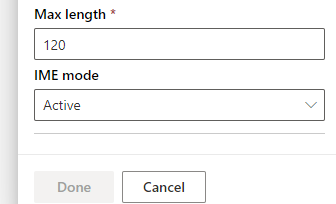
Increase the First Name field to 120 characters:
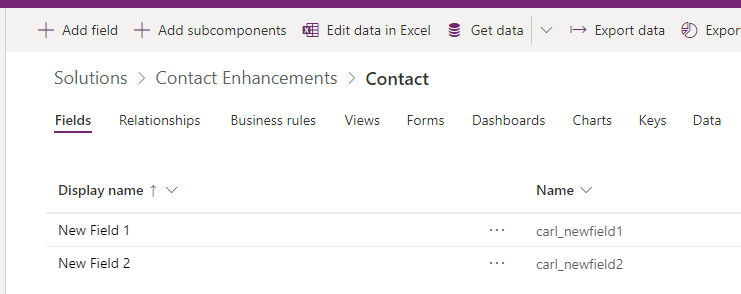
And let’s add some fields to the Contact entity and see how these are handled. We will add 2 fields:
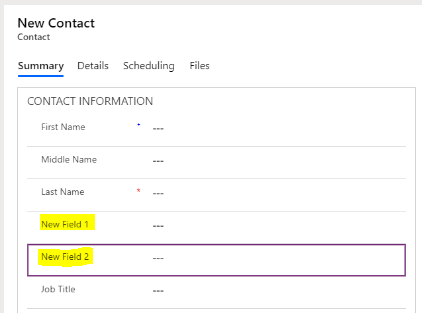
We will add these fields to the Contact form:
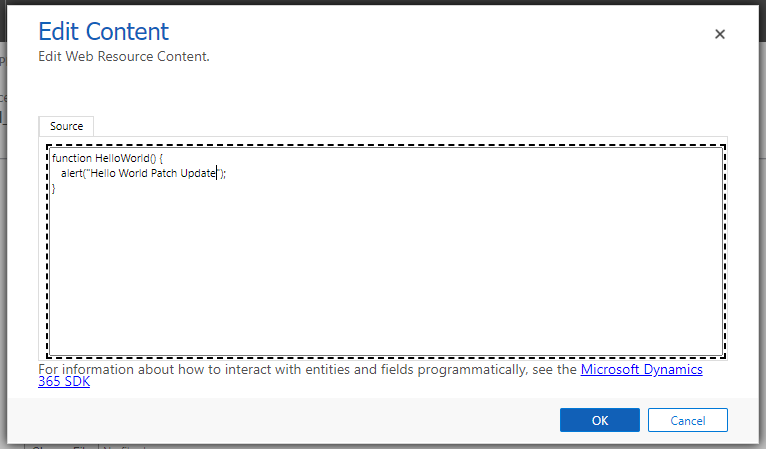
Let’s update the Web Resource so we can confirm it worked:
Export Patch 1.0.1.2

Export the solution (exporting the solution automatically increments the last digit, so you could have an incremented version number if you don’t change it):

Deploy Patch 1.0.1.2 to Target

Now let’s deploy the patch to the target environment:
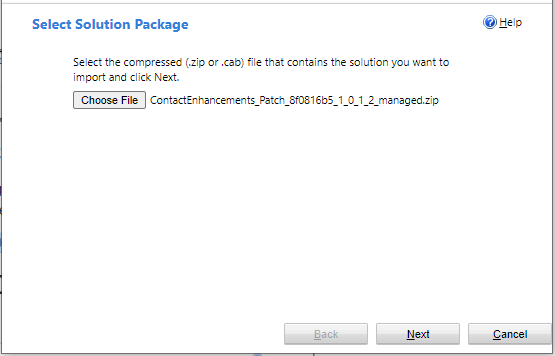
Click Import:
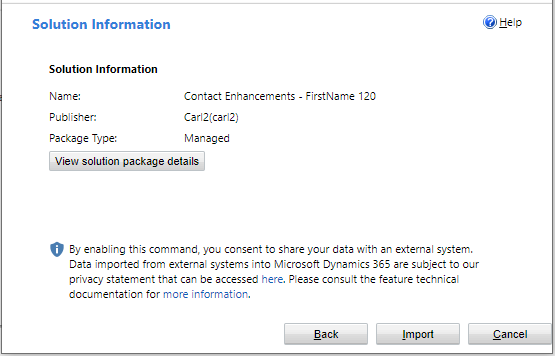
Now in the target, we see:

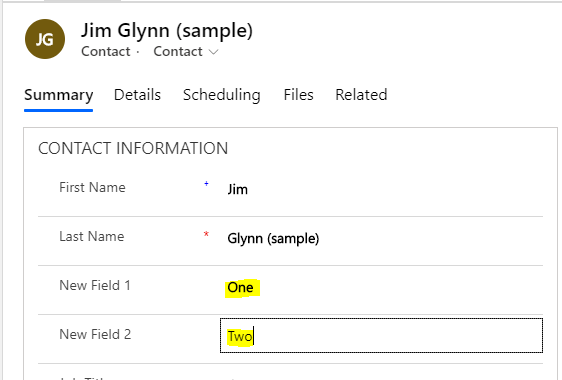
If we look at the contact, we see the new fields have been added, the field length for the First Name is 120, and the JavaScript has been updated.
Let’s update a Contact record by populating the new fields:
Create Patch 1.0.2.2

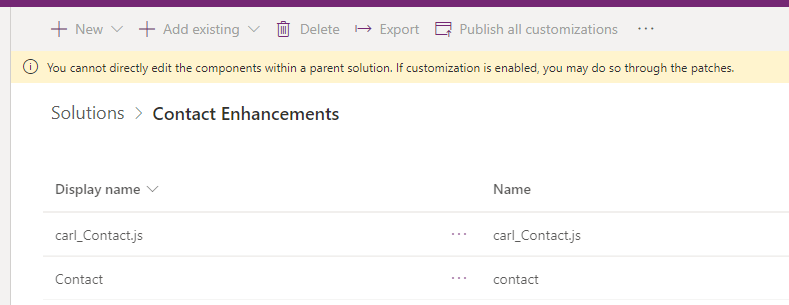
Note. if we went into the parent solution now in the source org, we would not be able to edit it. We get the message “You cannot directly edit the components within a parent solution. If customization is enabled, you may do so through the patches“:
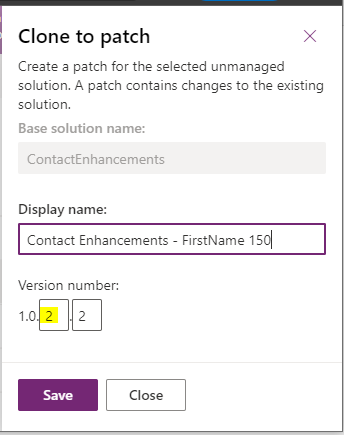
Let’s create a new patch, this time to increase the first name field size again, and to add a 3rd field. First, we will create the patch by selecting the original solution and choose Clone->Clone a patch. The patch version is 1.0.2.2:
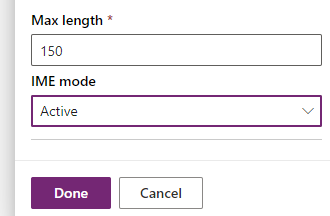
We will increase the First Name field size to 150:
We will add a 3rd field, New Field 3.

Export the patch:

Import 1.0.2.2 into Target

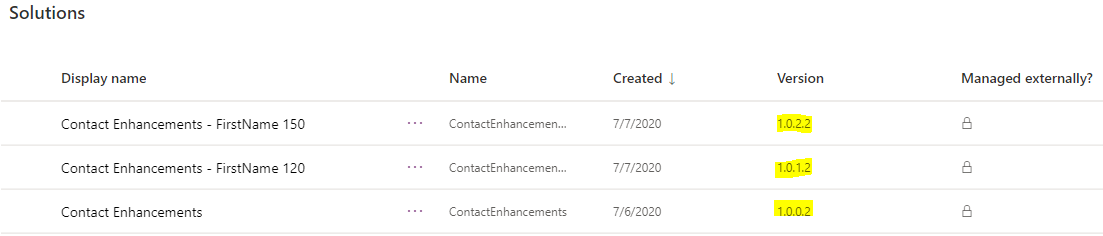
Let’s import the 1.0.2.2 patch into the target. We now have 3 solutions – 1 parent solution and 2 patches:
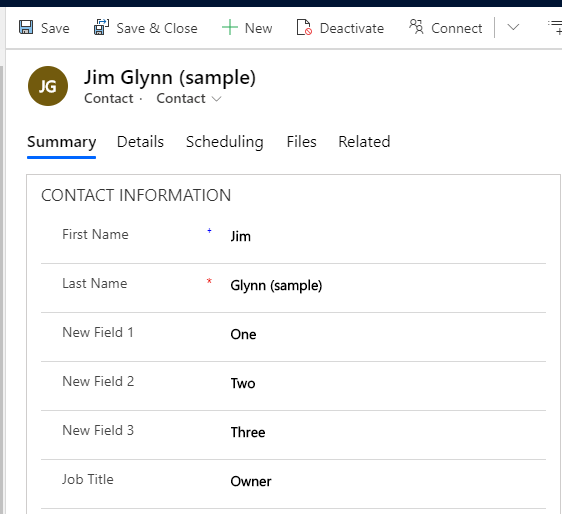
And we have 3 fields in the Contact entity:
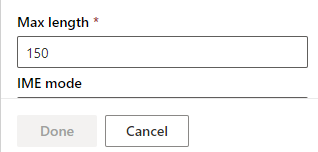
At this point, the Contact First Name field is 150 characters:
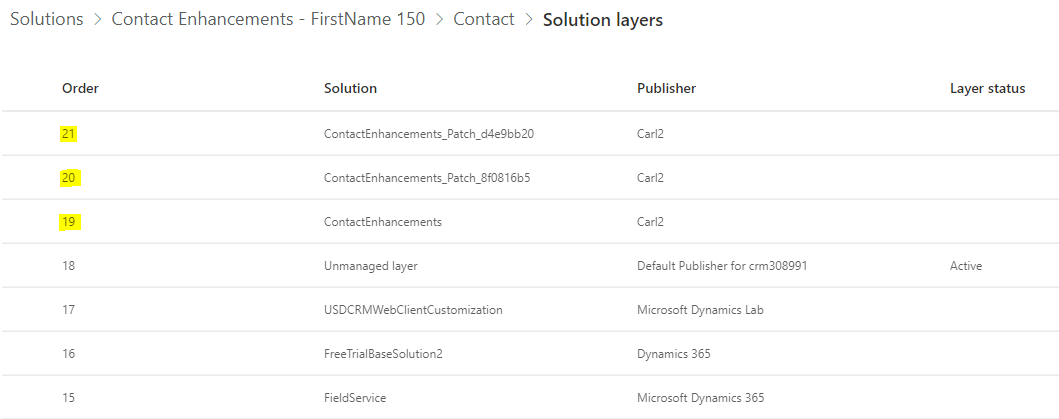
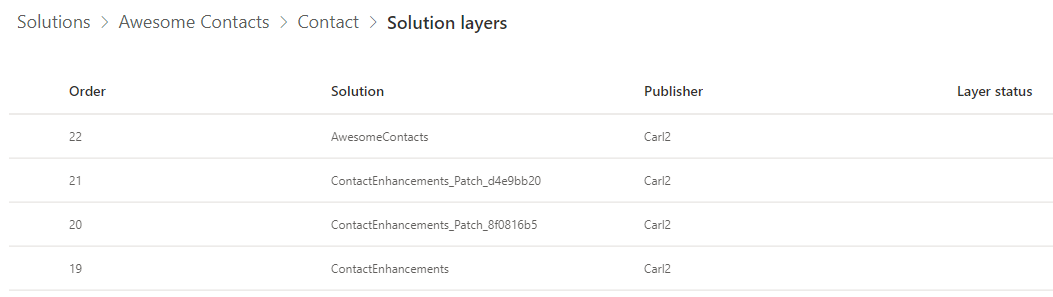
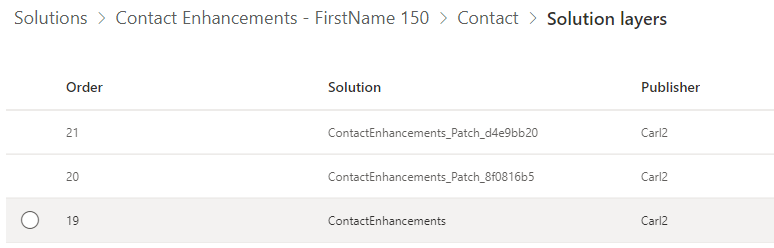
The solution layers look like below, where each patch has created its own layer on top of the Contact Enhancements layer:
Adding another Solution and Layer

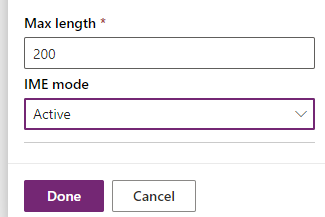
Now let’s say we import a new managed solution completely separate from the above solutions. Our solution is imported from another org and is called Awesome Contacts. It contains the Contact entity with the First Name, of max length 200 now in the target:
Patch 1.0.3.2

Let’s create another patch from our original solution:
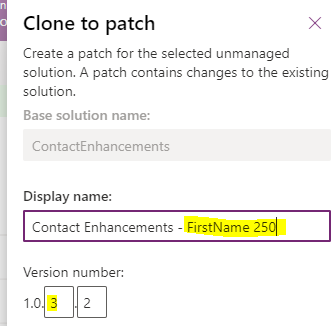
With the First Name = 250 characters:
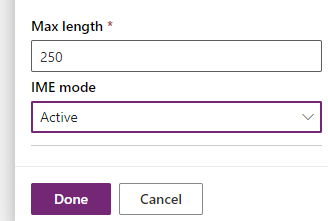
And import it into our target org.

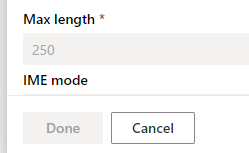
After importing, we see the field length of First Name is not 250, but 200:
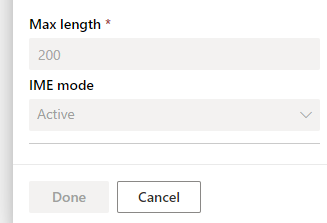
This is because the patch is inserted between the new Awesome Contacts solution and the  Contact Enhancements solution, i.e. it sits above the Contact Enhancements layer, so the newer Awesome Contacts has the “winning” field length:
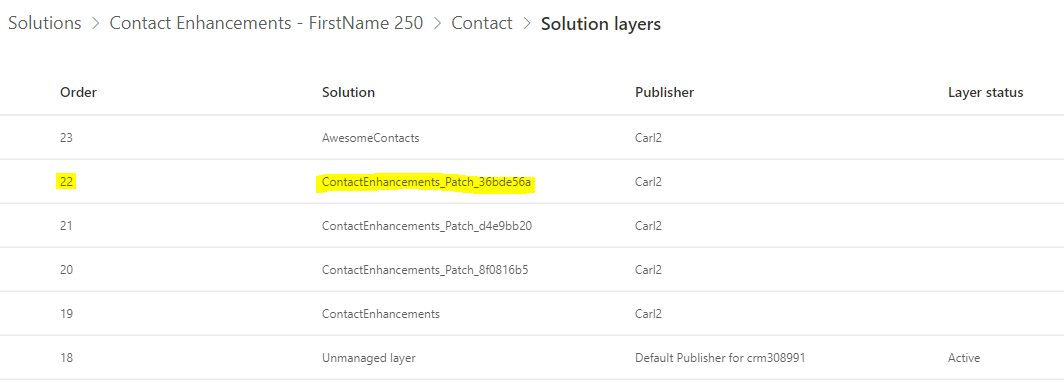
Here we can see that patching is giving us some level of predictability in terms of what will happen when managed solutions and patches are imported.

Rolling Back a Patch

What’s nice about patches is they are easy to roll back.

Let’s say in our target org we don’t want the Awesome Contacts installed, and we don’t want the last patch installed. Let’s look at what happens.

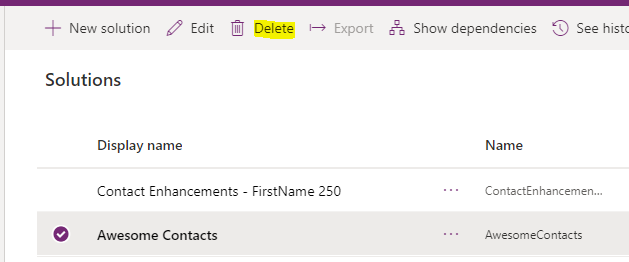
First, delete the Awesome Contacts solution:
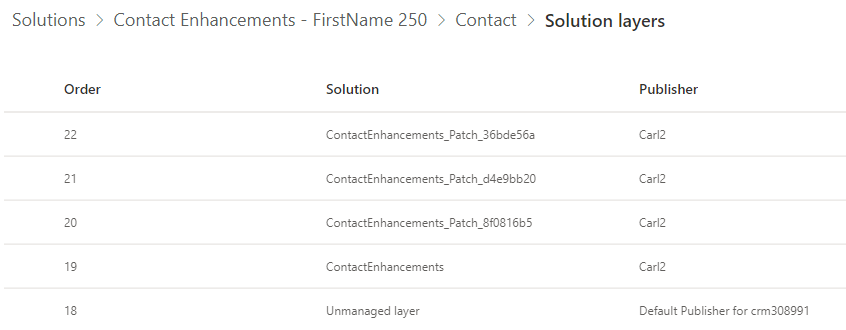
Our layers now look like:
And the field length is 200:
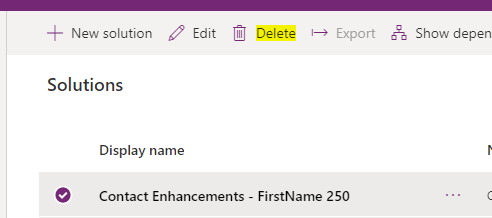
Now if we delete the Contact Enhancements – FirstName 250:
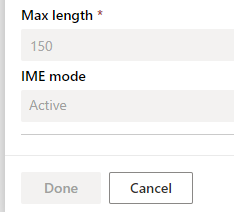
We are back to a field length of 150:
With the layers looking like:
Clone Solution

At some point in the process, we may decide to roll our patches up into our parent solution. Doing so means we will have a new solution that contains all the latest code, and having one solution instead of a solution with multiple patches makes it easy to deploy to a new environment.

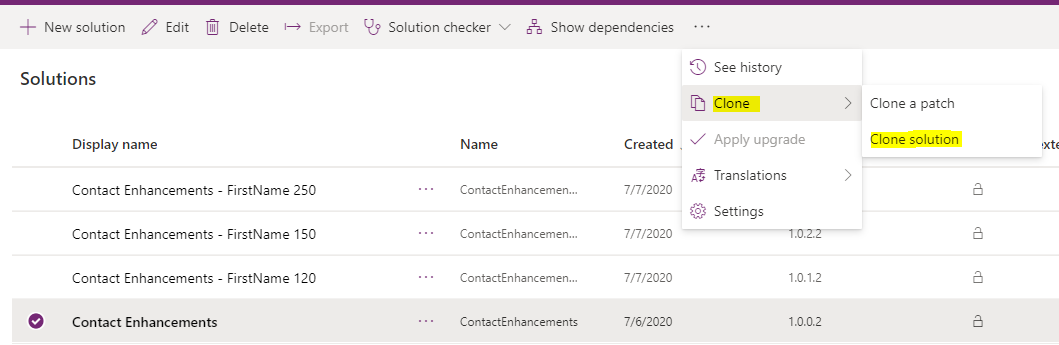
To roll up patches into a solution, we use Clone Solution. To do this, select the parent solution and click Clone->Clone to Solution (note if you chose a patch solution, this option would be greyed out):
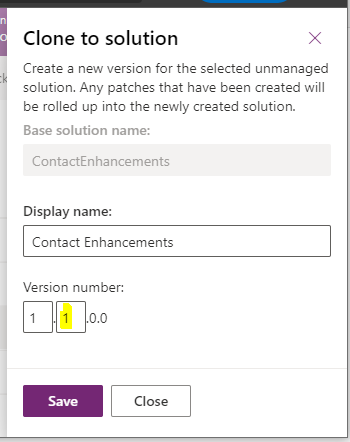
We are now presented with the ability to change the major and minor version numbers of this solution. Notice that the minor version number has been automatically incremented for us:
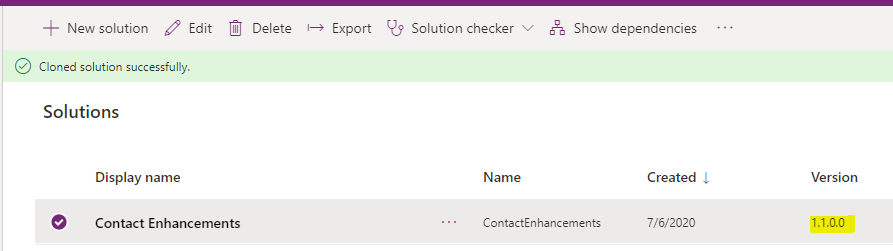
Once the cloning is complete, the older version of the solution and its patches have been deleted automatically:
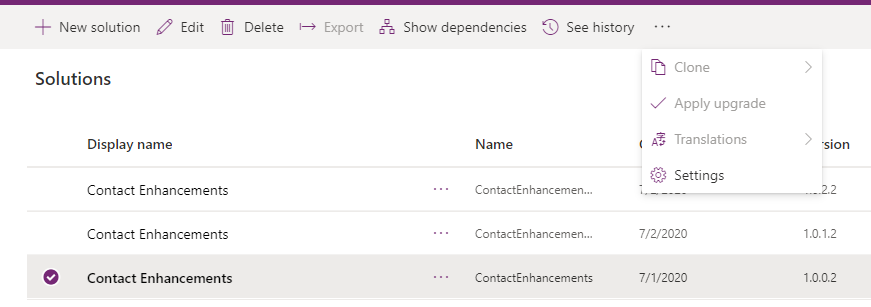
FYI, note that the target environment does not give us this option:
Hopefully this helps with your understanding of how patching and solutions work.


Tuesday, October 4, 2022

Using Business Rule For Data Import Validation

Recently, I saw one question in a CRM forum where the user was interested in using Business Rules to implement data validation for Data Import. So can we do that? The answer is yes, of course we can do that, the business provides support to run your logic on the server side. If you don’t know about this, check our earlier article first, but from the end-user perspective, it will not be helpful.

Let’s see this in action using a quick business rule on Contact entity. Suppose we have a couple of fields which are required and we want to cancel data import if those sets of fields are missing an import file. Let’s say we want to enforce the user to supply contact’s email and phone number:


So let’s setup quick business rules for contact entity to show the error message if contact’s email or phone number is null.

If you are new to the business rule, please check our earlier articles

  1. Navigate to your Dynamics 365 customer engagement application or you can set up a trail, using our earlier article
  2. Create a custom solution and contact entity in our solution.
  3. Expand entity node under Components.
  4. Select Contact and select Business Rules under Contact entity node.
  5. Click on New under business rule toolbar to create a new business rule.
  6. Click on Add condition and add two rules, one for email and one for phone. We can use the or operator between them.
  7. Add Show Error Message action, to show the error message, write some message. After completion, it should look something like below:


  8. Now, make sure to set the scope of the business rule as Entity (Because we want to make sure this should run from server side call).


  9. Save and activate the business rule.

Now when we will import contact record, with a missing email or phone number, it will show us the error.


So, as you can see the message is not user-friendly so we should look for other options which can provide a more user-friendly message.

Business Rules With Actions Set Business Required/Visibility In Model Driven Power Apps

 Introduction

In Dynamics 365 CRM or Power Platform, business rules provide a simple interface to implement and maintain fast-changing and commonly used rules to set and clear field values, set field requirement levels, show or hide fields, enable or disable fields, validate and show error messages. Every business rule will have components and properties. And every component will have Actions and Flow[Condition]. Every business rule starts with a condition. In this article, we are going to see about 2 Actions, Set Business Required and Visibility, with a business scenario on a contact entity.

Step 1

Login to the required Dynamics CRM/ Power Apps environment using URL make.powerapps.com by providing the user name and password as shown in the below figure.

Business Rules with Actions Set Business Required/Visibility in Model Driven Power Apps

Step 2

Create a solution with the required entity/table to create a business rule, if you want to know about how to create a solution, you can refer here and select the solution as shown in the below figure.

Business Rules with Actions Set Business Required/Visibility in Model Driven Power Apps

Step 3

Open ContactCustomiazations solution and click on entity/table contact as shown in the below figure.

Business Rules with Actions Set Business Required/Visibility in Model Driven Power Apps

Step 4

After step 3, go to contact entity/table and then create below custom(user-defined) columns as shown in the below figure.

Business Rules with Actions Set Business Required/Visibility in Model Driven Power Apps

Step 5

After step 4, click on Business rules and then click on Add business rule as shown in the below figure.

Business Rules with Actions Set Business Required/Visibility in Model Driven Power Apps

Step 6

After step 5, a new tab gets opened, provide Business rule name and relevant Description and keep Scope as Entity by default and click on save as shown in the below figure.

Business Rules with Actions Set Business Required/Visibility in Model Driven Power Apps

Step 7

After step 6, you will encounter validation Failed! shown in the below figure.

Business Rules with Actions Set Business Required/Visibility in Model Driven Power Apps

Step 8

After Step 7, Provide Condition Name and select field Birthday custom field and operator Contains Data and clicks on Apply shown in the below figure.

Business Rules with Actions Set Business Required/Visibility in Model Driven Power Apps

Step 9

After step 8, still we see 1 validation error. Now we have to provide 2 Business Required Actions from Actions Section and have to drag and drop Action and give it to true and false part of Condition and provide values as shown on the right side of the window and click on Apply you should see validation error goes off as shown in the below figure.

Business Rules with Actions Set Business Required/Visibility in Model Driven Power Apps

Step 10

After Step 9, now take another Action Set Visibility and then drag and drop to the right side of Set Business Required If Birthday has value as shown in the below figure.

Business Rules with Actions Set Business Required/Visibility in Model Driven Power Apps

Step 11

After step 10, as 1 validation failed error is shown at the top and another at the top of Set Visibility New Action, click on Set Visibility Action and provide field Discount and give Visible value as Yes and click on Apply as shown in the below figure.

Business Rules with Actions Set Business Required/Visibility in Model Driven Power Apps

Step 12

After step 11, provide Set Visibility Action to both Set Business Required Actions in Step 9 and click on Apply you could see validation successful message as well as shown in the below figure.

Business Rules with Actions Set Business Required/Visibility in Model Driven Power Apps

Step 13

After step 12click on Save Button and click on Activate button of the Business Rule window and close it and go-to solution and publish it as shown in the below figure.

Business Rules with Actions Set Business Required/Visibility in Model Driven Power Apps

Step 14

After step 13open a new contact record and select the Information form from Contact Dropdown and set Birthdate, and see Vaccination Field as required Field and Discount field will be also shown as shown in the below figure.

Business Rules with Actions Set Business Required/Visibility in Model Driven Power Apps

Step 15

After step 14, in the same way, if we make the Birthday Field empty, then the Vaccination field will become not Business Required or non Mandatory and the Discount field gets hidden as shown in the below figure.

Business Rules with Actions Set Business Required/Visibility in Model Driven Power Apps

Note

  1. Please make sure you keep the required fields on Contact Form.
  2. Select fields for Actions as well as for Conditions without fail.
  3. Make sure to Activate Business Rule after saving.
  4. Publish all changes without fail.
  5. Give the name of conditions and Actions in a meaningful way.

Conclusion

In this way, one can easily perform commonly used business rules  and Business Required and Visibility Actions can be built in a few minutes.

References :Business Rules Resources (c-sharpcorner.com)


Business Rules in CRM

 What are Business Rules?

–          In CRM 2013, the Business Rules are introduced to allow end users to apply basic form logic without writing JavaScript in CRM

–          It provides simple declarative interface to implement


What things are possible using Business Rules?

–          Hide/Show fields on the form

–          Set field values

–          Enable/Disable fields

–          Set field requirements

–          Validate data and show error messages


4 ways to configure Business Rules

–          Solution -> Entity -> Business Rules

image

–          Solution -> Entity -> Field

image

–          Form Editor

image

–          Form Editor -> Field (Field Properties) -> Business Rules

image


How Business Rules work?

–          Business rules are applied based on the scope of the business rules selected during creation. Only activated business rules will be applied on the respective entity forms.

–          By default the scope is set to All Forms. To make the business rule available to specific form, you need to change the scope of the business rule.

image

–          In below order the logic is applied to the form field:

1. System Scripts

2. Custom JavaScript

3. Business Rules

Note: If there are multiple Business Rules applied on single field, then the rule in the order in which rules are activated. Hence if you want any business rule to be applied first, then you need to activate that rule at the last.


How to edit existing Business Rule?

To edit existing Business Rule, first deactivate the rule and then edit. To apply the updated logic, you will need to activate the rule again.


Advantages

–          Allows end user/ CRM customizer to apply logic quickly without writing any code

–          Enabling and Disabling of logic is simple

–          Easy to test the written logic by Preview option on the Form


Limitations

–          No complex logic is supported.

–          Business Rules does not run on Form Save event. They only run on Form Load and Field Changes.

–          Custom JavaScript event on the ‘OnChange’ event of field will not work if you set field value using Business Rules.

–          The rule will not run if the field mentioned in the rule is not available on the form. It will not throw an error. Hence user will not come to know about the error.

–          Business Rules does not work on Tabs/Sections/Sub Grids etc.

–          Does not allow else condition. Hence to apply If Else logic, you need to create separate business rules for each condition.

–          Only AND logic can be applied in the Business Rule. No OR logic.


How to setup logic in Business Rules?

Business Rules are divided into 3 sections:

–          Conditions

a. Conditions can be checked on fields only

b. Below operators are available

image

–          Actions

Actions are the tasks that can be performed by the Business Rules. Actions will be performed only if all conditions are true.

o   Show error message: Used to show any custom error message on any field based on the condition. This does not allow the form to save.

o   Set field value: Allows to set value to any field.

o   Set Business Required: Allows to set any field either required or not required.

o   Set visibility: Allows to show/hide the field.

o   Lock or Unlock field: Allows to make field read-only or editable.

–          Description (Optional)

Gives description of Business Rule. This is optional and does not appear anywhere else.


Examples

–          Assumptions:

I have custom entity named “Business Rules Demo” with below fields:

– Field 1 – Two Options

– Field 2 – Option Set { A, B, C, D }

– Field 3 – Single Line of Text

– Field 4 – Single Line of Text

– Field 5 – Single Line of Text

  1. If Field 1 = True

Then

Hide Field 3

Make Field 4 Required

Set Field 5 to ‘Hello’

Disable Field 2

Show error message on Field 1 as ‘Field 3 is hidden’

Else

Show Field 3

Make Field 4 not required

Set Field 5 to ‘Bye’

Enable Field 2

For this, we need to create 2 business rules; 1 for If part and other for Else part as below:

image

image

Note: To copy the business rule, open business rule and use ‘Save As’ option. This will create copy of the business rule.

Custom error message will be shown as below:

image

  1. To check if any field is blank or not, use Contains Data and Does Not Contain Data operator in the condition.

References

http://technet.microsoft.com/en-us/library/dn531086(v=crm.6).aspx


Sunday, October 2, 2022

Dynamics 365 2 minutes plugin time out workaround

Plugin or custom workflow activity run in isolation mode "sandbox" will have hard limit 2 minutes. In case your plugin is complex and need more than 2 minutes, there are some workaround for this.

For CRM onpremise

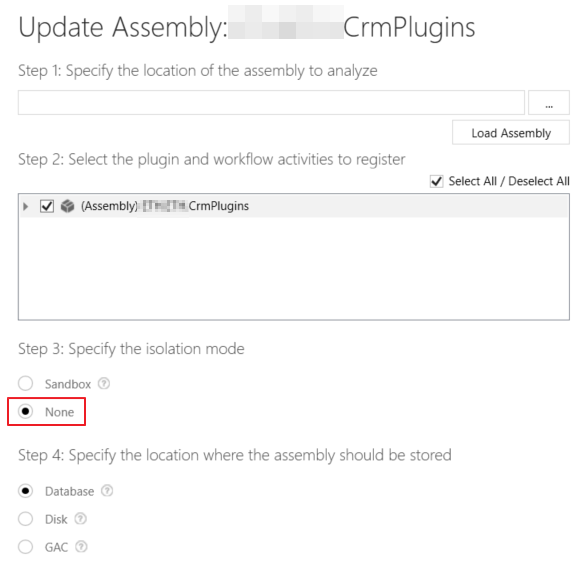
  1. Change plugin isolation mode to "None"Dynamics 365 2 minutes plugin time out workaround


  2. Open registry editor and change some values (in CRM server)
    1. HKEY_LOCAL_MACHINE\Software\Microsoft\MSCRM\SandboxClientOperationTimeoutInSec as a REG_DWORD key with a value in decimal greater than 120 (default is 120, which is equivalent to 2 minutes).

    2. HKEY_LOCAL_MACHINE\Software\Microsoft\MSCRM\SandboxHostOperationTimeoutInSec as a REG_DWORD key with a value in decimal greater than 120 (default is 120, which is equivalent to 2 minutes).  

    3. HKEY_LOCAL_MACHINE\Software\Microsoft\MSCRM\SandboxWorkerOperationTimeoutInSec as a REG_DWORD key with a value in decimal greater than 120 (default is 120, which is equivalent to 2 minutes).  

    4. HKEY_LOCAL_MACHINE\Software\Microsoft\MSCRM\OleDbTimeout as a REG_DWORD key with a value in decimal. Note The value of 600 represents 600 seconds. By default, the value is 30 seconds. You may need to set this to 86400 which is equivalent to a value of 24 hours.  

  3. Change Web.config in CRM server
    1. Open C:\Program Files\Dynamics 365\CRMWeb\Web.config in CRM server
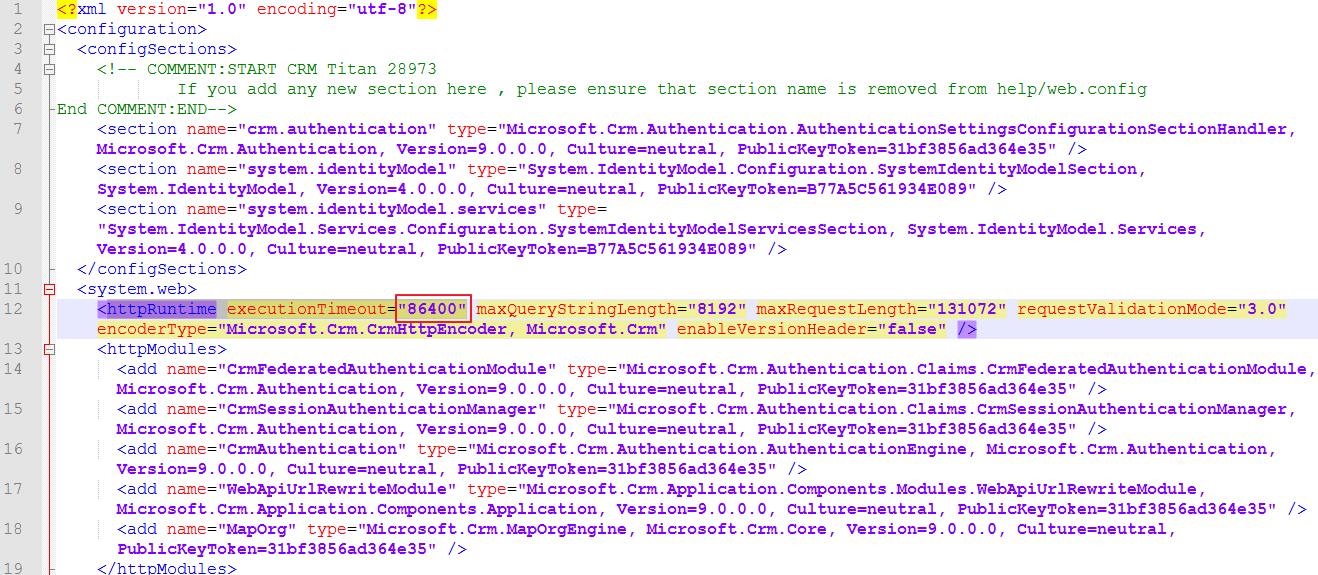
    2. Change the attribute httpRuntime executionTimeout="86400" (means 24h), default value is 300 means 5 mins
    3. Dynamics 365 2 minutes plugin time out workaround
  4. If your plugins can not run in mode "Sandbox", you can move the logic of the plugin to custom workflow activity, then you can run the workflow on demand or automatically with the trigger same as filtering attributes in plugin then try to run the wokflow in mode "None"


For CRM online

We can not change registry or web.config in CRM online. There are some workaround solutions:

  1. Move the whole logic of the plugin to Azure Function, then call Azure Function in the plugin.
  2. Move the whole logic of the plugin to a shedule job (console application), then setup this job run every some minutes. If you have a server, you can use window task scheduler or you can run it in Azure