Microsoft Power Apps are extremely popular with organisations who needs a reliable platform to make business applications.
In this blog I will walk you through how to use Azure DevOps to enable CI/CD for Microsoft PowerApps.
Prerequisites
- Microsoft PowerPlatform Account
- An Azure DevOps Account
- Azure Account
- Bitbucket Account
You will learn
- How to use Azure DevOps to enable CI/CD for Microsoft PowerApps.
Blog Outline
- Create PowerApp Environments
- Create PowerApp in Dev Environment
- Create Service Principals with PowerPlatform Permission
- Create Power Platform Service Connections in Azure DevOps
- Create Bitbucket Service Connection in Azure DevOps
- Create Azure DevOps Build Pipeline
- Create Azure DevOps Release Pipeline
- Test the CI/CD Flow
- Summary
- References
Azure DevOps Architecture
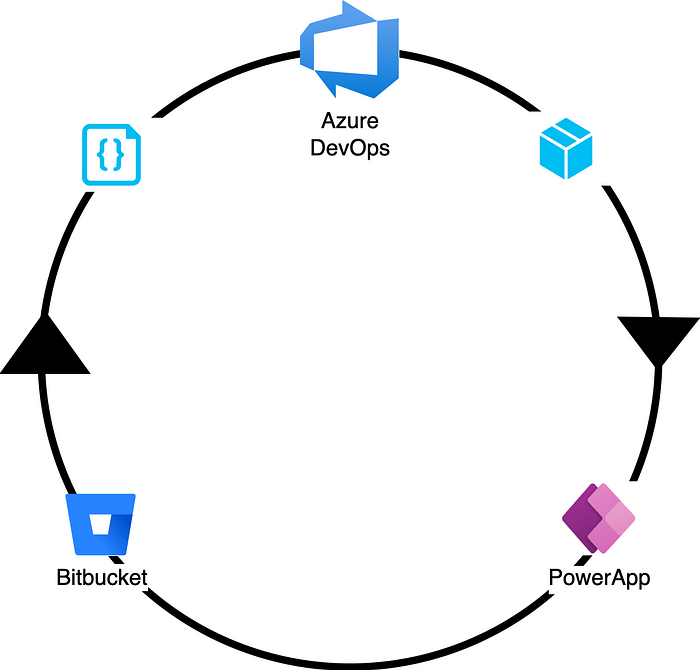
- Once developer has finished the development and wants to deploy to UAT & Production, developer will manually trigger the Build Pipeline.
- DevOps Build Pipeline will export the PowerApps Solution from PowerApp Dev Environment and Commit to Bitbucket.
- DevOps Build Pipeline will create the Build Artifact.
- When Build Artifact is created, this will automatically trigger the Release PipeLines for UAT and Production.
- Once Approvers approve the UAT release and the deployment will be completed for UAT environment.
- After UAT testing, Approvers will approve the Production release and the deployment will be completed for the Production environment.
Let’s go step by step to create this process.
1. Create PowerApp Environments
We will have following environments,
- DEV Environment — PowerApp will be developed in this environment.
- UAT Environment — PowerApp will be tested by the testing team in this environment.
- Production Environment — PowerApp production environment.
Go to PowerPlatform Admin Portal and create environments. I have already setup environments for Dev, UAT and Production.
2. Create PowerApp in Dev Environment
Let’s create a sample PowerApp.
- Go to this Link to Create Power App.
- Make sure Dev environment is selected.

3. Create a new Solution (“TestAppSolution” in this example) under Dev environment.

Inside the solution create a New Power App (“TestApp” in this example).

Now we have the below setup,
Dev (Environment) -> TestAppSolution (Solution) -> TestApp
UAT (Environment)
Production (Environment)
3. Create Service Principals with PowerPlatform Permission
1. Create 3 Azure app registrations for the 3 environments. Make sure to create a client secret for each of them and copy them. Please follow this guid to create Azure App Registrations.
2. Go to PowerPlatform Admin Portal and select the Dev Environment.
3. In your environment settings, Switch to the Application Users view as below.

4. Add the UAT Azure App Registration (App name in my case is “azure-devops-agent”) as an application user and provide the security role — System Customizer

Please follow this guide for above steps.
Now this Application User will have the necessary permissions required to export or import the PowerApps Solution.
Similar to this, assign 2 Azure app registrations as Application Users for UAT and Production environment as well. These Azure App Registrations will be used to create Azure DevOps Service connection for each environment.
4. Create Power Platform Service Connections in Azure DevOps
Here we will configure the service principals created for each environment as service connections.
1. Go to Visual Studio Market place and add Power Platform Build Tools to your Azure DevOps Organization.
2. Go to Azure DevOps Service Connection and create new Service Connection with Type — Power Platform.

3. Configure the details required for the service connection.

In order to get the Server URL, Go to PowerPlatform Admin Portal and select the environment as below.

Tenant Id — Your Azure Subscription Tenant ID
Application Id — Application Client ID of the Azure App Registration created in Step 3.1. You can find this in the Overview section of the Azure App Registration.
Client secret of Application Id — Copy the client secret generated in Step 3.1 here.
Configure 3 service connections for each environment as below.

5. Create Bitbucket Service Connection in Azure DevOps
Follow this Documentation and create Bitbucket service connection as below.

6. Create Azure DevOps Build Pipeline
1. Create a Bitbucket Repository to store the Power App package. In this example I have created “PowerAppTest”.
2. Go to Azure DevOps Pipelines and select Bitbucket Cloud as below. Select the repository afterwards.

3. Select “Starter pipeline”.

4. Use below Azure Pipeline YAML configuration. I have renamed the pipeline file as “azure-build-pipeline.yml”. This can be any name you want.

5. Click “Save and Run”. Make sure to give a commit message in the next window and click “Save and Run”.
This file will be committed to the Bitbucket repository. Azure DevOps will utilise this file whenever the developer wants to start a build to be deployed to UAT and Production.
This will trigger the Build Pipeline as below.

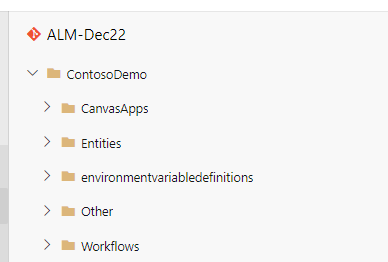
After the Build pipeline is completed, go the Bitbucket repository to see it is updated with the Power App solution code and “azure-build-pipeline.yml” file as below.

There are 8 steps in this Azure Pipeline file.
1. Checkout Step — This step configures how Pipeline check out the Bitbucket repository. This step is used to make sure Bitbucket credentials are persevered throughout all the steps with “persistCredentials” property.
2. CmdLine@2 Task — This command line step sets the Bitbucket username in Git configurations and checks out the repository.
3. PowerPlatformToolInstaller@2 Task — This task installs a set of Power Platform–specific tools required by the agent to run the Microsoft Power Platform build tasks. This task doesn’t require any more configuration when added.
4. PowerPlatformWhoAmi@2 Task — Verifies a Power Platform environment service connection by connecting and making a WhoAmI request. This task can be useful to include early in the pipeline, to verify connectivity before processing begins.
Note Dev environment service connection is used here since we need to connect to the Dev environment of the Power App to export the solution.
5. PowerPlatformExportSolution@2 Task — Exports the solution from the Dev environment and saves to “SolutionOutputFile” location as a Zip file.
6. PowerPlatformUnpackSolution@2 Task — Takes a compressed solution file and decomposes it into multiple XML files so that these files can be more easily read and managed by a source control system such as Bitbucket. In this case “SolutionTargetFolder” will contain the decomposed project files.
7. PublishBuildArtifacts@1 Task — Use this task to publish build artifacts to Azure Pipelines so it can be used by Azure Release Pipelines.
8. CmdLine@2 Task — This command line step commits the Power App solution to Bitbucket.
Committing the Power App solution to Bitbucket can also be done directly via Power Platform as well. There’s a feature in PowerApps to connect to a Git Repository and have the code automatically commit to Repository. Please refer to below Link.
So there is an option to have PowerApp configured with Bitbucket and use that Bitbucket repository from Azure Devops to trigger the Release Pipelines. At the time of the writing, this is a Preview feature.
7. Create Azure DevOps Release Pipeline
Now we need to create a Release pipeline to deploy the Power App to UAT environment.
1. Create New Release PipeLine and Start with Empty Job.

2. Rename the Release Pipeline as UAT.

3. Go to Tasks and Add Power Platform Tool Installer.

4. Add Power Platform Who Am I Task and configure as below. Make sure to select UAT Service Connection since we need to deploy into the UAT environment.


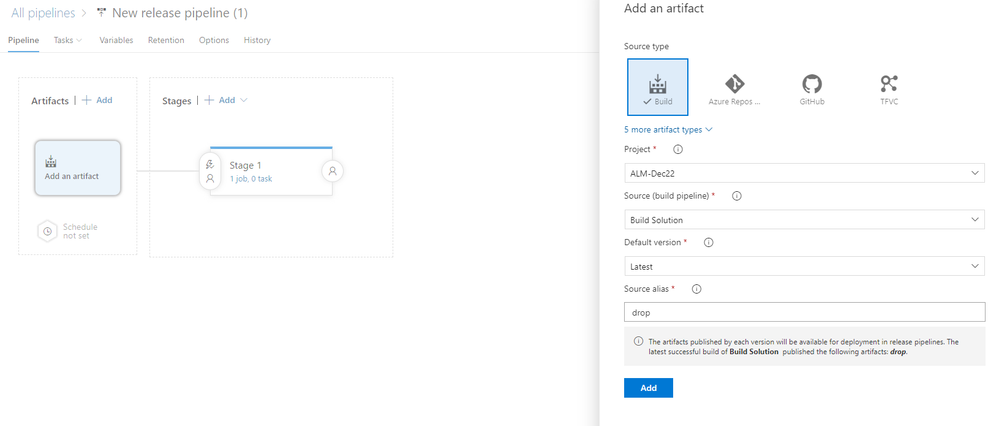
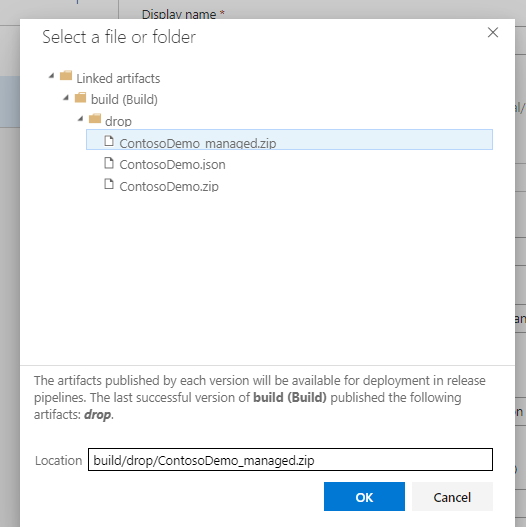
5. Add Artifact of the Build Pipeline we have previously created.

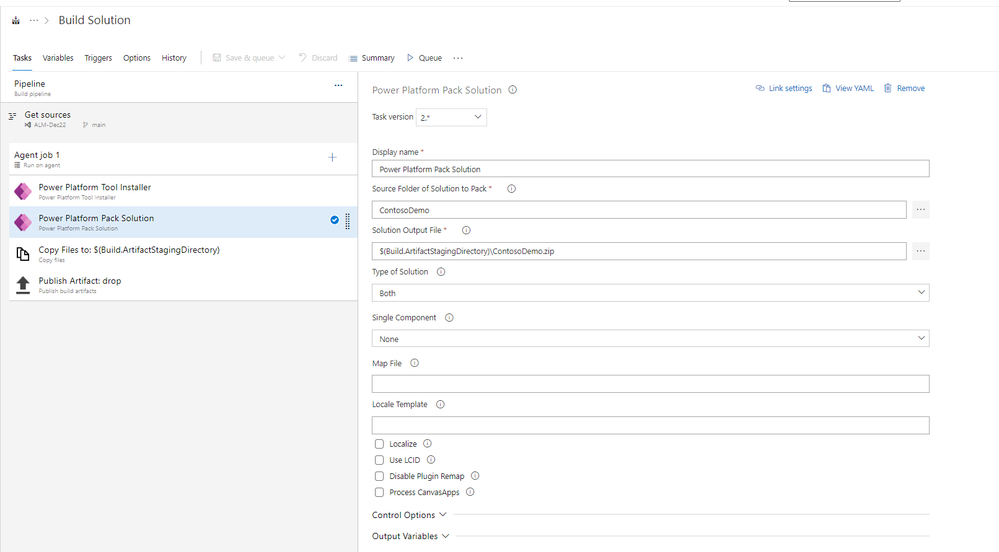
6. Add Power Platform Pack Solution and configure as below. Notice for “Source Folder of Solution to Pack” is the location of the PowerPlatformUnpackSolution@2 Task output file. Unpacked solution needs to be Packed again before deploying to Power App environment.

7. Add Power Platform Import Solution and configure as below. Note “Solution Input File” is the output from Power Platform Pack Solution Task.

8. Add Power Platform Publish Customizations and configure as below.

9. Add approvers for the UAT Release Pipeline.

10. Enable continuous trigger to make sure Release Pipeline is automatically triggered for every new Artifact build.

11. Click Save.
12. Similar to UAT, create another Release Stage for Production Environment as well using Production Service Principal as below.

8. Test the CI/CD Flow
1. Go to Power App in Dev Environment and add a new label as below.

2. Go to Azure DevOps Build Pipeline and run it manually.

3. Check the Build Pipeline logs successfully completes all the tasks.

4. Check Bitbucket Repository is updated with new Build After Build Pipeline.

5. Check to see Production and UAT Release Pipelines are triggered with pending approval.

6. Approve UAT first. Once UAT Deployment is succeeded go to the PowerApp UAT environment and verify the change is there.

7. After UAT change verification, approve the Production Release Pipeline. Once Production Deployment is succeeded go to the PowerApp Production environment and verify the change is there.

9. Summary
Azure DevOps is extremely flexible to design a proper CI/CD flow for each requirement in a project and a organisation. The purpose of this blog is to show that flexibility.
As you can imagine this can be customised further to support more complex flows!
Cheers!