Search This Blog

Saturday, April 16, 2022

DYNAMICS 365 ACTIONS

 Actions in Dynamics 365 are a capability to create business logic that can be called in different ways such as through code or a workflow. They are not run on demand or automatically, but rather they are triggered by processes or code. If you wanted to run an action on demand you could call it from an on demand workflow. Actions take input, do something and may produce output.

Let’s go through an example of creating an action. Let’s say when a case is created where the title contains the word “bug”, we want to send an email to a developer, and assign the case record to the developer. Generally, we could write a workflow to perform these steps and run it on creation of the case. However, what if we want to not have it triggered when a case is created, but we want to run it from code as well, say from JavaScript or C#? We can bundle that functionality into an action and have it called from our front end or plugin code.

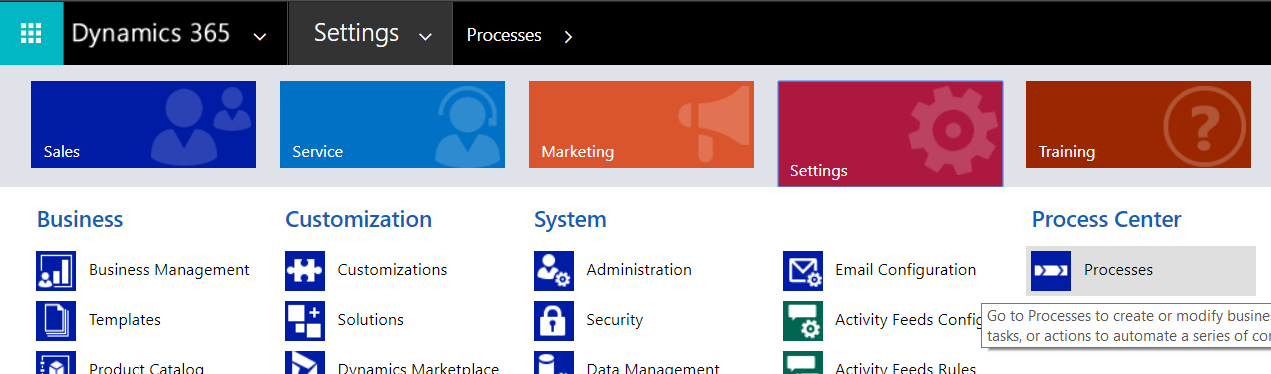
Writing the action itself is straight forward. Go to Processes:
Select new and create a new Action for our case:
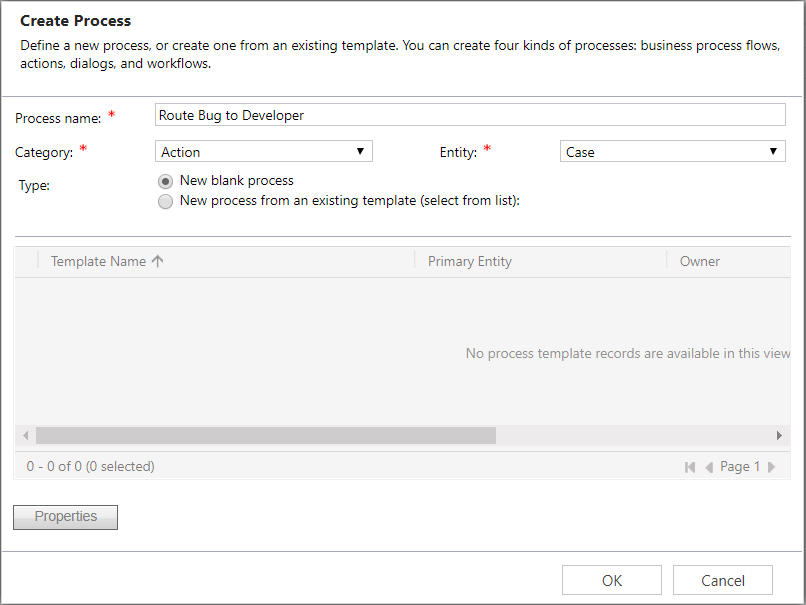
The window will open:
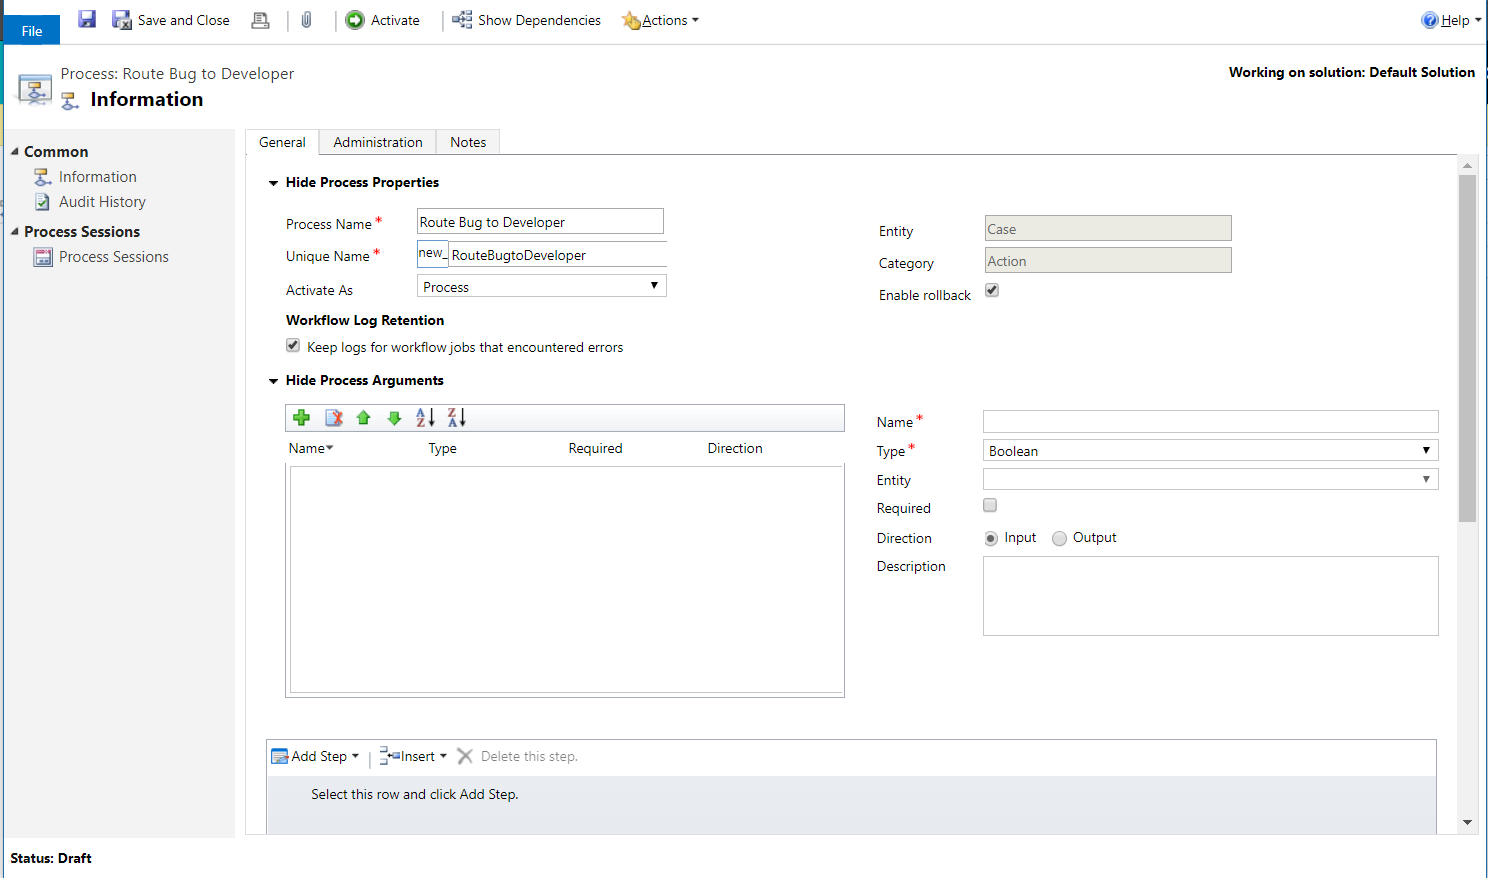
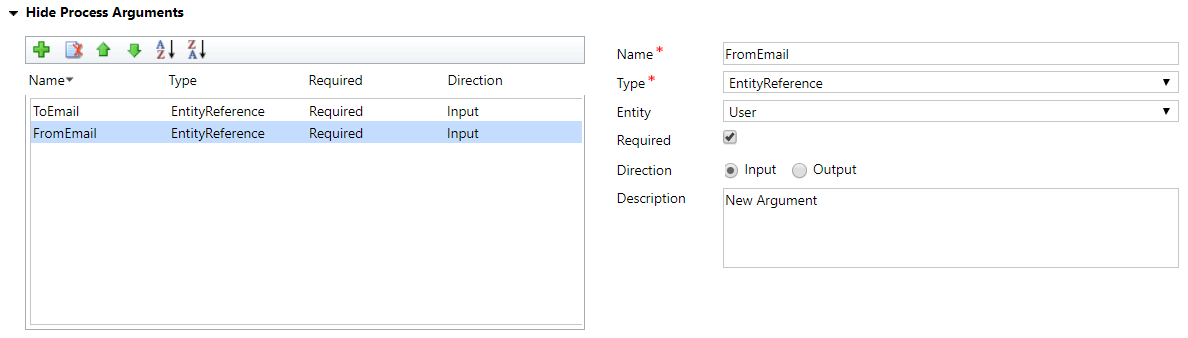
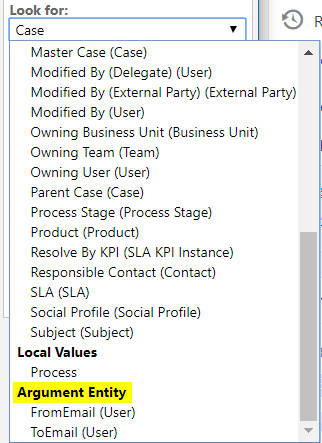
Note the Process Arguments section. This is the input for our action. As we will be sending an email, we can have a to and from email address here. Add a ToEmail and FromEmail field. These will be EntityReference fields to the User entity:
Now we can add some steps:
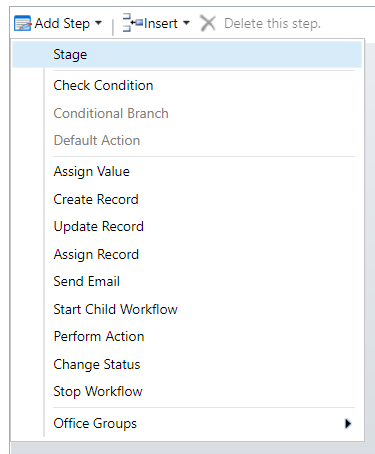
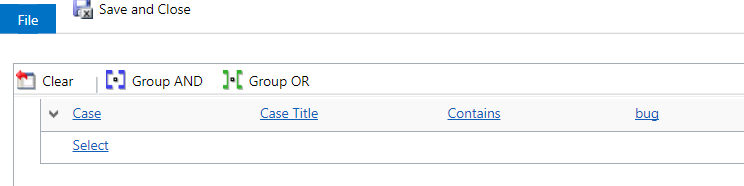
Add a Check Condition for the title:
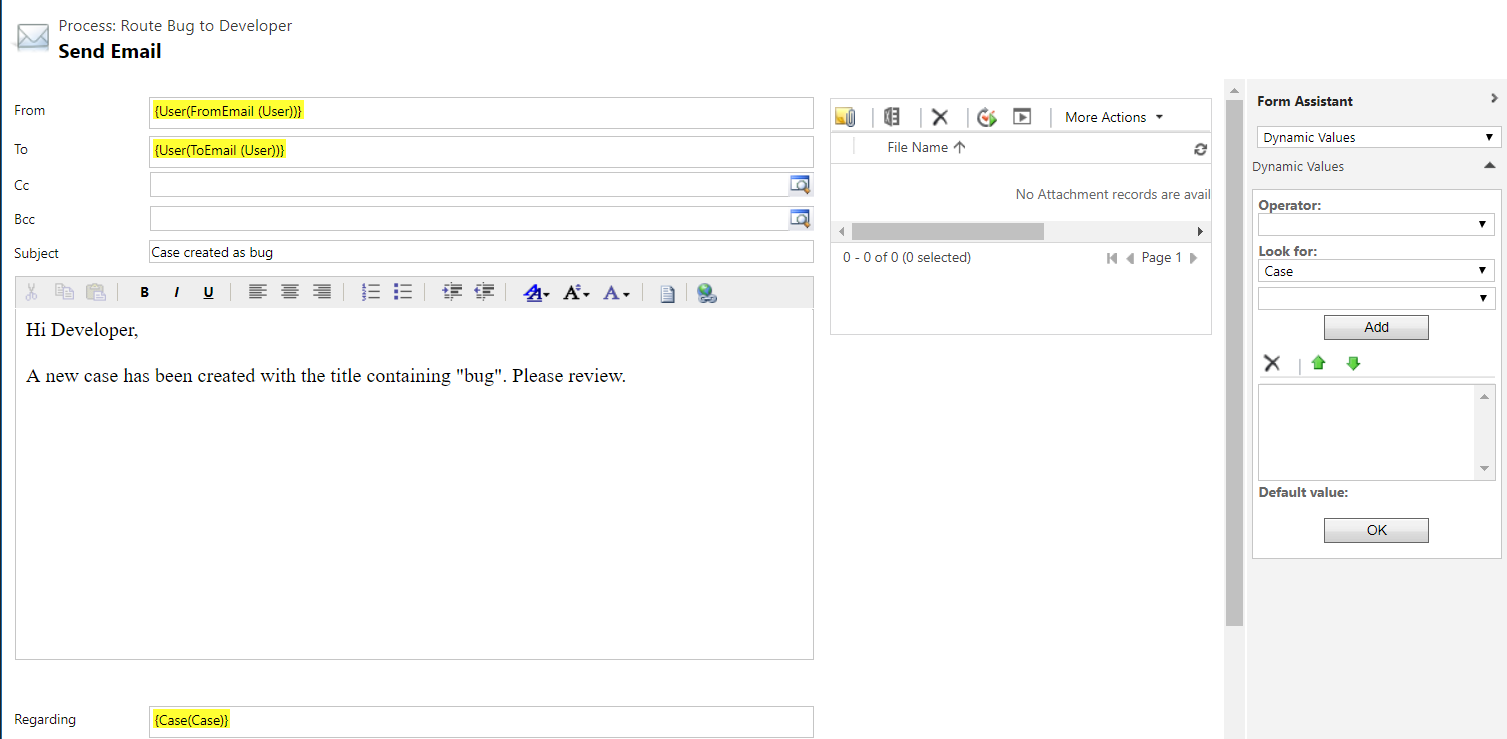
Add the Send Email step and configure the email to use the input parameters:
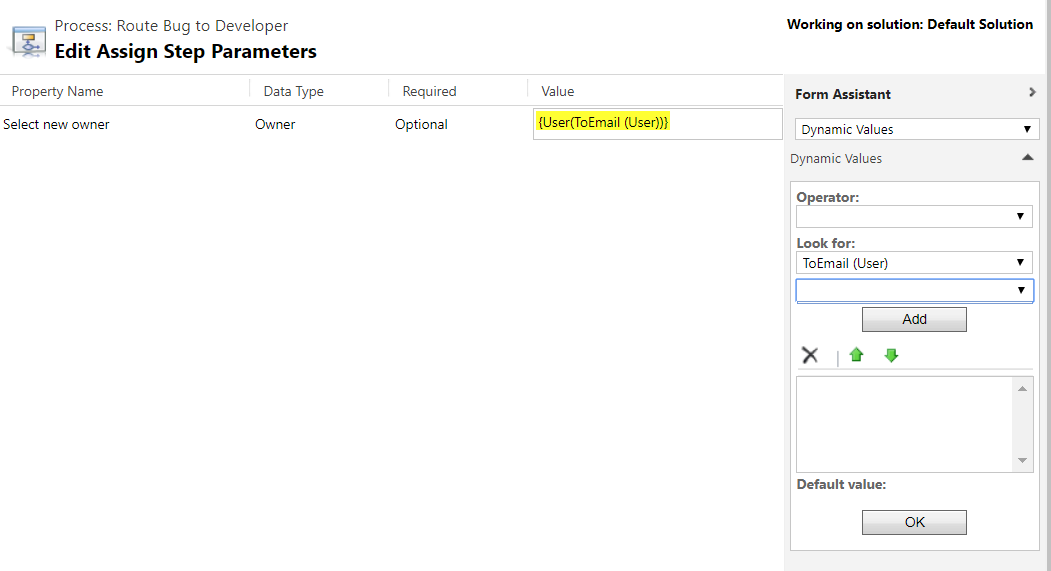
Then assign the case to the developer:
The action should now look like this:
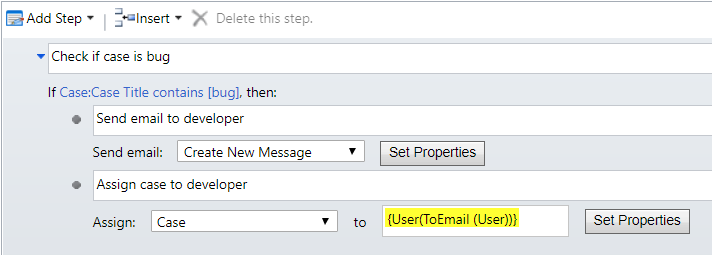
Activate the action. Now, we will create a Workflow to test the action:
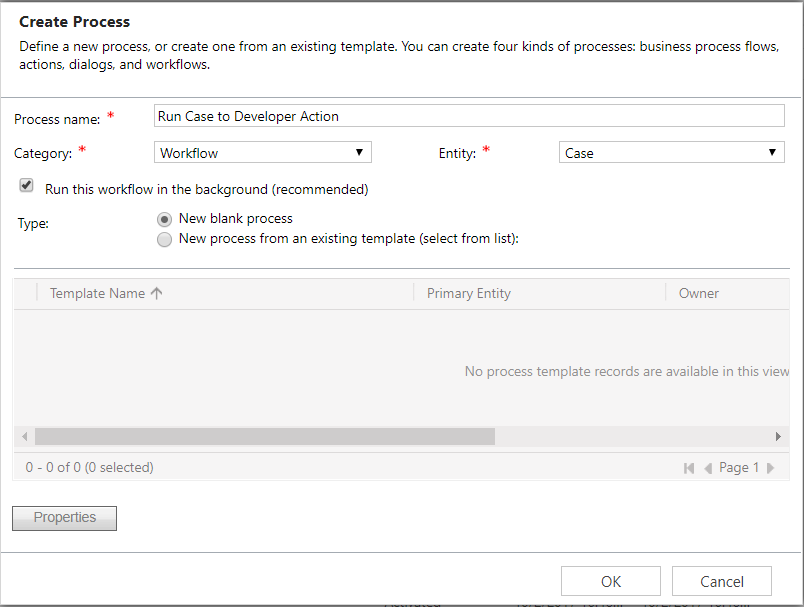
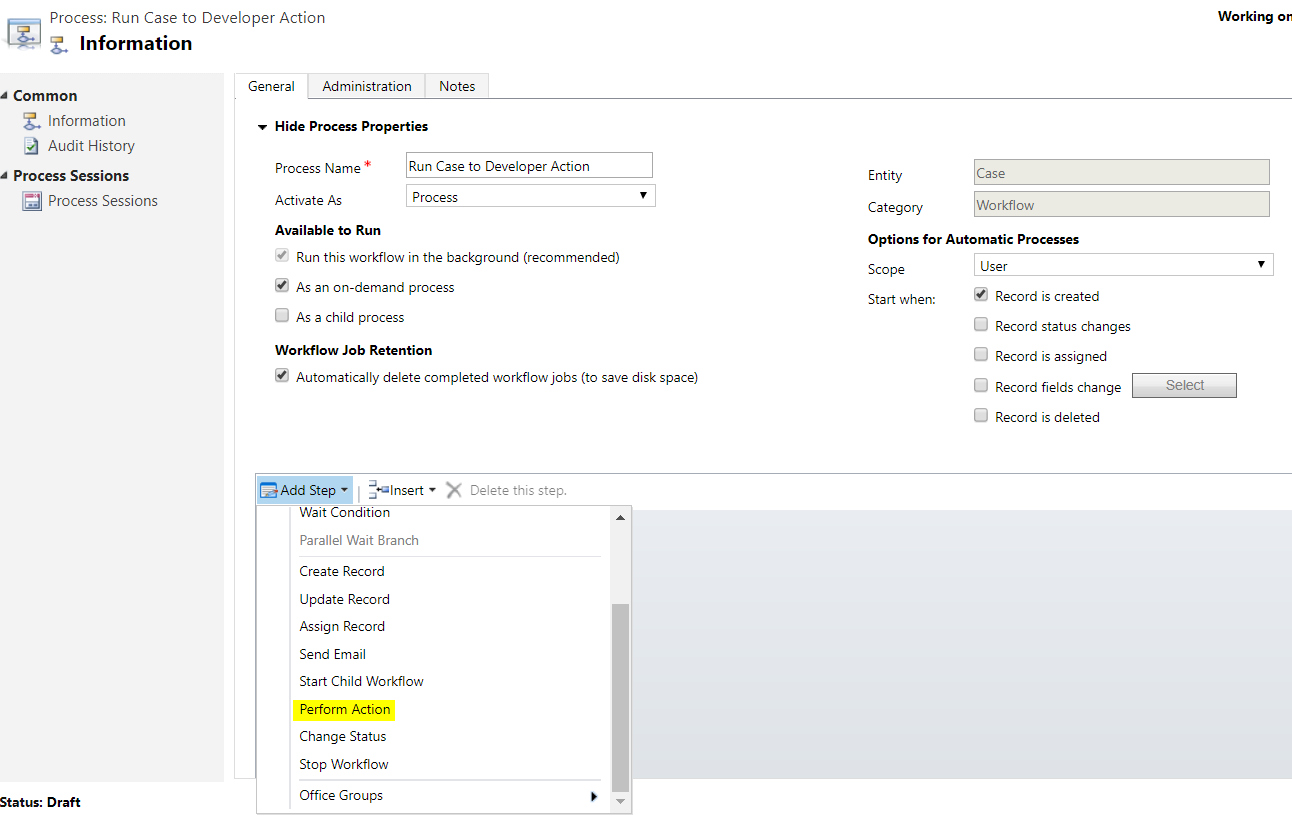
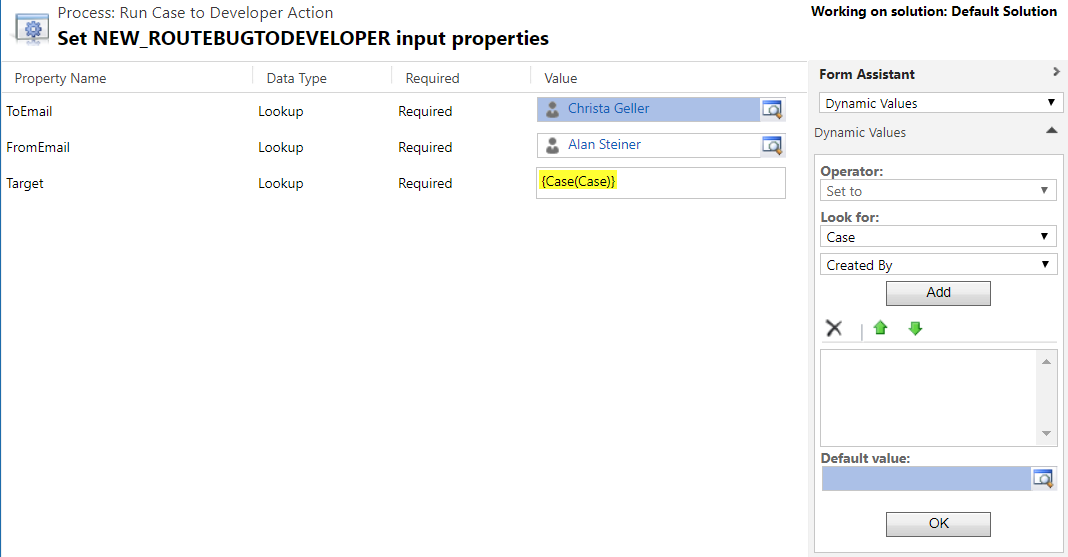
Enter the parameters for the action:
Activate the workflow.

Now, create a case.
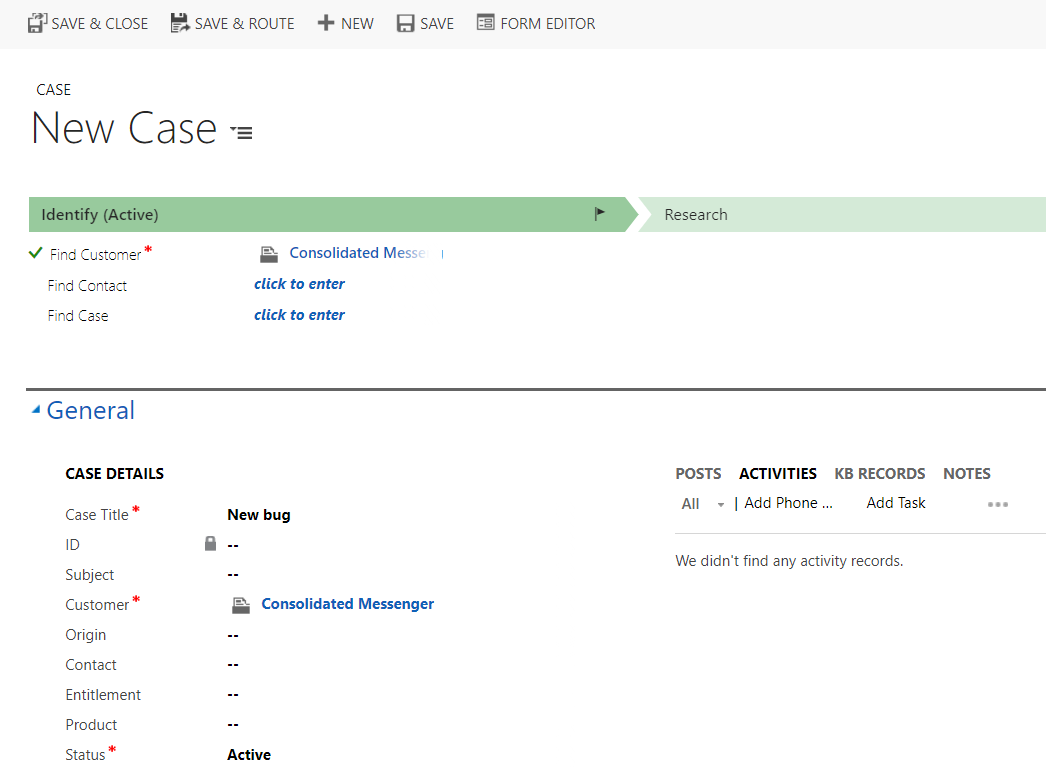
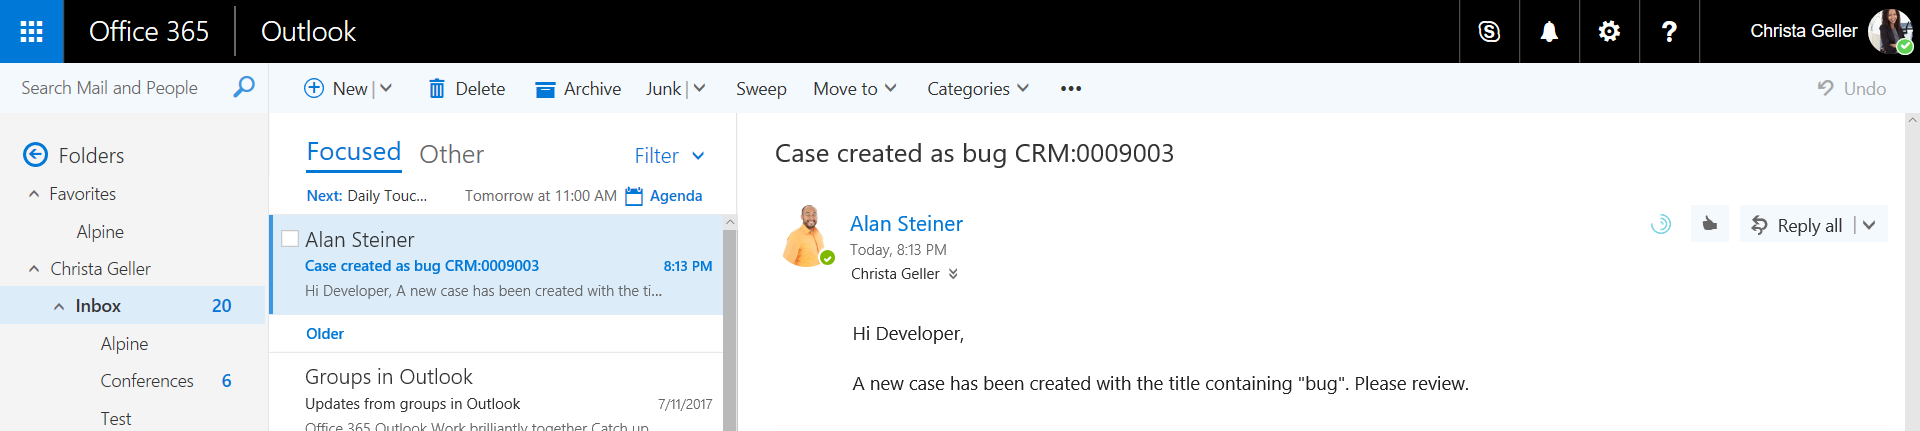
After saving the case, the case is reassigned to the developer and an email is sent:

HOW TO IMPLEMENT JAVASCRIPT CONFIRMATION DIALOGS IN POWER APPS AND DYNAMICS 365

In Dynamics 365, you may need to display a dialog to a user in order to decide which piece of code to run next. We can do this using the command Xrm.Navigation.openConfirmDialog. Let’s look at how to do this from a model-driven Power App.

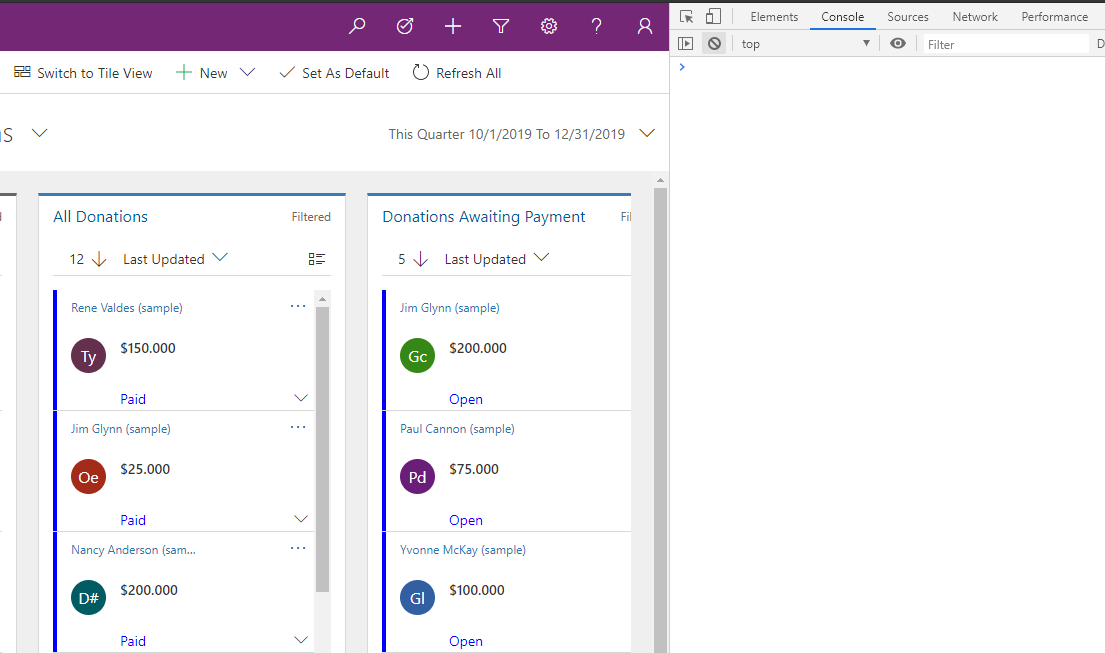
Go to the app and open the Console in your browser’s developer tools.

The function takes the following parameters:

Xrm.Navigation.openConfirmDialog(confirmStrings,confirmOptions).then(successCallback,errorCallback);

Let’s start with a simple example.

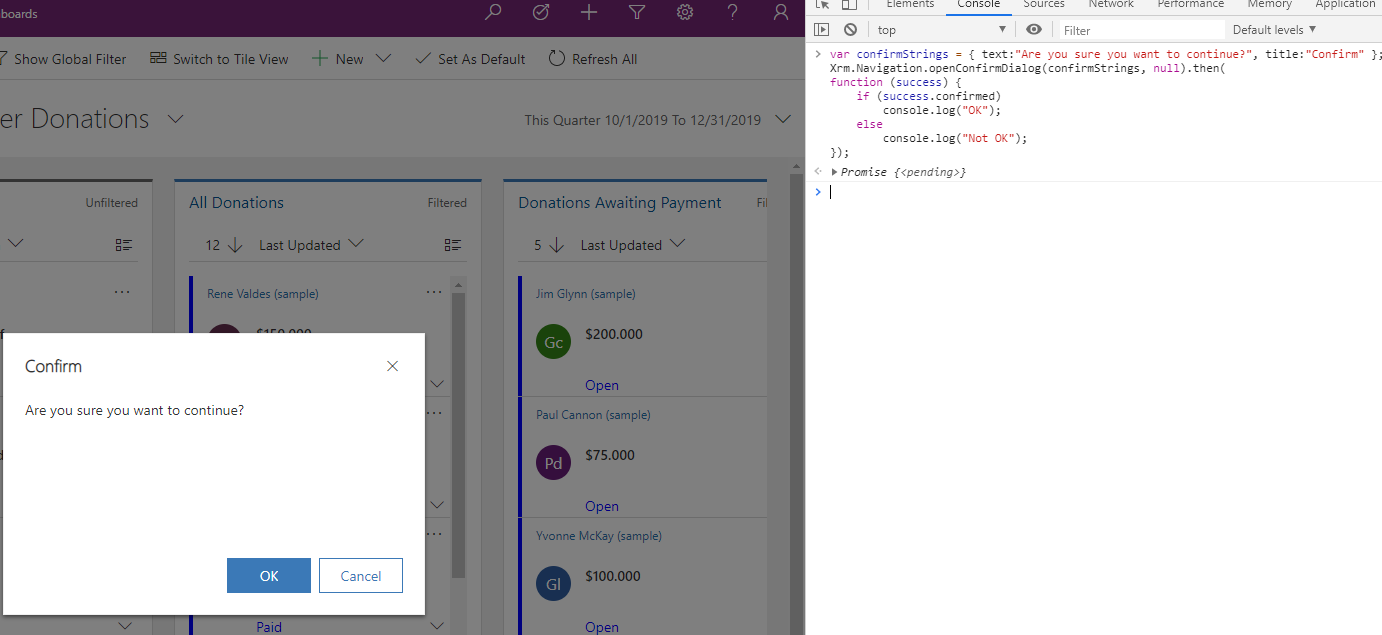
var confirmStrings = { text:"Are you sure you want to continue?", title:"Confirm" };
Xrm.Navigation.openConfirmDialog(confirmStrings, null).then(
function (success) {    
    if (success.confirmed)
        console.log("OK");
    else
        console.log("Not OK");
});

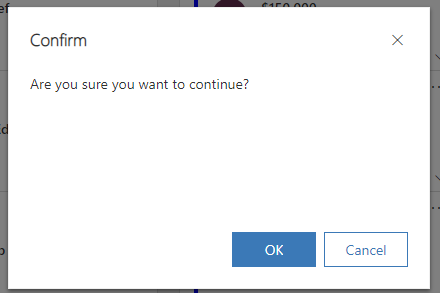
In this case, we are opening a Dialog with 2 buttons, OK and Cancel:

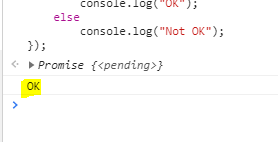
We also have a title, Confirm, and a message “Are you sure you want to continue?”. On clicking OK:

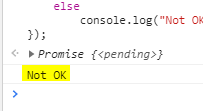
We see the code drops into the “success.confirmed”. In a real example we would write code to do something more meaningful rather than just write out to the console:

And on clicking either Cancel or the X button, we get the “else” run:

Let’s look at the other options we can provide from the Microsoft documentation:

NameTypeRequiredDescription
confirmStringsObjectYesThe strings to be used in the confirmation dialog. The object contains the following attributes:
– cancelButtonLabel: (Optional) String. The cancel button label. If you do not specify the cancel button label, Cancel is used as the button label.
– confirmButtonLabel: (Optional) String. The confirm button label. If you do not specify the confirm button label, OK is used as the button label.
– subtitle: (Optional) String. The subtitle to be displayed in the confirmation dialog.
– text: String. The message to be displayed in the confirmation dialog.
– title: (Optional) String. The title to be displayed in the confirmation dialog.
confirmOptionsObjectNoThe height and width options for confirmation dialog. The object contains the following attributes:
– height: (Optional) Number. Height of the confirmation dialog in pixels.
– width: (Optional) Number. Width of the confirmation dialog in pixels.
successCallbackfunctionNoA function to execute when the confirmation dialog is closed by clicking the confirm, cancel, or X in the top-right corner of the dialog. An object with the confirmed (Boolean) attribute is passed that indicates whether the confirm button was clicked to close the dialog.
errorCallbackfunctionNoA function to execute when the operation fails.

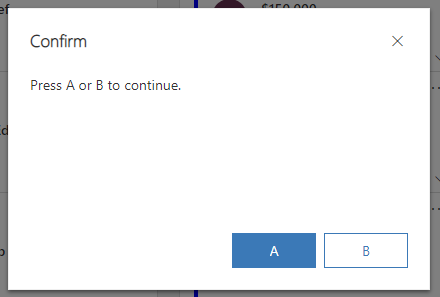
Let’s do another example, and change the Confirm and Cancel button text to A and B:

var confirmStrings = { text:"Press A or B to continue.", title:"Confirm", confirmButtonLabel:"A", cancelButtonLabel: "B" };
Xrm.Navigation.openConfirmDialog(confirmStrings, null).then(
function (success) {    
    if (success.confirmed)
        console.log("A pressed");
    else
        console.log("B pressed");
});

Now we get A and B buttons, which we can program accordingly:

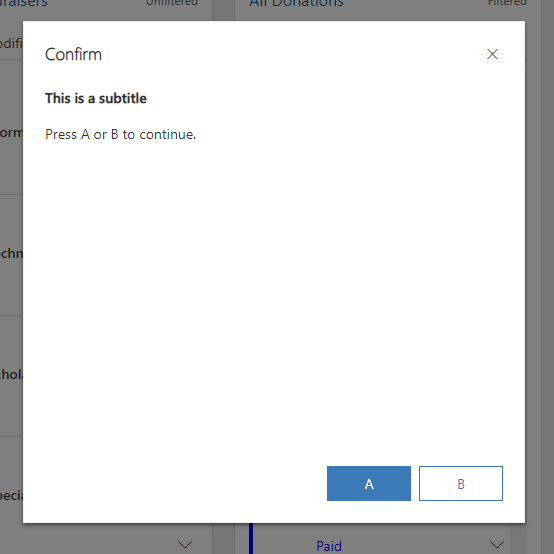
Let’s add a subtitle and change the size of the dialog.

var confirmStrings = { text:"Press A or B to continue.", title:"Confirm", confirmButtonLabel:"A", cancelButtonLabel: "B", subtitle: "This is a subtitle" };
var confirmOptions = { height: 500, width: 500 };
Xrm.Navigation.openConfirmDialog(confirmStrings, confirmOptions).then(
function (success) {    
    if (success.confirmed)
        console.log("A pressed");
    else
        console.log("B pressed");
});

We can see the size has changed and we have a subtitle now as well:

There may be limitations around using this, but the functionality should be very useful if you need to use dialogs in Power Apps / D365.


Replace Dialogs with Microsoft Flow

 We all know or should know that Microsoft Dynamics 365 Dialogs have been deprecated. When introduced Dialogs allowed a Functional Consultant to create an interactive step-by-step data entry form. The replacement options now are either business process flows or Canvas Apps. Both of which are reasonable alternatives and the latter, embedding PowerApps presents some really exciting possibilities.

But what if you need something a little simpler and perhaps utilize something you have already built? If it is a Microsoft Flow I will show you the simple steps you can do to embed an Button Flow into the Dynamics 365 Customer Engagement application.

Let’s consider this business scenario.

You have a busy Sales Exec at your company that refuses to login into the Dynamics 365 application to see what is going on with Opportunities. This person keeps emailing or calling you to have you email them a list of all the new Opportunities. I am going to keep this scenario simplified in the blog post but you can take what you learn and make it more complex.

Let’s imagine that previously you created a Flow Button and installed the Flow app on the Sales Exec’s phone. All the Exec had to do was to open the Flow App, tap on the Button and it would send directly to the exec a list of all the new Opportunities created in the last 24 hours.

But now the Exec calls you and keeps changing the time frame. And also refuses to even use the Flow App.

So your idea is to take the original Flow Button and modify it so you can vary the time for new Opportunities and it is business logic you can kick off from within the Dynamics 365 Web Client were you, as the Sales manager, live all the time.

Step 1 – Take the existing Flow Button and make a copy.

Microsoft Flow Make a Copy

Step 2 – Edit the Flow to delete the Manually Trigger a Flow Button element.

Microsoft Flow Delete a Button Trigger

Step 3  – Insert the Common Data Service When a Record is Selected Trigger. This will cause the Flow to be available from the Toolbar Flyout from the Opportunity Grid View. Add an Output field to prompt you to enter the number of days you want the report to cover for new Opportunities.

Microsoft Flow When a Record is Selected

Step 4 and a little more – here we need to initialize a variable, then set the variable with the output from the prompted question so we can use it in the Get Past Time Step.

Microsoft Flow Initialize Variable

Step 5 – There is nothing else we need to do except modify the To: field in the Send an Email Action. For the purposes of the blog post I am retrieving my own email address as the executor of the Flow. You could either hard code your bosses email address here (I don’t have a boss, I own the company. 🙂 ) or you could add to the prompt for the recipients email address and use it in this later step.

Microsoft Flow Retrieve Filter Records

Step 6 – Now go to the Opportunity Grid View, select one row (this is required, doesn’t matter which record) and then click as shown in the image below.

Microsoft Flow Run from Dynamics 365 CE

Step 7 – After clicking on the Copy of – Receive… link, the Flow ‘Dialog’ Window will open up. Now respond the prompt and enter the number of days.

Microsoft Flow Dialog like Prompt

Step 8 – With a little bit of luck will see a screen as follows with all green check marks meaning your Flow has run successfully. The email to your Exec will have been sent out.

There is much more you can do with the process. I just wanted to show you the basic framework to get you started. Happy Flowing!

Microsoft Flow Successful Run

Microsoft Flow Send Email


DIALOGS IN DYNAMICS 365

 Dialogs are a way to guide a user through a set of interactive questions and then perform actions based on their responses. They are designed for user interaction.

Let’s go through creating a dialog. Let’s say we want to create a dialog that is used for capturing information about how satisfied a customer is with our service.

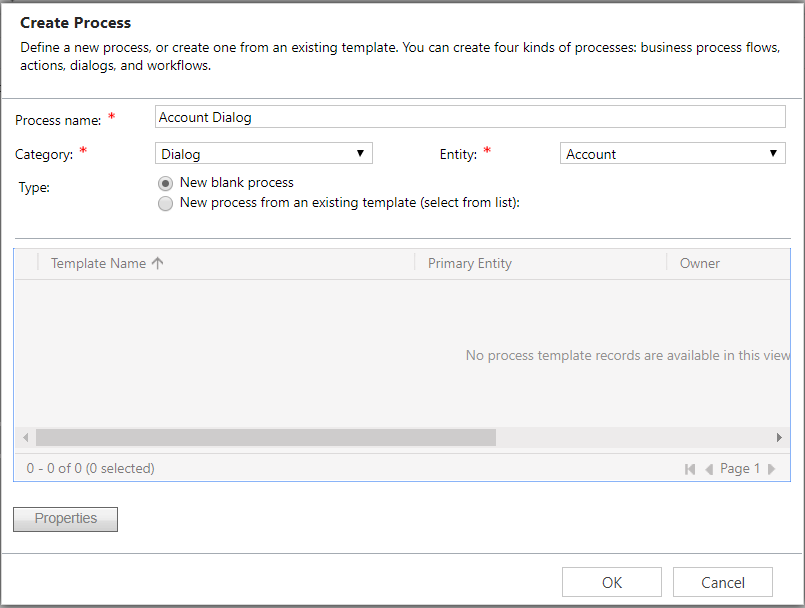
Go to Settings->Processes and select Category = Dialog:

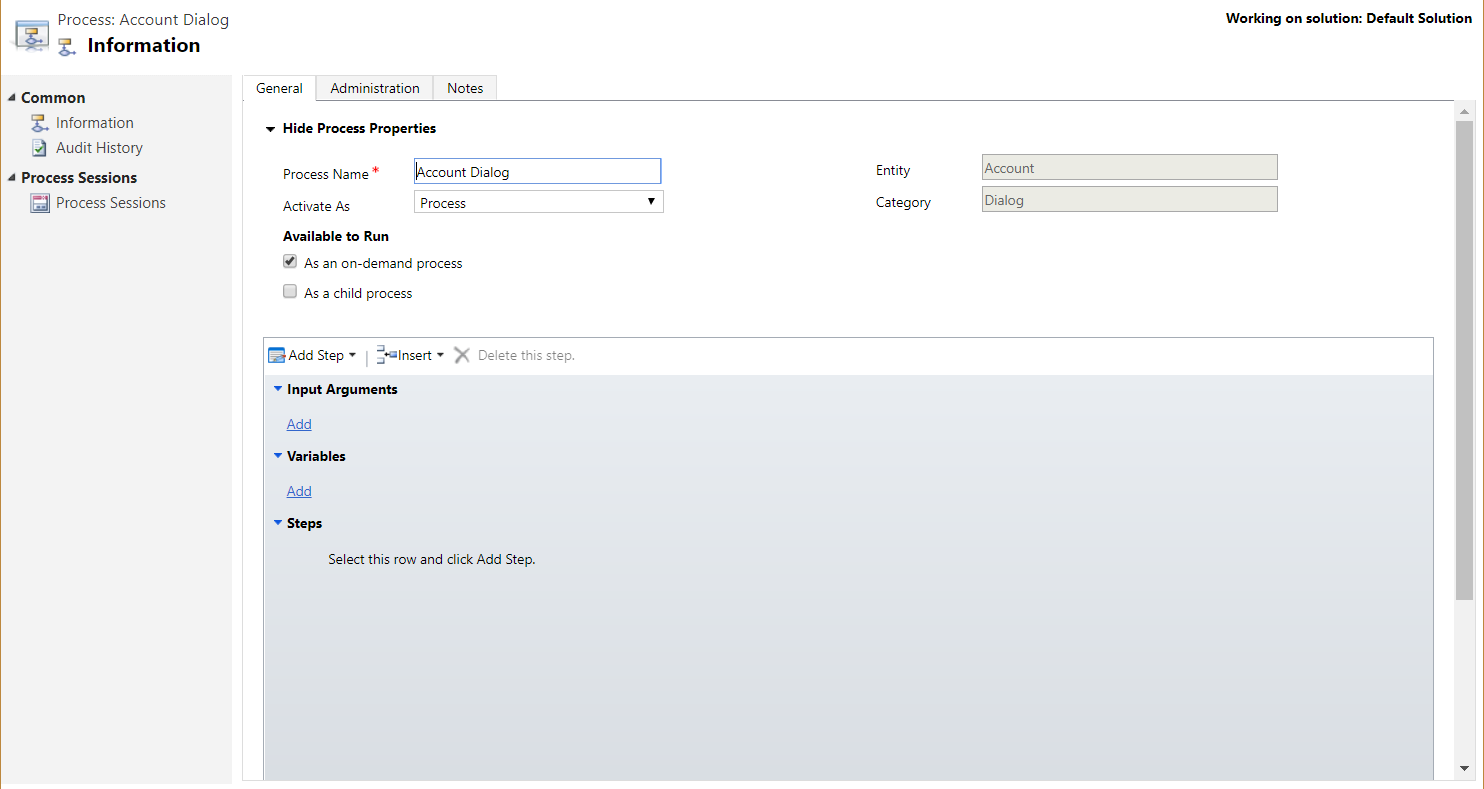
Click OK and it will open the dialog window:

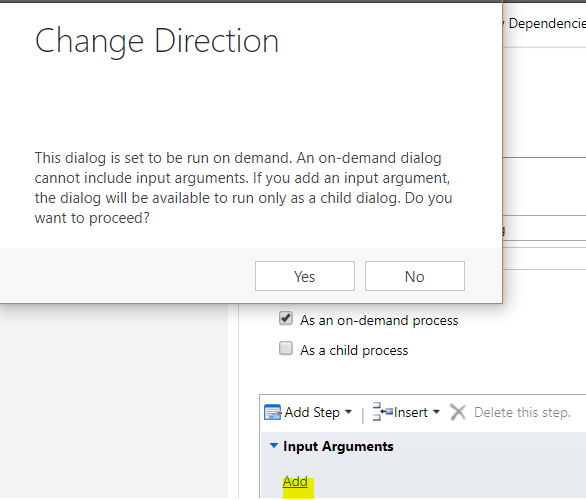
Click to add input arguments. Note you cannot add input arguments to an on-demand dialog. Clicking Yes will enable the dialog as a child process and remove the on demand process. We will keep our dialog as a on demand dialog:

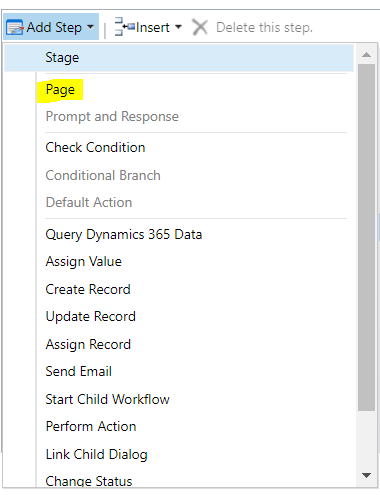
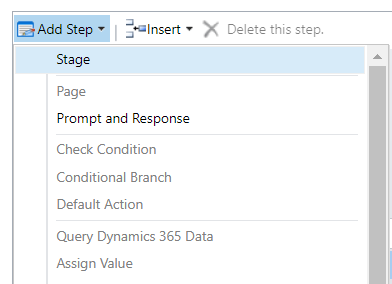
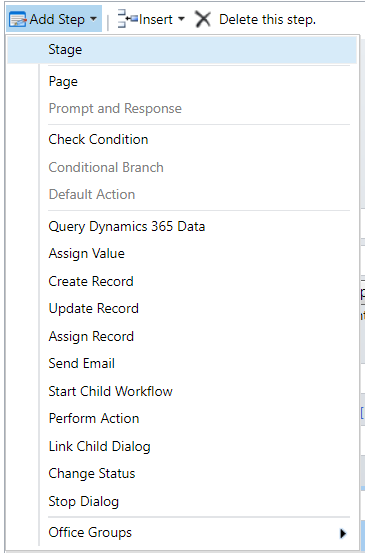
Click to add a step and choose a page:


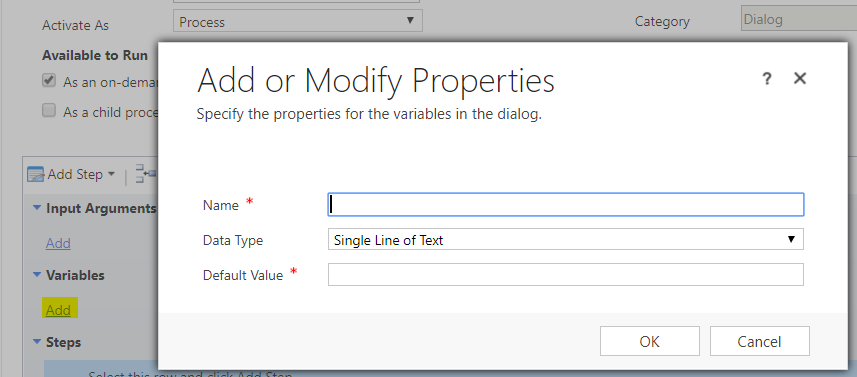
Click to add variables:

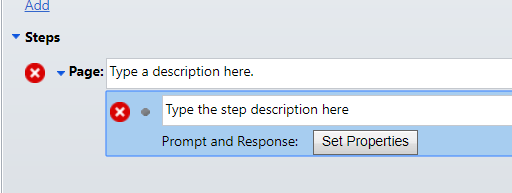
Choose the line and select Prompt and Response:

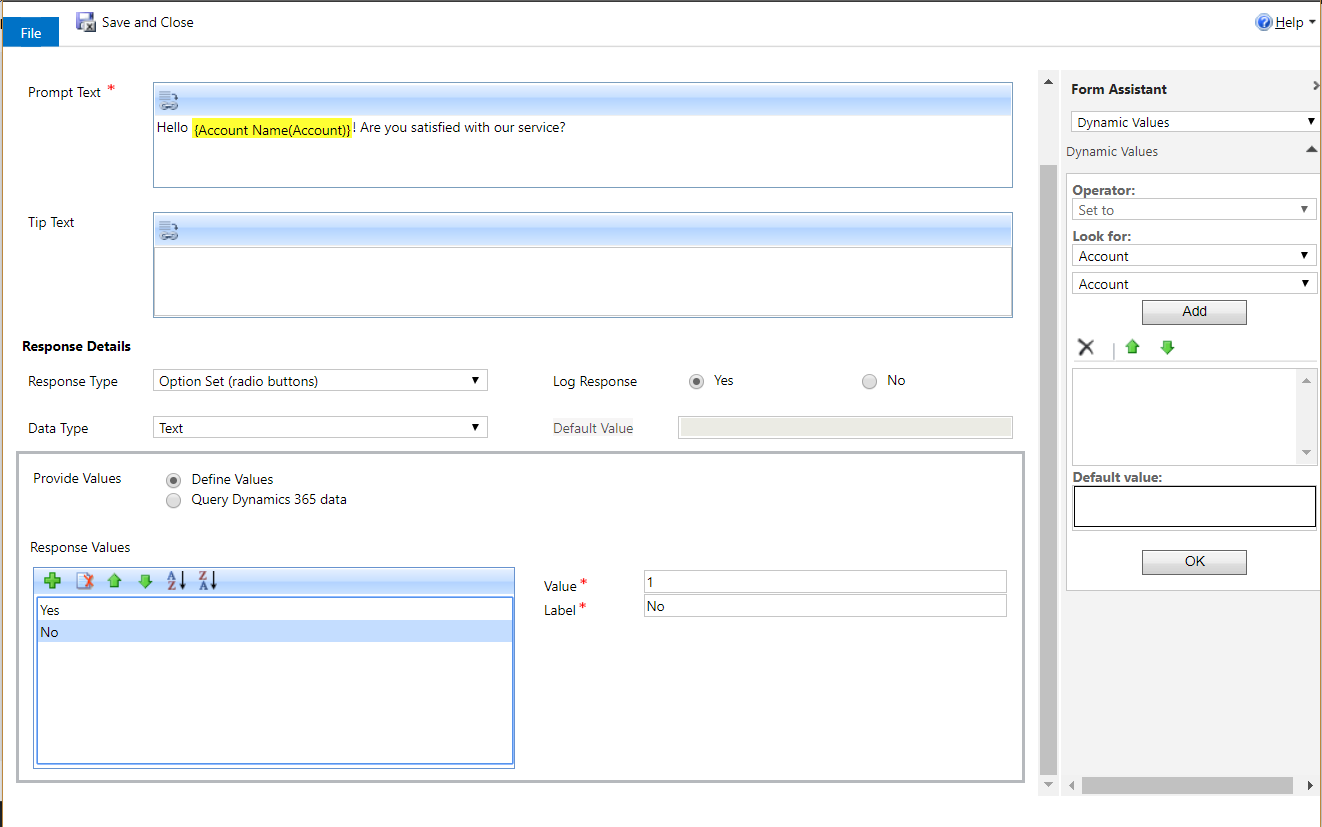
Click Set Properties:

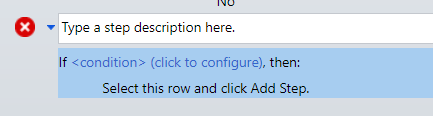
Based on their answer, we can add a condition:

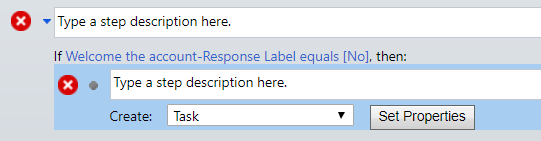
If they answer no:

We can now add a step. Let’s create a task:

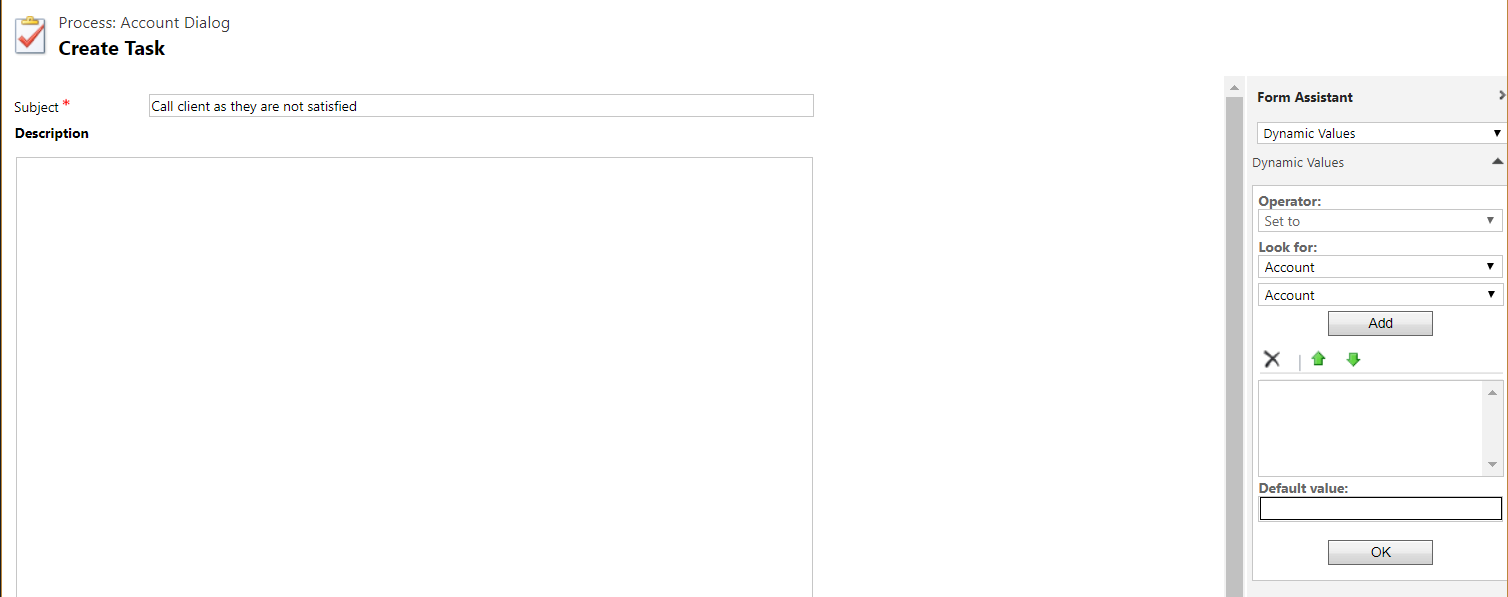
The task will be to call the client:
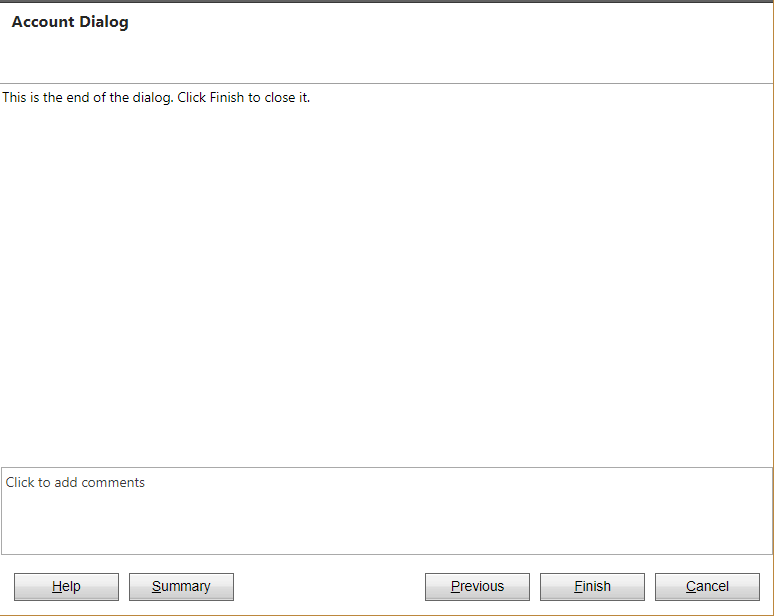
Save and exit. Back to the dialog, you can see there are many things we can do at this point, including running Actions:

We will stop the dialog. Save and Activate the dialog.

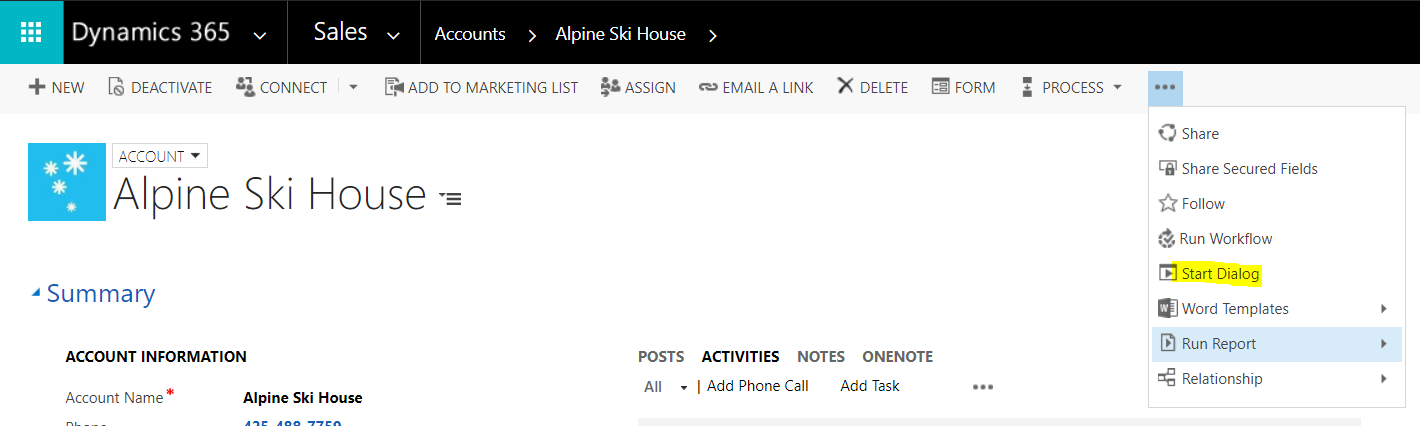
Go to an account record and select Start Dialog:

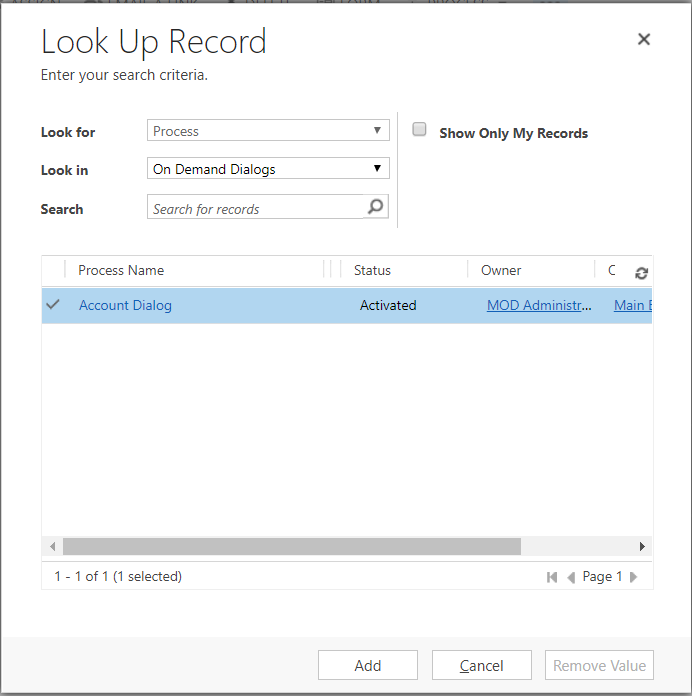
Select the dialog we just created:

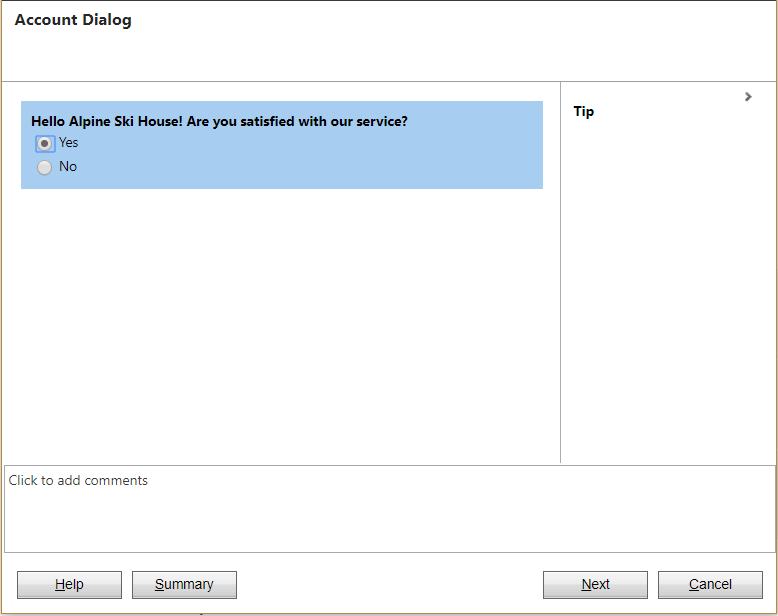
A window will open:

Click No and next:

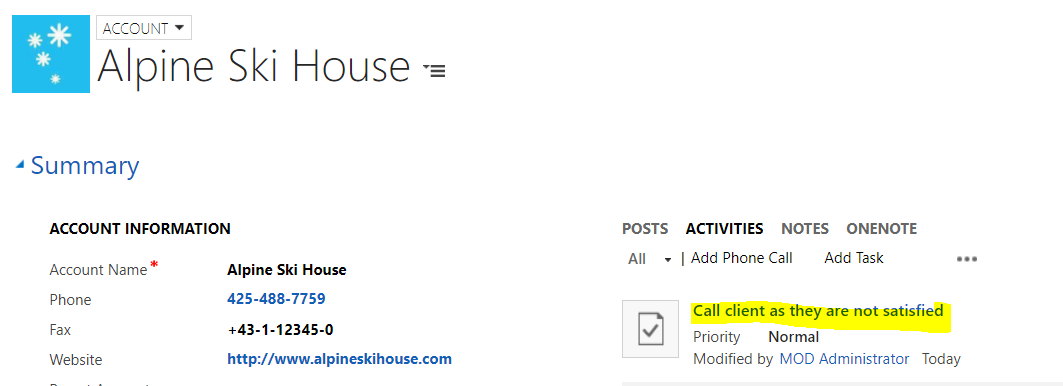
A new task is created: