Search This Blog

Saturday, April 24, 2021

Top 25 Tricks and Tips in Power Automate


  1. 1-      # Flow Tops :(5 Type of Flow-Automate, Instant, scheduled, Business process, UI Flow).
  2. 2-      # Flow Template :(Various of Flow Template used Them).
  3. 3-      #Creating Flow (skip trigger): When go create click the trigger name after you can see.
  4. 4-      # Connecter.
  5. 5-      # Rename the action: so flow is improving readability and visibility.
  6. 6-      # Add Comment in your Action.
  7. 7-      # Copy and Paste Actions.
  8. 8-      # Use Scope Action: it is very power full group action to organized flow. Note: within the scope you can declare the variable. Declare out of scope only.
  9. 9-      # Composed VS Variables: (compose define any type variable, faster than variable, composed variable value never can be change it like static variable, Variable value change anywhere in flow)
  10. 10-  # Expressions and Experimental Features: (Experimental Features is enable from setting so that you can see more space in Composed variable section)
  11. 11-  # Flow Run URL: (How to generate URL from flow run)
  12. 12-  # Trigger Conditions: (When record is created the revenue value >5000) the work flow is run)
  13. 13-  # Peek Code: Behind the code of any action here you can see all expression.
  14. 14-  # Apply to each Concurrency: To overcome taken time by Apply to each loop come concurrency control (for each loop executed sequentially by default to overcome the default setting to customize the degree of parallelism). Go to setting of Apply to each loop enable the concurrency control set the time as for you required. Maximum 50 loop of action execute concurrently.
  15. 15-  # Format Number: When you dealing the Number One Action is Format Number (here some by default format and also make custom format).
  16. 16-  # Date Time Format & Convert Time Zone.
  17. 17-  # Data Operation. There several data format of function (etc. compose.).
  18. 18-  # Parallel Branches: You can run action parallel as well.
  19. 19-  # Error Handling: Configure Run after properties for action setting and also maintain Try Catch block with help of Scope.
  20. 20-   # Flow Checker: Flow checker is basically your friend which identified the error and warning.
  21. 21-  # Test Flow: You can see here all flow status.
  22. 22-  Add Additional Flow Owners: We can make the another owners of flow. Owner of flow will have full access of all connection in the flow and content within the connected account
  23. 23-  # Export and Import Flow: Here the option to export and import yours automate context of exported or imported user
  24. 24-  # Flow Run duration is 30 days: My Flow by default tome 30 day. after 30 days’ work timeouts the step. If you have approval process, you want to send notification after each 15 days. Go Action setting here Timeout As define (Example P1D,P15D) and send notification as well .
  25. 25-  # Flow run History is 28 days: General Data Protection Regulation (GDPR) requires us to keep run logs for no longer than 28 days. To maintain a longer history, you'll need to manually capture run histories before they are deleted. All My History can be download ad CSV Format.

 References : https://www.youtube.com/watch?v=8O68-cc-QNo


Tuesday, February 23, 2021

SPFx Pre-requisites

Before start working on SPFx, we need to have some tools installed on our system. Below is a list of commands to uninstall/install these tools in sequence. There are 2 ways to make setup. EITHER we check each and every tools whether already installed or not and the install the remaining ones OR we uninstall all the required tools and then install back. Here, we are providing the uninstall and install commands. Choice is yours which path to follow.

Before starting the process, make sure, Node JS and npm are installed on your system. To verify, open 

command prompt. Change directory path to C:. Then execute below commands-

  1. node -v /* For Node Version */
  2. npm -v /* For NPM Version */


Uninstall Commands-

  1. npm uninstall -g chalk
  2. npm uninstall -g loadash
  3. npm uninstall -g lodash
  4. npm uninstall -g tar-fs
  5. npm uninstall -g update-notifier
  6. npm uninstall -g yeoman-generator
  7. npm uninstall -g yosay
  8. npm uninstall -g yo
  9. npm uninstall -g gulp
  10. npm rm -g gulp-cli
  11. npm uninstall -g @microsoft/generator-sharepoint


Install Commands-

  1. npm install -g chalk
  2. npm install -g loadash
  3. npm install -g lodash
  4. npm install -g tar-fs
  5. npm install -g update-notifier
  6. npm install -g yeoman-generator
  7. npm install -g yosay
  8. npm install -g yo
  9. npm install -g gulp
  10. npm install -g gulp-cli --force
  11. npm install -g @microsoft/generator-sharepoint
  12. npm install    gulp@next (if got error of primordials is not defined)
  13. npm install -g npm@latest


To install gulp locally in project directory, we use below command-

npm install --save-dev gulp /* Install gulp locally in project directory folder */


To list all npm installations-

npm ls -g --depth=0 /* List All npm Installations */


For more details, please refer Microsoft Website.

SharePoint Framework (SPFx)

According to microsoft-
The SharePoint Framework (SPFx) is a page and web part model that provides full support for client-side SharePoint development, easy integration with SharePoint data, and extending Microsoft Teams. With the SharePoint Framework, you can use modern web technologies and tools in your preferred development environment to build productive experiences and apps that are responsive and mobile-ready.

Key features of the SharePoint Framework include:

  • It runs in the context of the current user and connection in the browser. There are no iFrames for the customization (JavaScript is embedded directly to the page).
  • The controls are rendered in the normal page DOM.
  • The controls are responsive and accessible by nature.
  • It enables the developer to access the lifecycle in addition to renderloadserialize and de-serializeconfiguration changes, and more.
  • It's framework-agnostic. You can use any JavaScript framework that you like including, but not limited to, React, Handlebars, Knockout, Angular, and Vue.js.
  • The developer toolchain is based on popular open-source client development tools such as NPM, TypeScript, Yeoman, webpack, and gulp.
  • Performance is reliable.
  • End users can use SPFx client-side solutions that are approved by the tenant administrators (or their delegates) on all sites, including self-service team, group, or personal sites.
  • SPFx web parts can be added to both classic and modern pages.
  • SPFx solutions can be used to extend Microsoft Teams.

Thursday, December 31, 2020

Modify or create a record (in a data source)/Merge records (outside of a data source)

You'll modify or create a record in a data source, named IceCream, that contains the data in this table and automatically generates the values in the ID column:

Example icecream

MODIFY OR CREATE A RECORD (IN A DATA SOURCE)
FormulaDescriptionResult
Patch( IceCream,
Lookup( IceCream, Flavor = "Chocolate" ), { Quantity: 400 } )
Modifies a record in the IceCream data source:
  • The ID column of the record to modify contains the value of 1. (The Chocolate record has that ID.)
  • The value in the Quantity column changes to 400.
{ ID: 1, Flavor: "Chocolate", Quantity: 400 }

The Chocolate entry in the IceCream data source has been modified.
Patch( IceCream, Defaults( IceCream ), { Flavor: "Strawberry" } )Creates a record in the IceCream data source:
  • The ID column contains the value 3, which the data source generates automatically.
  • The Quantity column contains 0, which is the default value for that column in the IceCream data source, as the Defaults function specifies.
  • The Flavor column contains the value of Strawberry.
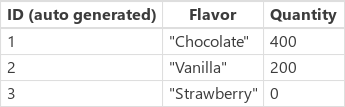
{ ID: 3, Flavor: "Strawberry", Quantity: 0 }

The Strawberry entry in the IceCream data source has been created.

After the previous formulas have been evaluated, the data source ends with these values:
Example icecream after

Merge records (outside of a data source)

MERGE RECORDS (OUTSIDE OF A DATA SOURCE)
FormulaDescriptionResult
Patch( { Name: "James", Score: 90 }, { Name: "Jim", Passed: true } )Merges two records outside of a data source:
  • The values in the Name column of each record don't match. The result contains the value (Jim) in the record that's closer to the end of the argument list instead of the value (James) in the record that's closer to the start.
  • The first record contains a column (Score) that doesn't exist in the second record. The result contains that column with its value (90).
  • The second record contains a column (Passed) that doesn't exist in the first record. The result contains that column with its value (true).
{ Name: "Jim", Score: 90, Passed: true }

Use of As or ThisRecord

Using the As or ThisRecord keyword in the formula avoids ambiguous evaluation context.

In the example below, consider the first lookup in the If statement. (OrderID = A[@OrderID]) is expected to compare the OrderId in the lookup scope with the OrderId of collection A in the ForAll scope. In this case, you likely want A[@OrderId] to be resolved as a local parameter. But it is ambiguous.

Power Apps currently interprets both the left-hand side OrderId and right-hand side A[@OrderId] as a field in the lookup scope. Therefore, lookup will always find the first row in [dbo].[Orders1] because the condition is always true (that is, any row's OrderId is equal to itself.)

ClearCollect(
    A,
    Filter(
        '[dbo].[Orders1]',
        OrderId = 8888888
    )
);
ForAll(
    A,
    If(
        LookUp(
            '[dbo].[Orders1]',
            OrderId = A[@OrderId],
            "OK"
        ) = "OK",
        Patch(
            '[dbo].[Orders1]',
            LookUp(
                '[dbo].[Orders1]',
                OrderId = A[@OrderId]
            ),
            {
		OrderName: "val1"
	    }
	),
	Patch(
            '[dbo].[Orders1]',
            Defaults('[dbo].[Orders1]'),
            {
		OrderName: "val2"
	    }
	)
    )
)

Using As or ThisRecord

Whenever possible use the As operator or the ThisRecord to disambiguate the left-hand side. As is recommended for the above scenario.

When your formula uses multiple scopes with ForAllFilter, and Lookup on the same data source or table, it is possible that the scope parameters may collide with a same field elsewhere. Therefore, it is recommended to use the As operator or ThisRecord to resolve the field name and avoid ambiguity.

For example, you can use the As operator to disambiguate in the example below.

ClearCollect(
    A,
    Filter(
        '[dbo].[Orders1]',
        OrderId = 8888888
    )
);
ForAll(
    A,
    If(
        LookUp(
            '[dbo].[Orders1]' As B,
            B.OrderId = A[@OrderId],
            "OK"
        ) = "OK",
        Patch(
            '[dbo].[Orders1]',
            LookUp(
                '[dbo].[Orders1]' As C,
                C.OrderId = A[@OrderId]
            ),
            {
		OrderName: "val1"
	    }
	),
	Patch(
            '[dbo].[Orders1]',
            Defaults('[dbo].[Orders1]'),
            {
		OrderName: "val2"
	    }
	)
    )
)

Alternatively, you can use ThisRecord for the same purpose.

Power Apps
ClearCollect(
    A,
    Filter(
        '[dbo].[Orders1]',
        OrderId = 8888888
    )
);
ForAll(
    A,
    If(
        LookUp(
            '[dbo].[Orders1]',
            ThisRecord.OrderId = A[@OrderId],
            "OK"
        ) = "OK",
        Patch(
            '[dbo].[Orders1]',
            LookUp(
                '[dbo].[Orders1]',
                ThisRecord.OrderId = A[@OrderId]
            ),
            {
		OrderName: "val1"
	    }
	),
	Patch(
            '[dbo].[Orders1]',
            Defaults('[dbo].[Orders1]'),
            {
		OrderName: "val2"
	    }
	)
    )
)
Update Sharepoint list items when click on Submit in Powerapps (Survey App)

 Hi All,

Need a help in updating the sharepoint list when I click submit in Survey App created in PowerApps

I created a SP list and from there I created an app using the SP list in PowerApps

Requirement as below.

  1. The survey is supposed to be sent to new joinees after they complete 30 days in the company via an automated email.
  2. Before doing so, I should have a working App, so I created multiple edit forms in Power Apps (screenshots below). However, I failed in achieving the same. Any help is appreciated on this

Need help with the below:

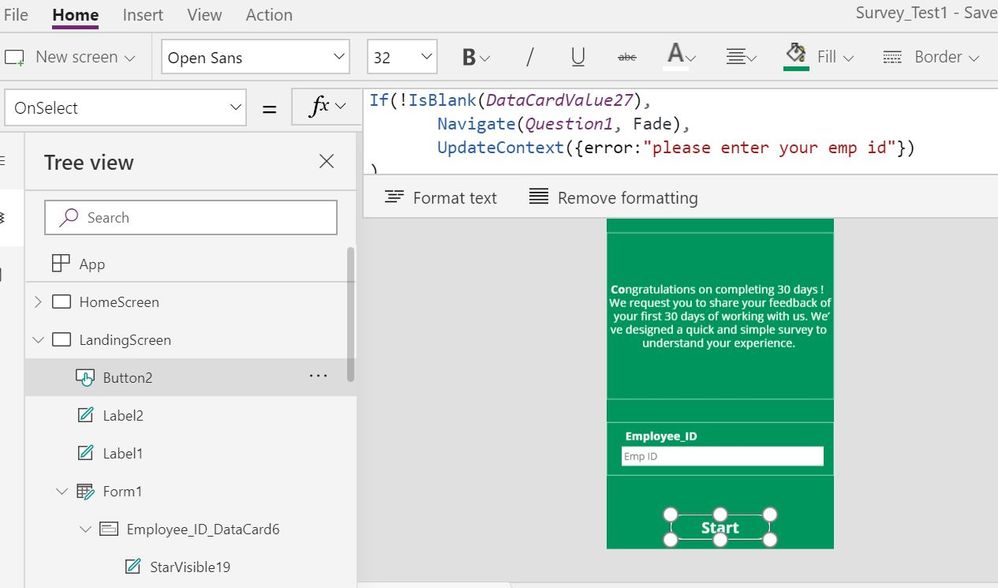
  1. I created a landing page where the employee has to input his EMP ID, he cannot go to next page until employee enter his/her employee id. However, I want to display a message saying "please enter your emp id" when he/she clicks on Start.
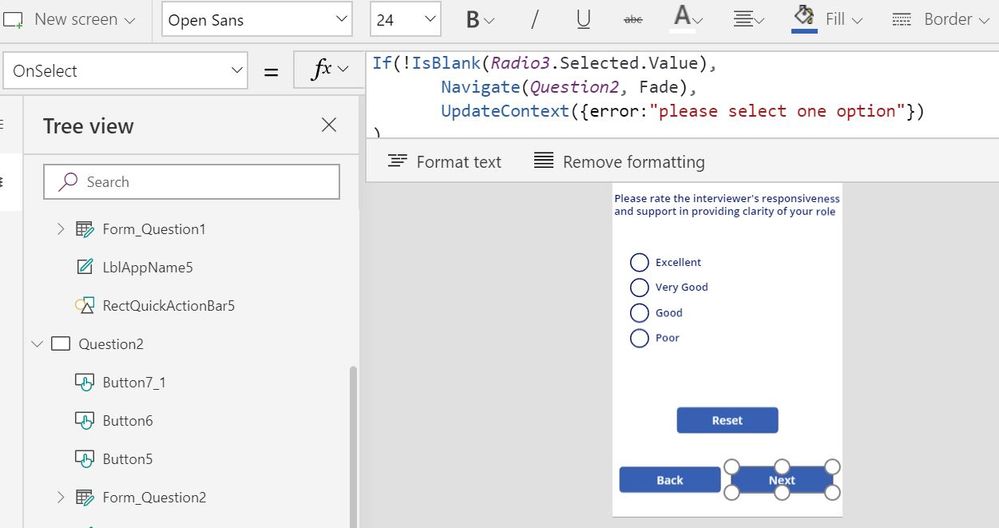
  2. In Question1 form, I want the employee to select one option. Want to display a message that "atleast one option should be selected" if they click on next without selecting any option
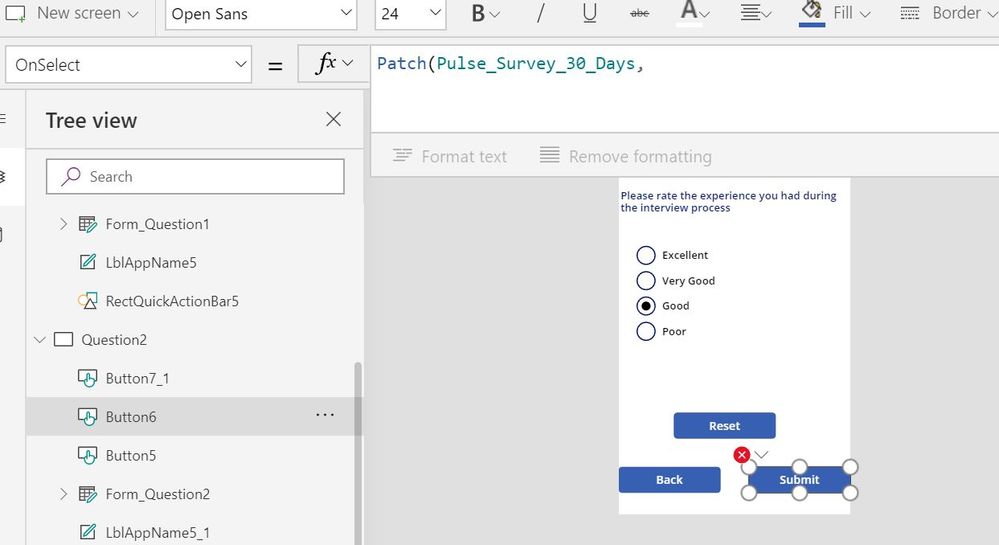
  3. In Question2 form, when the employee click submit I want those results to be updated in the sharepoint list where I have some details against their employee id. I do not want to create a new item for the survey results in the list. However using Patch () Defaults() i see that two more items were created and the items updated only the questions in the survey but no other details were captured including Employee ID

Below are the screen shots of the list and the app

LandingScrren_Survey.JPGScreenshot1_Survey.JPGScreenshot2_Survey.JPGSP_List_Survey.JPG


Wednesday, December 30, 2020

Model Driven vs. Canvas Power App App Major Differences


eaturesCustomized list form [Model-Driven Apps]Standalone app [Canvas Apps]
Permissions/Share OptionsSharePoint permissions on the listUser or Co-owner
TemplatesDefault Modern List Template only available which can be further customizedFew dozen pre-built canvas app templates available
End-user interactionOn the listfrom the list of PowerApps, or using a direct link
MobileIn the SharePoint app, if embedded as a web partIn the PowerApps app
DesigningFrom the list, customize list format web.powerapps.com
ExportCan’t be doneat web.powerapps.com
Versioningsave, then see all versionsfrom the app’s details screen, web.powerapps.com
Data FocusFocused on dataFocused on the user interface
StructureInput data to define structural componentsDrag and drop components onto a blank canvas
Data SourcesPulls data from Common Data Service(CDS)Can pull data from over 200 data integration sources out of the box
ResponsivenessResponsive by designNot responsive by design
Business NeedsBest suited for creating end-to-end solutionsBest suited for task-based or role-based applications

Friday, December 25, 2020

A piece of Code Add, edit,save ,cancel,reload.

 Hi  All find code of Add, edit,save ,cancel,reload in powerapp,

Icon

Code Logic

Add New

UpdateContext({NewDisplayMode: DisplayMode.Edit}); UpdateContext({EditDisplayMode: DisplayMode.Disabled})

Edit

UpdateContext({NewDisplayMode: DisplayMode.Disabled}); UpdateContext({EditDisplayMode: DisplayMode.Edit})

Cancel

UpdateContext({NewDisplayMode: DisplayMode.Disabled}); UpdateContext({EditDisplayMode: DisplayMode.Disabled})

Save

If (NewDisplayMode = DisplayMode.Edit,

    If (!IsBlank(LastNameField) && !IsBlank(EmailAddressField),

        SubmitForm(AddNewForm); ResetForm(AddNewForm); Refresh(Contacts),

        Notify("Cannot create record. Missing data.", NotificationType.Error)),

    true);

UpdateContext({NewDisplayMode: DisplayMode.Disabled}); UpdateContext({EditDisplayMode: DisplayMode.Disabled})

Reload

Refresh(Contacts)