PowerBI is a great tool for reporting on and analyzing data, from a wide range of sources, including Dynamics 365. To set this up, you must connect to Dynamics 365 as a PowerBI data source, so PowerBI can load your CRM data. In this blog, we will review the two versions of PowerBI and then provide step-by-step instructions for setting this up in PowerBI Desktop.
Before we begin, if you also want to leverage pre-built Power BI Content Packs with CRM for Dynaimcs 365, check out a previous blog: Connect Your CRM Online Data to PowerBI for Powerful Analysis.
Now, let's start by talking about the two different versions of PowerBI, PowerBI Service, and PowerBI Desktop.
PowerBI Service, is the online version that you can access from your browser, at www.powerBI.com after logging in. This is the version that is accessed by most users who want to utilize PowerBI for analyzing data, and creating reports and dashboards.
PowerBI Desktop is an application that is installed and run on your PC, like any other Windows application. It is geared for more technical users, who often do the work of setting things up to help regular users who will be using PowerBI Service. The two versions are designed for different purposes, and while they have a lot in common, they are definitely not the same.
Alright! We've reviewed the differences, now let's look at how, in PowerBI Desktop, you connect to and gain access to CRM Online data.
As a preliminary step, we need to know the url to enter in to PowerBI to point it to the Dynamics CRM online org. This is best done by logging in to Dynamics CRM online and copying the url from a screen called "Developer Resources". These first steps show you how to get to the screen:
1. Log in to Dynamics 365 online.
2. Click on the "Settings" tile.

3. Choose "Customizations."
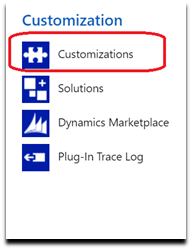
4. Choose "Developer Resources."

5. Copy the url listed under "Instance Web API," and save it for entering into PowerBI Desktop.

6. With the saved url, we can point PowerBI Desktop to CRM data on Dynamics 365.
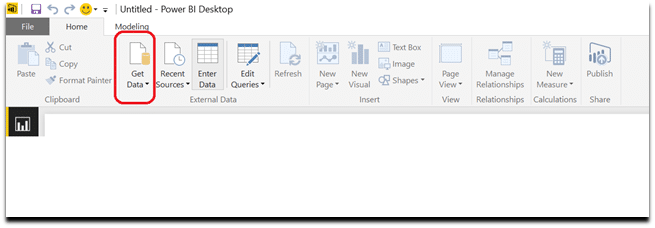
7. Start PowerBI Desktop and then select "Get Data" either from the Splash Screen or from the ribbon at the top of the screen.
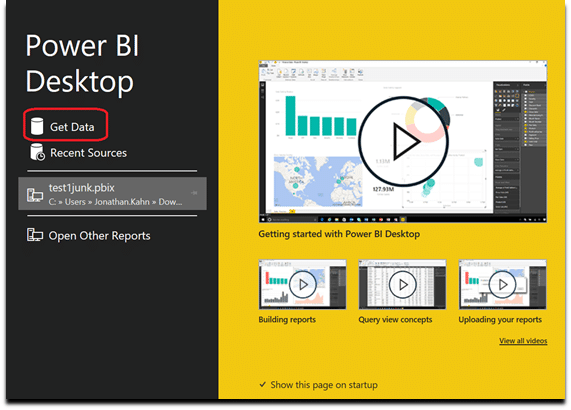
OR
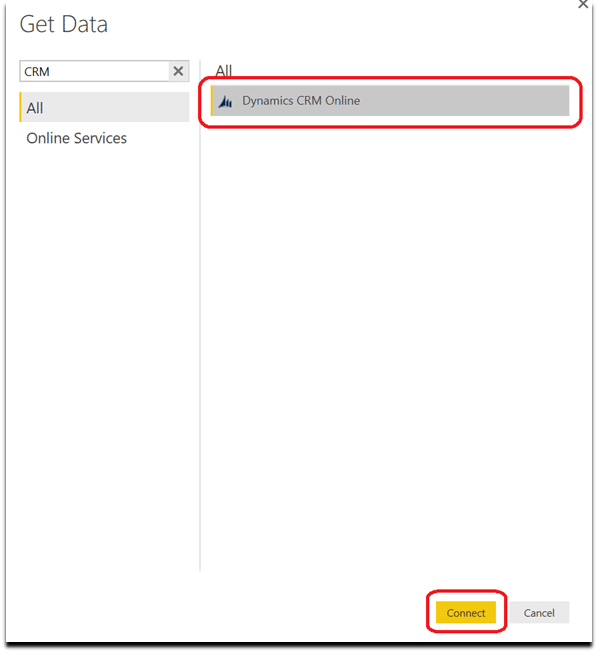
8. Type CRM into the search box to locate CRM for Dynamics 365 Online. Then click on the "connect" button.
9. Enter the CRM url (saved earlier) and click "OK."
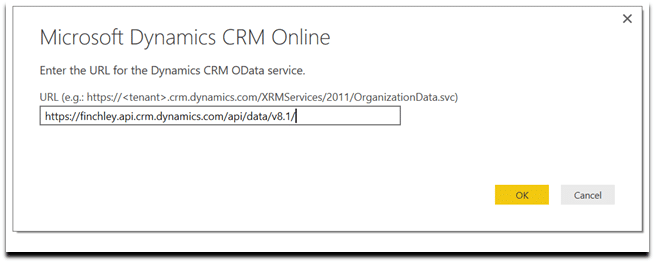
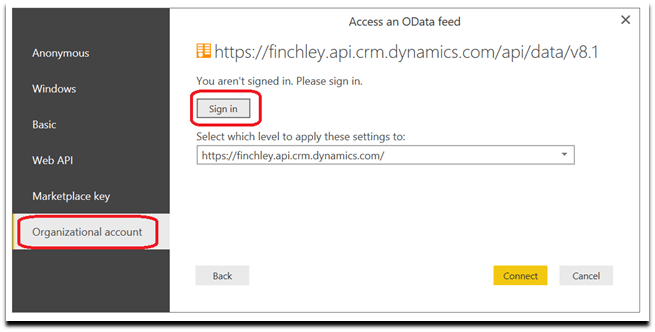
10. In the "Access an OData feed" dialog box, select "Organizational account" and then click "Sign in."
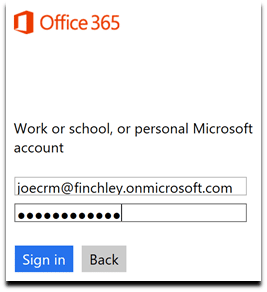
11. You may then need to sign in to your CRM for Dynamics 365 Online with your username and password.
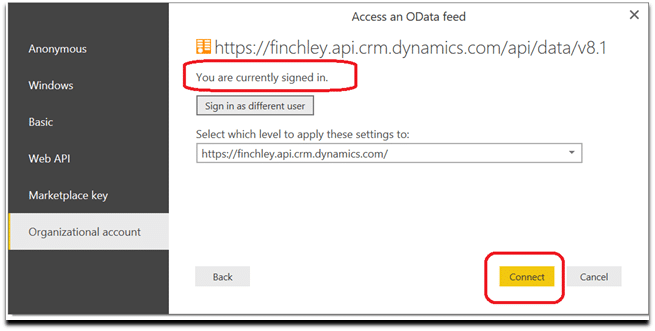
12. Verify that you are signed in by making sure you see the message "You are currently signed in" in the dialog box and then click "Connect."
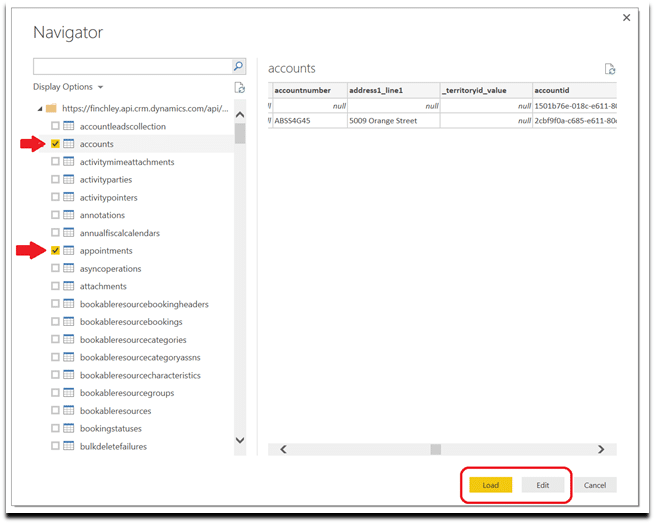
13. The navigation screen will allow you to select the CRM entities whose data you want to load into PowerBI Desktop.
Note, if you click "Load," all the data and every field in the selected entities will be loaded into PowerBI.
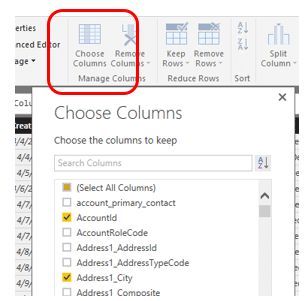
Best practice would be to click "Edit" and select the columns of data you need for reporting.
With your CRM data loaded into PowerBI, you can now start building reports. After you publish them, your PowerBI Service users will be able to build their own dashboards using CRM data.

No comments:
Post a Comment