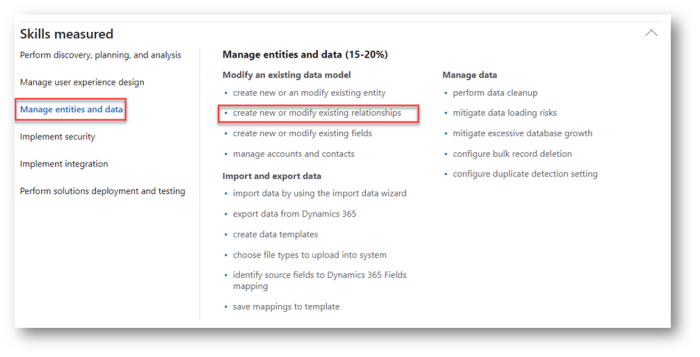
You can see below that we have a section of the exam which covers managing entities and data. Within this section needing to know how to create and modify relationships is referenced.

Overview
Understanding how to relate Common Data Service (CDS) entities to each other is a key concept when you are customizing a Dynamics 365 system. Within CDS / Dynamics 365 there are several ways to create a relationship between two entities and also multiple types of relationship.
The system entities that come preconfigured already contain many relationships but you can create additional relationships between system and custom entities. It is also possible to amend relationships to alter how they behave. As cascading rules define what will happen to child records when the parent is assigned, shared, deleted etc. For example, if we delete an account what will happen to all of the contacts associated to that account?
Relationship types include;
- One to Many (1:N) or Many to One (N:1)
- Many to Many (N:N)
- Hierarchical Relationships (e.g. Account and sub accounts.)
- Connections
- Customer
Tip: There is no such thing as a one to one 1:1 relationship!
Also, linked to relationships we have field mapping rules. These are applied when one record is created from another. For example, if we create a contact from an account the address, phone number and such like for the contact can be defaulted to the details from the account.
Note: In this post I am going to exclusively use the new maintenance experience we find a make.powerapps.com. If you have been using Dynamics for sometime you will no doubt be aware of the classic approach to maintaining relationships. The classic approach does still work but I encourage you to experiment with the newer interface.
One to Many Relationships (1:N)
One to many relationships are probably the most common type of relationship in any relational database. It is very common for a parent to have one child or multiple children. Examples of a one to many relationship would include an account having multiple contacts. Or a contact having multiple cases.
With a 1 to many relationship, the child record will have a lookup field that effectively contains the GUID of the parent. A contact for example will have a look up to the account entity.
FYI:
GUID stands for global unique identifier, it is essentially a reference that uniquely identifies any record in CDS.
Let’s look at a very simple example of a 1:N relationship. Below you can see then on my account I have a sub grid of contacts. Meaning each account (1) can have many contacts (N).

The contacts are the children of the account. On a child contact we can see that it has a relationship back to the parent. We see this in Dynamics 365 as a lookup field.

Many to Many Relationships (N:N)
With a many to many relationships the parent can have multiple children and the child can have multiple parents. One example of this might be competitors and opportunities. As there might be multiple competitors on one opportunity. And each competitor can exist on multiple opportunities. In this scenario on the opportunity we’d have a sub grid of competitors and on the competitor we’d have a sub grid of opportunities.
On the opportunity we see a sub-grid of competitors….

Then on the competitor we see a sub grid of opportunities ….

With many to many relationships we have two approaches to implementation. The first is described as a “native many to many” relationships. The link between competitor and opportunity is an example of a “native many to many relationship”. These are created simply using functionality available directly in Dynamics 365.
The second type of many to many relationship is called a “manual many to many” relationship.
Before thinking about a manual many to many it might be worth considering what is happening behind the scenes when you create a “native many to many” relationship. As the system actually creates a hidden entity that acts as an intersection between the two entities. Effectively each entity has a many to one relationship with the intersection. Which in turn effectively creates a many to many relationship. A manual many to many takes the exact same approach expect the intersection is manually created.
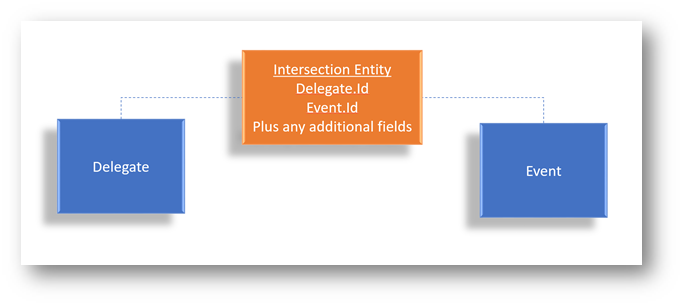
Manual many to many relationships are used when additional fields are needed to capture extra detail. Imagine we have an entity called events and another called delegates. Each delegate could attend multiple events and each event would have multiple delegates. But each time a delegate attends an event we might wish to capture some additional details about that booking. Such as any special instructions for dietary requirements, expected time of arrival etc etc.
When creating a “manual many to many” relationship we actually create an intersection entity. (Meaning it isn’t hidden and additional fields can be added.) The intersection entity will contain the GUIDs from both of the related entities plus any additional fields.
Note: You will often see the GUID field described as the Id field, the terms are interchangeable!

Connections
Connections are essentially a special relationship that allows us to link records in a “non-traditional” manner based on a connection role. Traditional relationships are “hard” relationships, such as linking a case to a contact. Connections are useful to record “soft” relationships, such “is a friend of”, “former employee of”, “went to school with” etc etc. Below you can see an example where my lead “John Smith” is a friend of “Tony Stark”, is influenced by me, has a child called “Paul”.

Additionally my lead has a former employer of “Blue Yonder”, if we look at the Blue Yonder account we can see that John smith is described as a former employee. Hence we can see that connection roles can have two sides.

Customer
Microsoft Dynamics CRM 2016 Update 1 introduced the capability to create a customer field on any system or custom entity.
“Customer” has been a special polymorphic relationship. For example, consider the customer field on cases. It is polymorphic because a customer could be an account or contact, so we can have one field that can relate to either entity.
This relationship always existed in older versions of “CRM” but it wasn’t until CRM 2016 Update 1 that customizers could create customer fields on any entity. It is now possible to create a customer field on any entity.
Below you can see that whilst working with a customer field I can select to filter the results to show contacts or accounts. Additionally the new record option or change view options will also prompt me to work with accounts or contacts.

Creating Relationships – One to Many
I have used the concept of a custom policies entity in previous posts, so I will stick with that as an example of how to create a one to many relationship. Say I want each account to be able to have one or many policies.
First of all, I navigation to the primary entity. In this example that would be account. So I open my solution (or from the default solution using the customizations option) and then find the account entity. Next I relationships and add relationship. Now I click “+ One-to-Many Relationship”.
Tip: I could have navigated to the child entity (policy) and added the relationship as a new “Many-to-one” relationship.

I can then define the details for the relationship. As shown below.

Once I have created the relationship, you can see below that a lookup field has been created on my policy entity. On the policy entity I could open this lookup field and change / review if the field is required, searchable etc.

Relationship Behavior
In defining my relationship, in the advanced option, I kept the behavior as referential. (the default). It is important you for to know that other types of behavior exist and you can tailor these as required.
| Field | Comment |
| Type of Behavior | The default when creating a custom entity will be referential. Other options include parental, referential restrict delete and configurable cascading.
|
| Assign | Defines what will happen if the owner of a record is changed. Read-only, unless configurable cascading is selected. The assign, as with share, unshare, reparent and merge has the following options available.
|
| Share | Defines what will happen if a record is shared with another user or team. Read-only, unless configurable cascading is selected. |
| Unshare | Defines what will happen if a record is unshared with another user or team. Read-only, unless configurable cascading is selected. |
| Reparent | This option is actually similar to share / assign. It is triggered if the parent of the child is changed. For example, if set to cascade all, the owner of the newly assigned parent would inherit access to the child. But if cascade none was set the new owner would not inherit access. Read-only, unless configurable cascading is selected. |
| Delete | Defines what will happen if the parent is deleted. Read-only, unless configurable cascading is selected. Has a different set of cascade options which include;
|
| Merge | Defines what will happen to the children if the parent is merged with another parent. Read-only! This option is always cascade all. |
Create Native Many to Many
Creating a native many to many relationship is actually very similar to creating a one to many relationship. Except the many to many relationship does NOT have any cascading rules.
Below you can see I have added a relationship between contact and my custom entity called policy. This would mean that each policy could be associated with many contacts. And each contact could be related to many policies.

Create a customer relationship
As already mentioned the customer relationship is a single lookup between account or contact. To create a customer relationship, navigate to fields and use the add field option.

Next set the data type of your new field to be type customer.

You can see below that it will create two relationships between account and contact. It will default the names for these relationships. Typically I don’t change these names but you could!


No comments:
Post a Comment