Azure API Management
Azure API Management is a service that is responsible for managing back-end services like web API, WCF, open API, etc. It provides most of the tools required for end-to-end management of API’s. You can add validations for the headers, restrict the number of calls to an API, add an IP filter, etc.
Components
Gateway
This is the front-end of the APIs. The request lands on the gateway. Authentication, authorization, validations are done on this layer. It verifies the identity, restricts the number of calls, and redirects to backend API. You can also transform the HTTP response with custom properties as well as monitoring and logging can be done at this level.
Azure Configuration Portal
Construct the APIs, mock response data, and package your APIs into products. You can create access policies and monitor your incoming requests.
Developer Portal
This is a kind of developer website which is exposed to clients/consumers. Its created from your API schema and allow clients to see the endpoints-related information. It also provides a console to test the endpoints.
Create APIM
- Login into the Azure Portal with valid credentials.
- In the search box type “API Management Services”

- Enter the details as per your requirement.
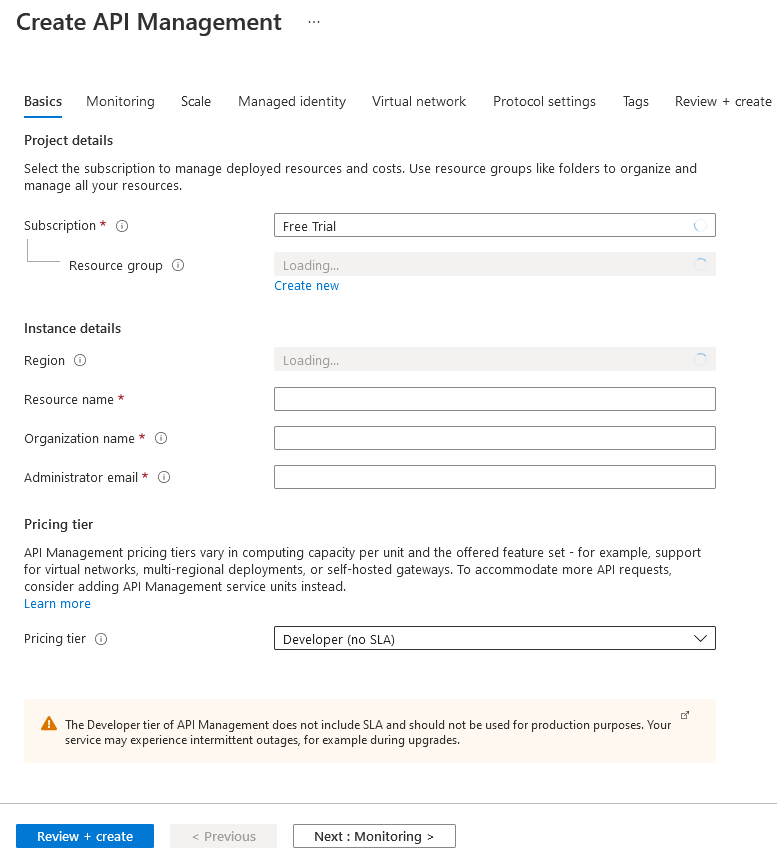
- Hit Review and Create.
- It will take approximately 15- 20 minutes, so relax and wait for an email from azure that API Management has been created.
- Once its created, navigate to API Management services, you will see the newly created API service with status = Online
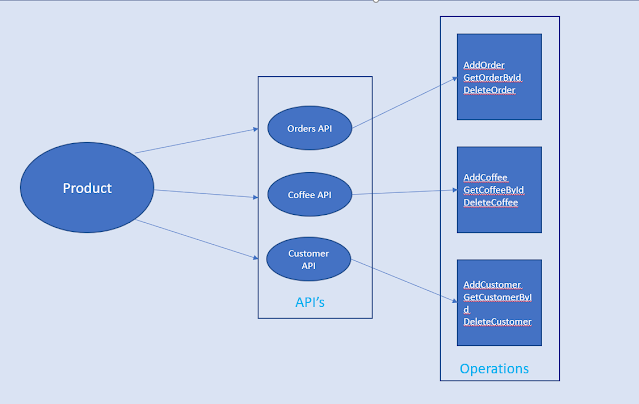
Products, API’s and Operations
Operation
An operation is an endpoint that is consumed by the client for HTTP requests, it could be Post, Get, Delete, Head, etc.
Apis
When you group together the operations, then they became an API like Coffee API has multiple operations to Add, Delete Get Coffee.
Product
The collection of APIs is called a Product.
It’s time to do some practical.
- Log in to the Azure portal and navigate to API Management.
- Click on the APIs link available under the APIs section. You will see lots of options to create a new API or create from the definition.
- In this demo, we will be using the Open API option. I have already deployed my Web API application on the app service.
- Select the Open API option and enter the JSON configuration file or URL of your API.
- Hit create button.

Your newly created API should be visible under the developer's portal. Click on the API, you will see all the operations available under that API under the ALL Operations tab.

On the right-hand side, you will see Frontend, Inbound processing, Outbound processing, and Backend.
Frontend
This is the APIM URL that you will share with the client. You can edit them according to your need. The request will land on the frontend layer first. You can define request headers, any additional query parameters.
Inbound Processing
Modify the request before it is sent to the backend service. In this layer, you can add different policies like limit the number of requests, the time delay between the request, CORS, IP-filter, etc.
Backend
This is your HTTP(s) endpoint, see it like this is the actual code of your Web API. This will have your app service web API URL.
Outbound processing
Modify the response before it is sent back to the client. You can add headers, validate status code, validate content, etc.
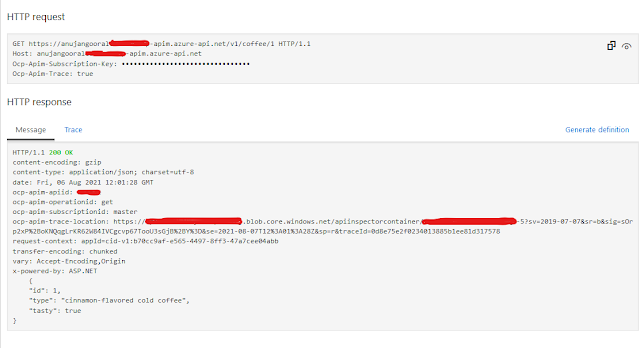
API Testing
Select the particular operation from the All Operation panel that you want to test and from the top menu, click Test. A new panel will show up which has the template parameters, query parameters, and header. you can fill in the details according to your endpoint. In my endpoint, it expects the item id, so I am going to pass the id of the item that I want to fetch using the Get call. After filling in the required details, hit the send button. you will see the HTTP Request and HTTP Response.