Search This Blog

Monday, November 30, 2015

SharePoint Object Model Hierarchy


SPFarm: The SPFarm object is the highest object within the Windows SharePoint Services object model hierarchy. The servers property gets a collection representing all the servers in the deployment and the services property gets a collection representing all the services.

SP SERVER: The Server object represents a physical server computer. The service instances property provides access to the set of individual service instances that run on the individual computer.

SPWebApplication: Each SPWebApplication object represents a load-balanced web application based in Internet Information Services (IIS). The SPWebApplication object provides access to credentials and other server Farm-wide application settings. The Sites property gets the collection of site collections within the web application and theContentDatabases property collection of content databases is used in the web application. The SPWebApplication class replaces the obsolete SPVirtualServer class but it can still be helpful to think of a SPWebApplication object as a virtual server; that is, a set of one or more physical servers that appear as a single server to users.

SP Content Database:
 the SPContentDatabase object inherits from the Database class and represents a database that contains user data for a SharePoint web application. The Sites property gets the collection of site collections for which the content database stores data and the WebApplication property gets the parent web application.

SPSiteCollection: An SPSiteCollection object represents the collection of site collections within the web application. The Item property or indexer gets a specified site collection from the collection and the Add method creates a site collection within the collection.

SPWEB: Each site collection includes any number of SPWeb objects and each object has members that can be used to manage a site, including its template and theme, as well as to access files and folders on the site.

SPLIST: Each SPList object has members that are used to manage the list or access items in the list.

ITEMS: Each SPListItem object represents a single row in the list.

Cascading Drop down In SharePoint Lists using jQuery

Out-of-the-box SharePoint doesn't provide a way to cascade drop downs in list forms. Luckily, jQuery provides a way to implement cascading drop downs in SharePoint list forms. Here is the step by step implementation guide:


We need to have two more lists to implement this. Lets say:

List 1: Parent list, say: Country
cascading drop down sharepoint

List 2: Child list, say: Cities
cascading dropdown sharepoint list

List 3: Our target list, where we are going to implement the Cascading drop down.

So, Now:
Insert the following code: Just below

<script language="javascript" type="text/javascript" src="/address to document library/jquery-1.3.2.min.js"></script>
<script language="javascript" type="text/javascript" src="/address to document library/jquery.SPServices-0.4.8.min.js"></script>
<script language="javascript" type="text/javascript">
 $(document).ready(function() {
  $().SPServices.SPCascadeDropdowns({
   relationshipList: "Cities",
   relationshipListParentColumn: "Country",
   relationshipListChildColumn: "Title",
   parentColumn: "Country",
   childColumn: "City",
   debug: true
  });
 });
</script>

Here:
relationshipList: “Cities” : this is the name of the relationsship list = the list containing parent and child
relationshipListParentColumn: “Country” : Column name from the Cities list
relationshipListChildColumn: “Title” : Column name from the Cities list
parentColumn: “Country”: Column name from the list where the drop down is = Vacation Plans
childColumn: “City”: Column name from the list where the drop down is = Vacation Plans

1. Download the jquery-1.3.2.min.js by Jquery.com, from the below link

2. Download spservices (jquery.SPServices-0.5.6.min.js) from the codeplex link

3. After downloading upload these two files in a document library

4. In SharePoint Designer, create your own NewForm.aspx (and EditForm.aspx)


Cascading drop down example- What you will get as output is:
Cascading Drop down in SharePoint List Forms using jQuery
Verified that, cascading dropdown list method works on both SharePoint 2007 and SharePoint 2010,SharePoint 2013


Set a fixed width for a column in a view

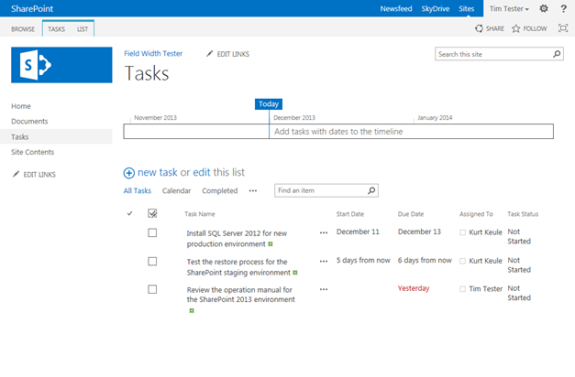
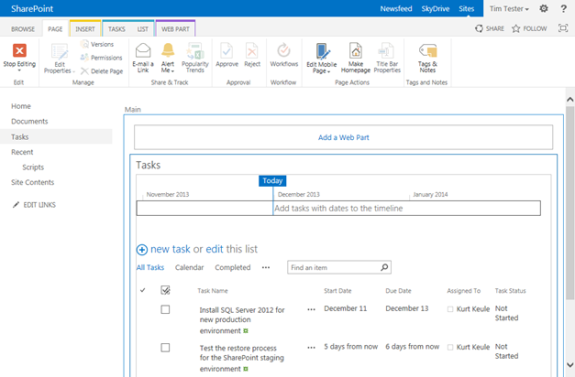
In a view, the content for one field (in this example the field “Task Name” in a task list) should be displayed with a fixed width. This is the view, as it comes without any modification:
In previous versions of SharePoint, this was done using SharePoint Designer, convert the view into an xslt view and modifying the xslt of this view.
With SharePoint 2013 this could be done with a little bit of jQuery. This step-by-step should show, how this could be done.
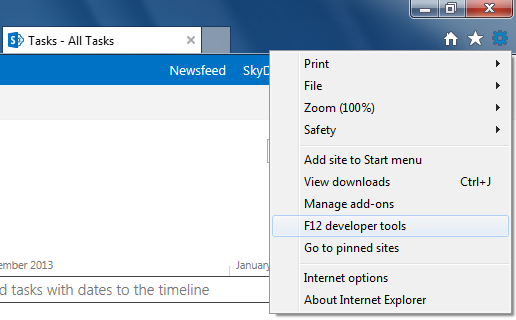
First of all, we need some information about the html- and css-code of the page, when it is displayed in the browser. This information will be available with the developer tools of Internet Explorer.
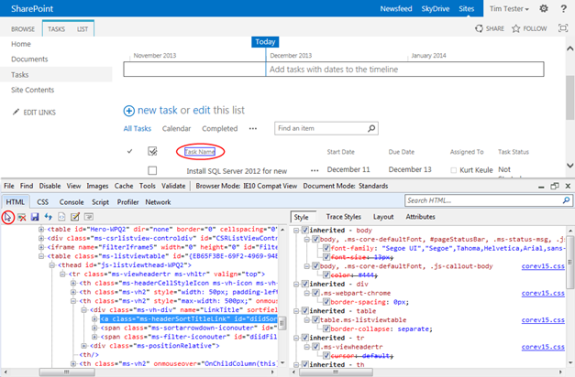
When you see the developer tools in your Internet Explorer window, first click the arrow symbol in the HTML tab of the developer tools, then click the title of the column in your view that should be changed.
From here we will get some information that is necessary to change the width of the column.
Because we need some jQuery, we need to know, what element should be changed by our jQuery code. Marked in the picture above is the html-tag for the header and the class that should be used for the header in this column. Additionally, the title of the column is marked.
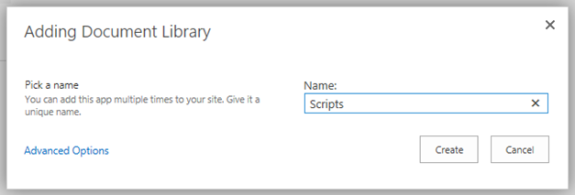
Next, we need to write some JavaScript that is necessary to inject the view with our jQuery. The file with the JavaScript code needs to be stored in a library. Therefore, we create a new library and name the library simply “Scripts”.
In this library we store a file named “TaskNameColumnWidth350.html” with this content:
1
2
3
4
5
6
7
8
9
10
11
<!--ADJUST TABLE COLUMN WIDTH-->
</script>
 
 <script type="text/javascript">
 
 $(function(){
    $("th.ms-vh2:contains('Task Name')").css("width", "350px")
});
 
 </script>
In this script we see two script tags. The first one is to add the necessary library to use jQuery, the second one is the code we use to modify the width of the column. If your environment is already prepared to use jQuery (often in branded environments, there is already a link to jQuery added in the masterpage), you can remove the first script-tag. In this case you only have this code in your file:
1
2
3
4
5
<script type="text/javascript">
$(function(){
    $("th.ms-vh2:contains('Task Name')").css("width", "350px")
});
</script>
What is done with this code in the file?
With the line with the underlines in the image above, the code searches for a th-tag with the class “ms-vh2”, where the inner text contains the string “Task Name”. The CSS for this element is changed and the width is set to 350px. Here we see the components again, we investigated with the developer tools.
Next, we need to combine the view with this script file that is stored in our Scripts library. Therefore we open the view in our browser and switch to the edit mode of the web part page.
What we need to do at this point is to “Add a Web Part”. So, we click the link on this page.
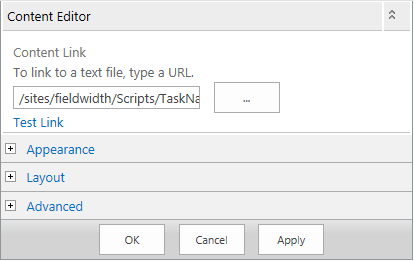
From the category “Media and Content” we select the “Content Editor” and click Add to insert the web part to the current page. Next we have to edit the properties of this web part.
In the Content Link field enter the relative path to the script file we have stored in the Scripts library.
Click OK to save the properties of the web part to the web part page. Click “Stop Editing” in the ribbon and refresh the page.