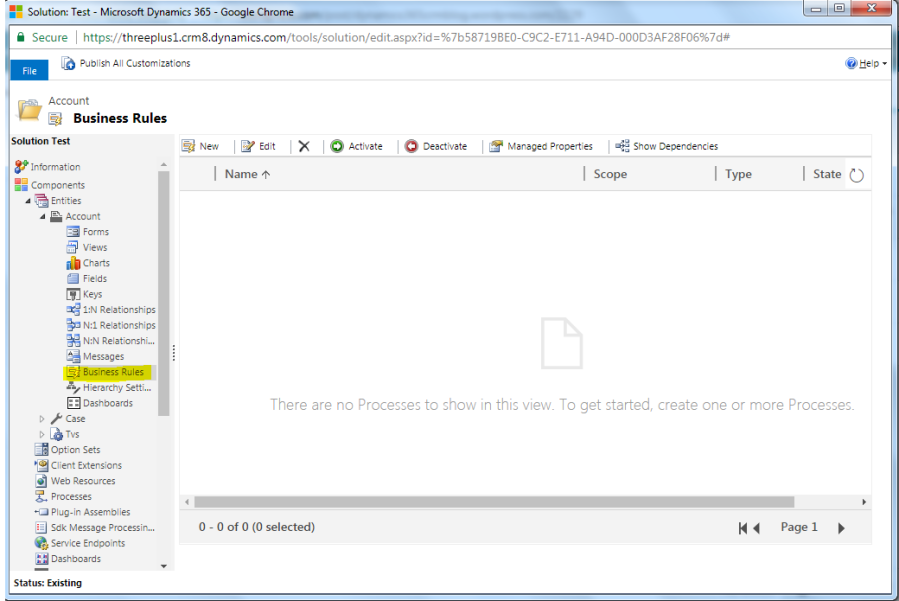
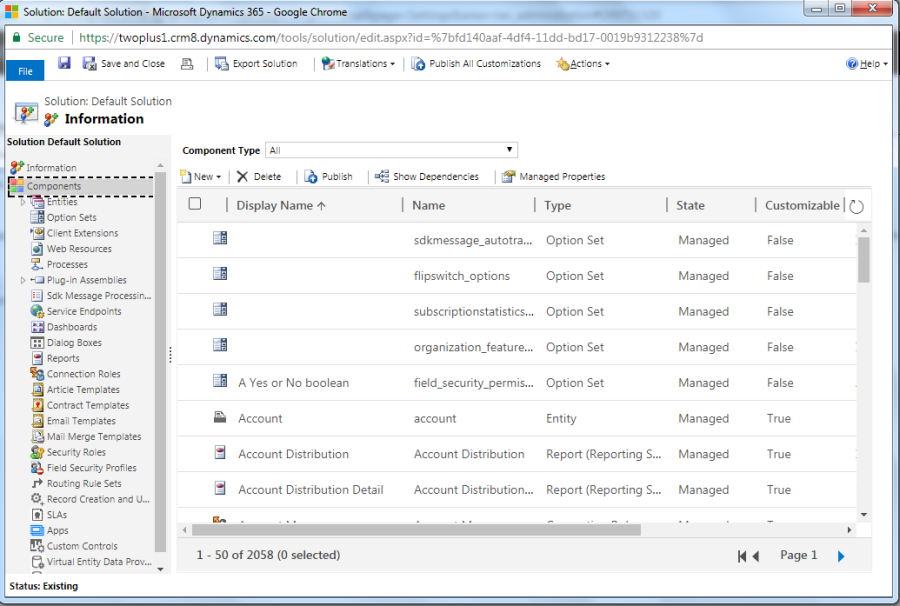
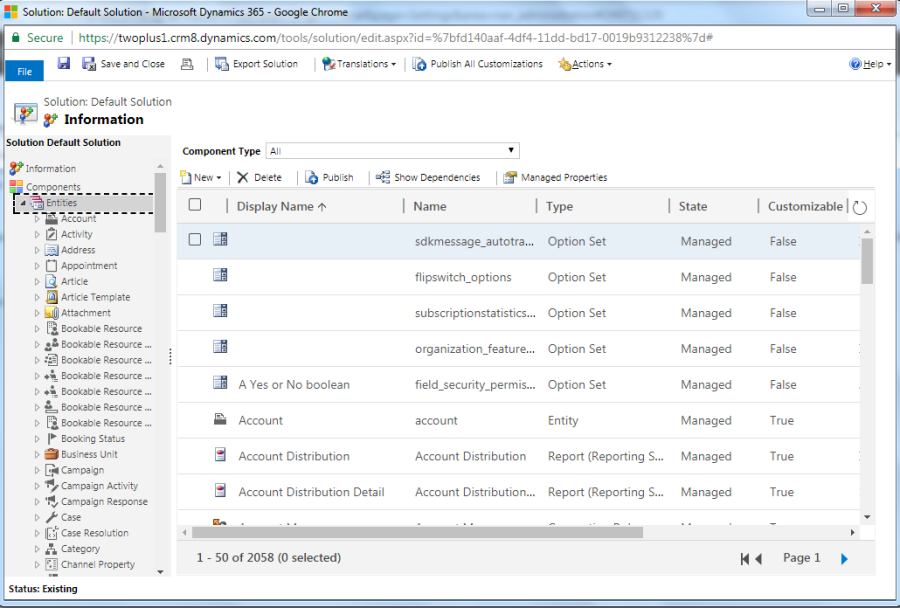
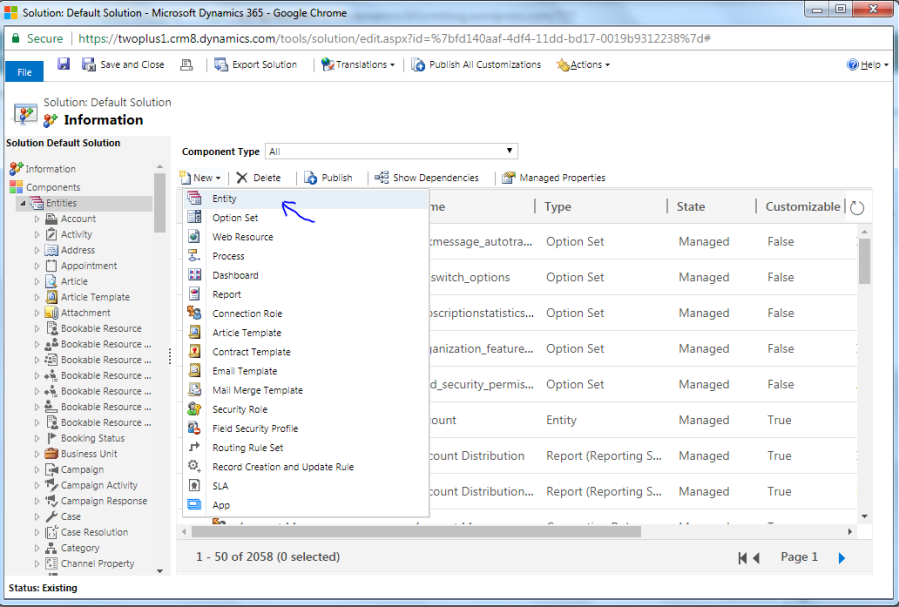
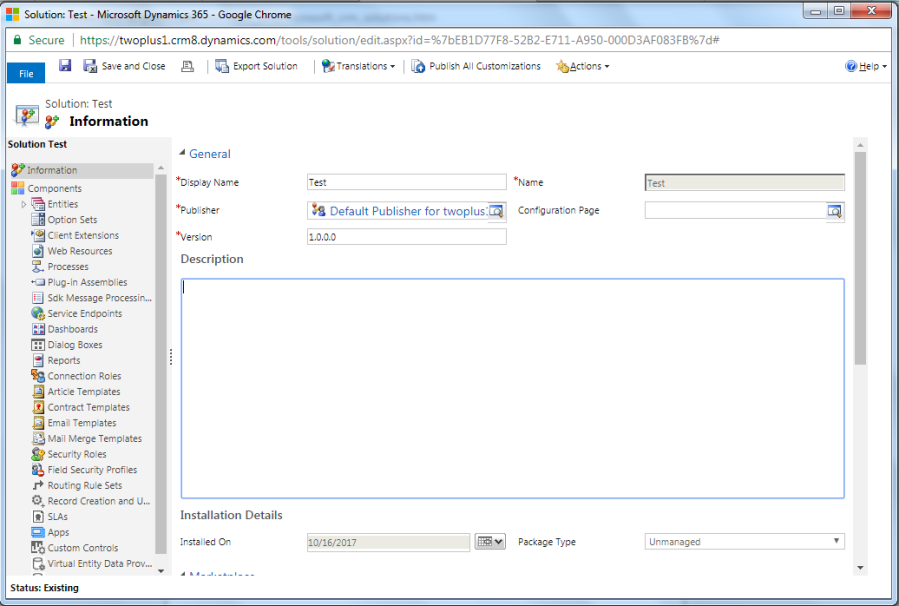
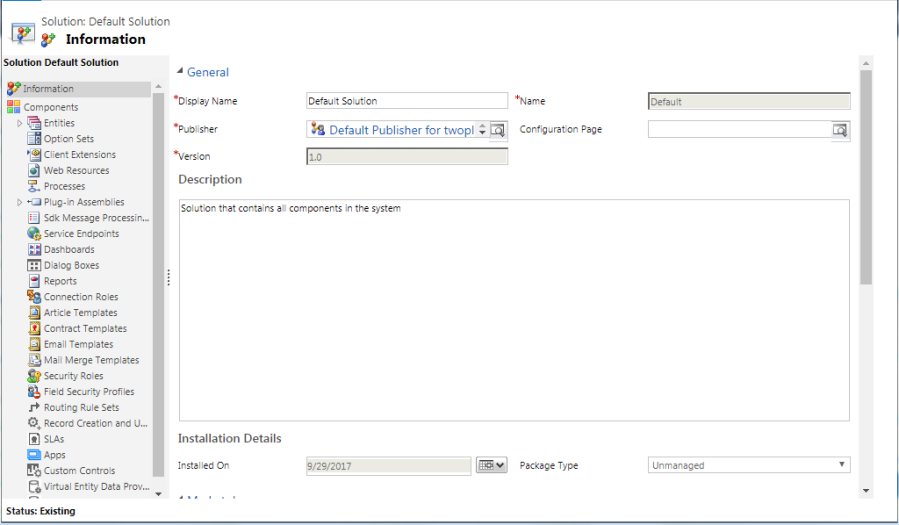
A solution can be used to package the following components customized using default, unmanaged, or managed solutions.
Entities:
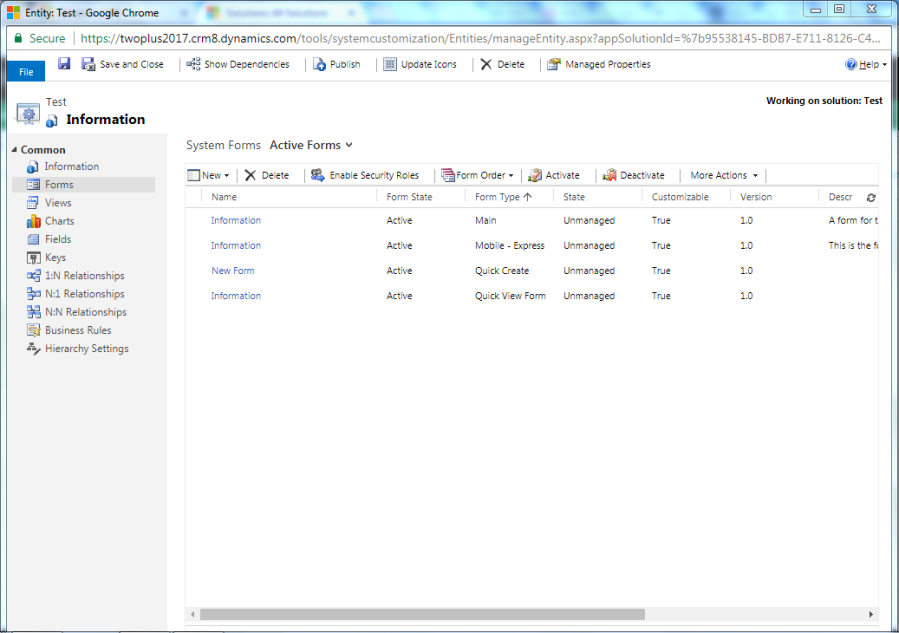
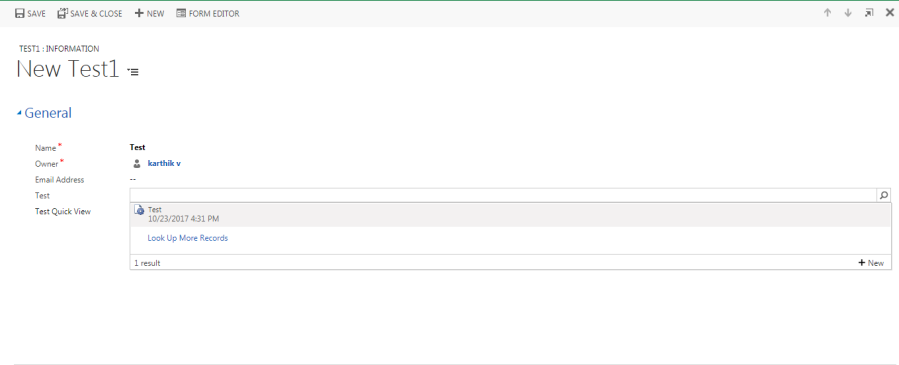
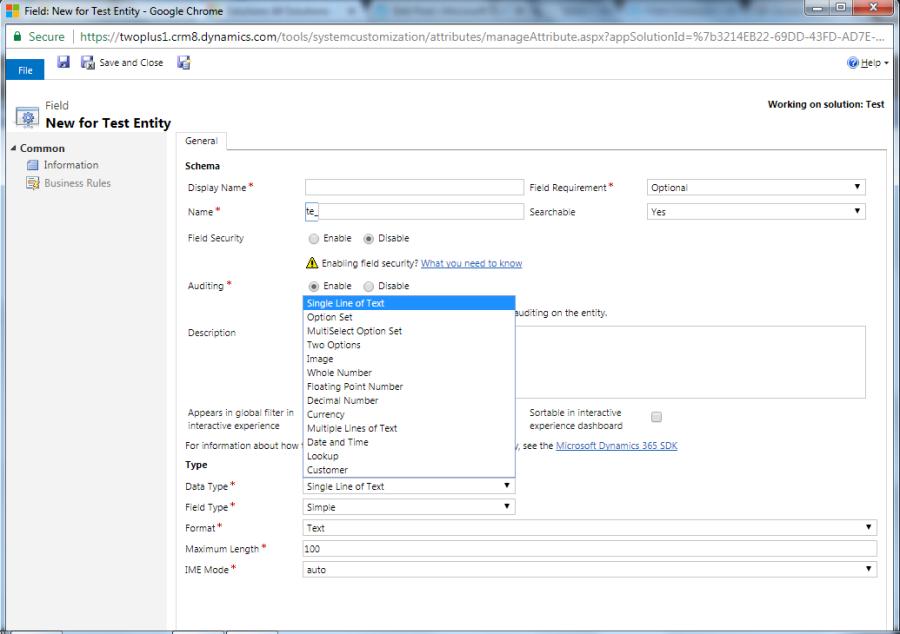
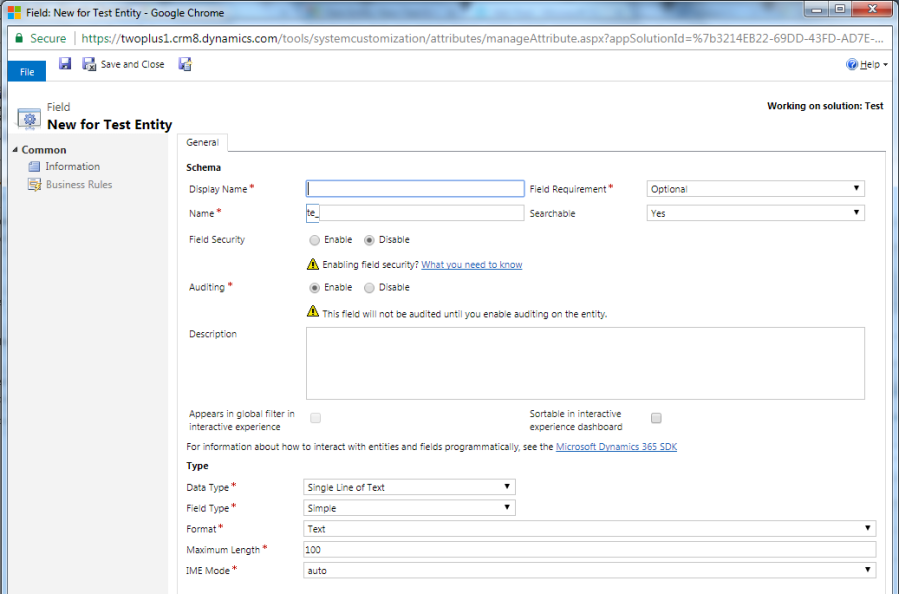
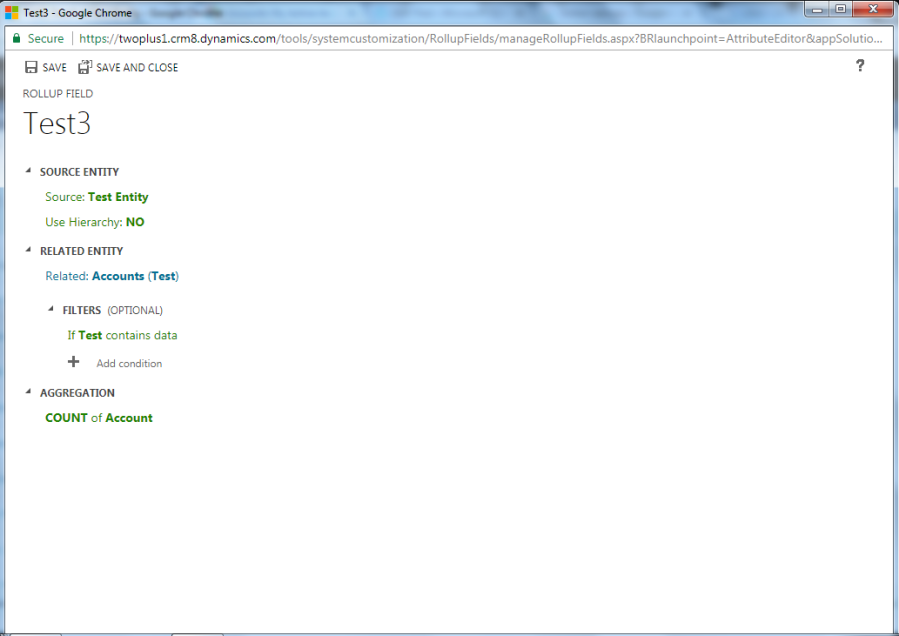
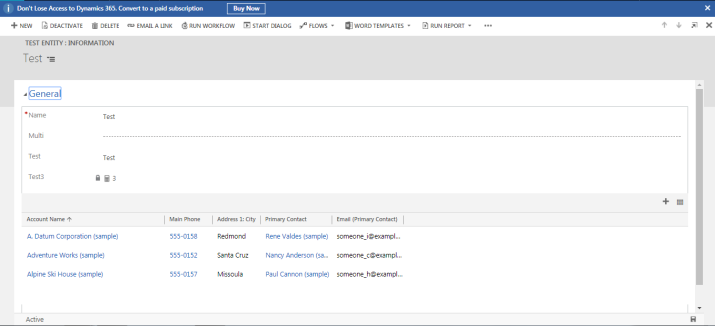
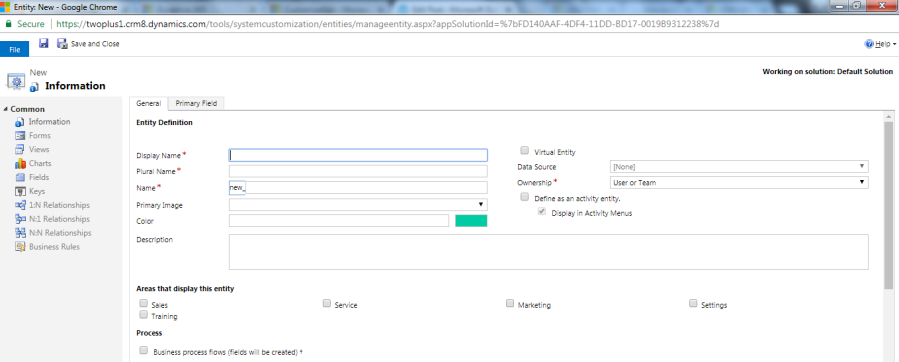
The entities are used to model and manage business data in Microsoft Dynamics 365. For example, entities such as account, campaign, and incident (case) can be used to track and support sales, marketing, and service activities. An entity has a set of attributes and each attribute represents a data item of a particular type. For example, the account entity has Name, Address, and OwnerId attributes.
Practically, an entity is like a database table, and the entity attributes correspond to the table columns. Creating an entity record (or, simply a record) in Microsoft Dynamics 365 is like adding a row in a database table.
Option Set:
An option set is a type of field that can be included in an entity. It defines a set of options. When an option set is displayed in a form it uses a drop-down list control. Option set is also called as “picklist”.
Option Set can be defined within itself(locally) or it can be defined by global option set.you use global option sets to set fields so that different fields can share the same set of options, which are maintained in one location. You can reuse global option sets. Global option sets are useful when you have a standard set of categories that can apply to more than one entity.
This contains information about changes developers and customizers can make to extend Microsoft Dynamics 365 (online & on-premises) in the clients provided for Microsoft Dynamics 365 — the web application, Microsoft Dynamics 365 for phones, and Microsoft Dynamics 365 for tablets — by using JavaScript and web resources. These clients are designed to allow you to add extensions that can be applied for all clients rather than each one separately.Client extensions can provide a very rich and responsive experience for users because the code runs on their device. However, critical business logic should not be applied only by client-side scripts.
Web Resources:
Web resources are virtual files that are stored in the Microsoft Dynamics 365 database and that you can retrieve by using a unique URL address.Web resources are typically used by developers to extend the web application using files that are used in web development. As a Microsoft Dynamics 365 user you may need to manage web resources provided by a developer or designer.
Web resources represent files that can be used to extend the Microsoft Dynamics 365 web application such as html files, JavaScript, and Silverlight applications. You can use web resources in form customizations, the SiteMap, or the application ribbon because they can be referenced by using URL syntax.web resources are stored within the Microsoft Dynamics CRM database, they can be reused throughout the system in different forms or entities and can be deployed using Solutions.Web resources can move them to different organizations by exporting them as part of a solution and importing the solution into a different organization.Web resources are limited to specific types of files. Web resources can only be files that would be loaded into a web browser.
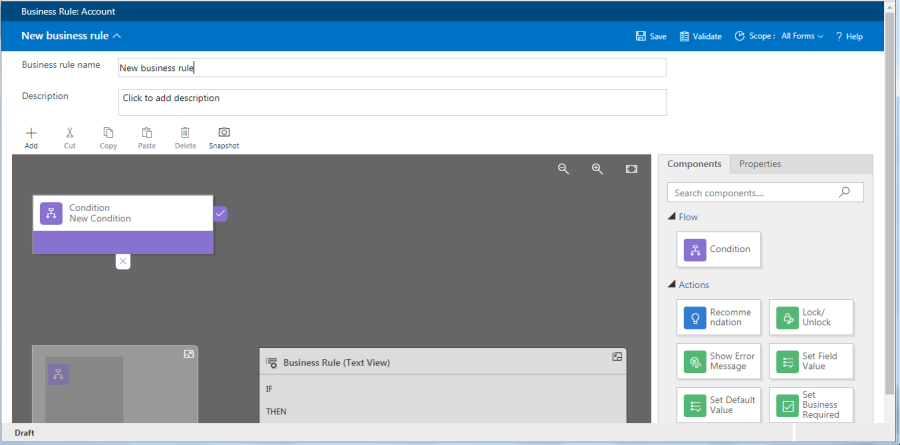
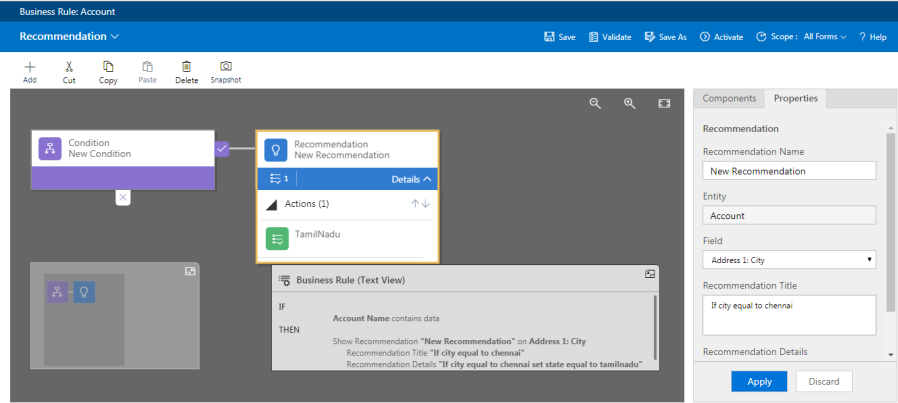
Processes:
Processes is used to automate the task and make the business process in a flow.Processes enable you to model real-life business processes.
Processes are divided into four category :
- Action
- Business Process Flow
- Dialog
- Workflow
Plug-in assemblies:
A plug-in assembly represents an assembly that contains one or more plug-in or custom workflow activity types.All users have read access to this entity. It is an unsafe practice to save logon credentials within this entity or within the assembly itself.
Sdk Message Processing Steps:
This defines how a plug-in or custom workflow activity should be registered in a stage of the event execution pipeline and under what conditions it should be executed.
Service Endpoints:
A service endpoint represents a Microsoft Azure platform endpoint. This entity stores the configuration information of a service endpoint. The schema name for this entity is ServiceEndpoint.
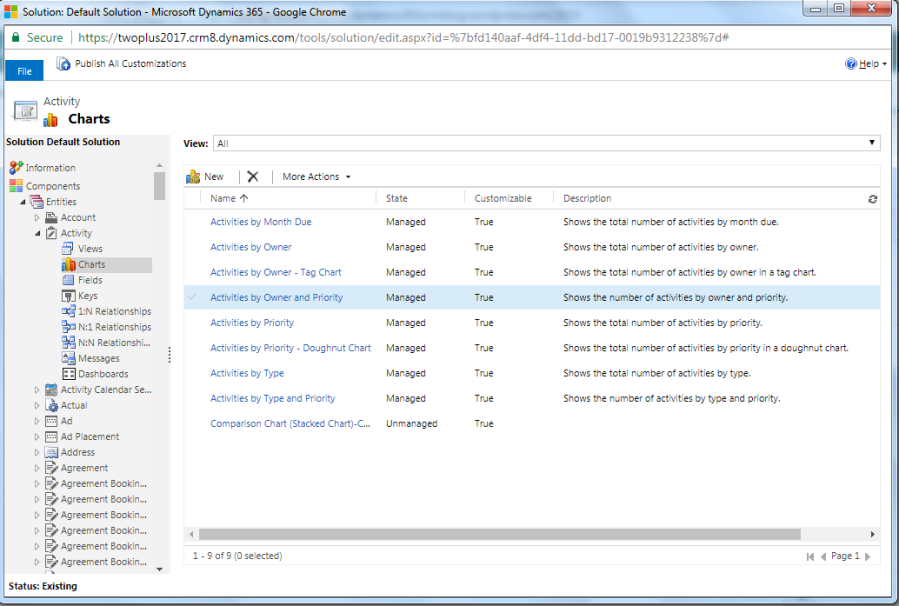
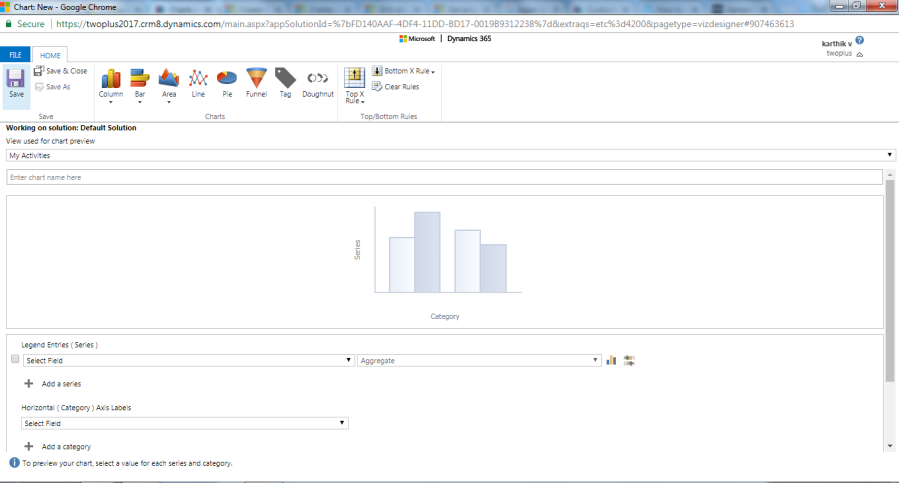
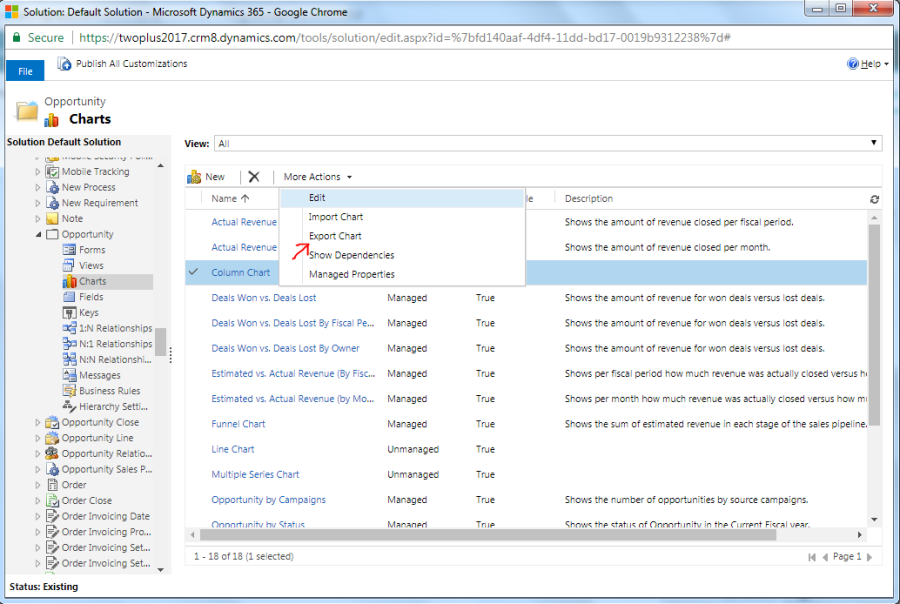
Dashboards:
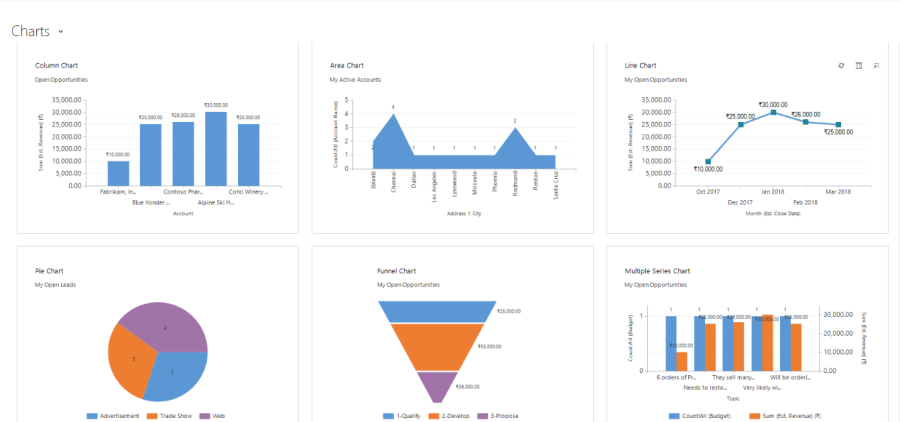
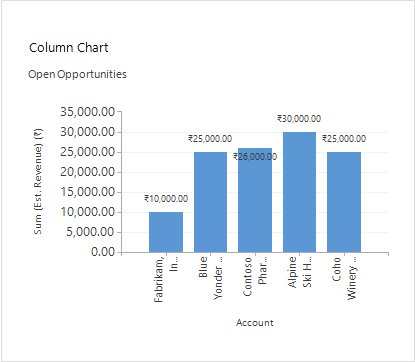
Dashboards in Microsoft Dynamics 365 provide an overview of business data ‒ actionable information that’s viewable across the organization.Dashboards are collections of view lists, charts,iFrames,web resource and Power BI that can pull in things like website information that you can modify to show key performance indicators and other important data.
There are two types of Dashboard :
User dashboards. A user dashboard can be created by any user in the user’s work area: Sales, Service, or Marketing. A user dashboard doesn’t have to be published to be visible, but it’s only visible to the person who created it, unless shared with others. A user dashboard can be set as the default dashboard, in which case it overrides the system dashboard for that user.
System dashboards. A system dashboard is created by a system administrator or customizer in the Settings area. A system dashboard must be published to be visible. After it’s published, it’s visible to everyone in the organization, unless hidden by the admin or customizer. The admin or customizer can set a particular dashboard as the default dashboard for the whole organization.
Reports:
Reports help you manage your progress towards your goals by helping you see how you’re doing.The Microsoft Dynamics CRM report wizard is a tool that helps users quickly and easily create sophisticated reports with charts, tables and drill-through capabilities.
Connection Roles:
In Microsoft Dynamics 365, you can create and view the relationships between records for many entities using Connect. Connections enable you to easily associate users, contacts, quotes, sales orders, and many other entity records with each other. When you open a record and select Connections, you can view all of the connections between it and other records.
When creating a connection, you assign it a role. There are many different roles you can use to identify your connections, such as Account Manager or Colleague. Connection roles define how records are related to you, to your organization, or to one another, such as manager to employee. There are eight types of connection roles. Your system administrator can add new connection roles.
Article Templates:
Article templates help you create new articles for your organization’s knowledge base library. You can also create templates with boilerplate text to help article writers use consistent language and messaging.The new knowledge articles in Microsoft Dynamics 365 enable you to create rich knowledge articles along with versioning and translation support. When you create and publish a knowledge article, it become available to users in your Dynamics 365 instance so that they can use information in the articles to effectively service the customers.
Articles are essentially pieces of information that can be easily distributed. They can be as simple or as complicated as the need requires them to be. They are just contains of information and are based on a very simple concept – Knowledge Transfer. Microsoft Dynamics CRM provides the user the distributive capabilities through the system itself either through views, dashboards, cases, embedded emails & enhanced search functionality.
Contract Templates:
In Microsoft Dynamics 365 (online & on-premises), a contract is an agreement to provide support during specified coverage dates or for a specified number of cases or length of time. When customers contact customer service, the level of support they receive is determined by their contract.In order to manage and keep track of the agreements that have been made with customers, Microsoft Dynamics CRM has a Contracts.
Email Templates:
Email templates contain prefilled data that you specify, so you don’t have to reenter the same information for each article this will Save time when creating multiple email messages by making email templates.An email template is attached to an email activity after the activity is created. Typically, each type of email activity has its own email template.
Mail Merge Templates:
Mail merge templates with Microsoft Office Word to create customer-ready letters, faxes, e-mail messages, and quotes.We can use Microsoft Dynamics 365 for Outlook with Microsoft Office Word to create documents for your customers that display Microsoft Dynamics 365 data.Microsoft Office Word templates are created and edited in Word, but can be uploaded to Microsoft Dynamics 365 to use with mail merge and share with other users. Only Word .xml documents can be used as templates.
Microsoft Dynamics 365 (online) the fundamental concept in role-based security is that a role contains privileges that define a set of actions that can be performed within the organization. A security role defines how different users, such as salespeople, access different types of records. To control access to data, you can modify existing security roles, create new security roles, or change which security roles are assigned to each user. Each user can have multiple security roles.They are grouped under different tabs based on their functionality. These groups include: Core Records, Marketing, Sales, Service, Business Management, Service Management, Customization and Custom Entities.
Field Security Profiles:
Field Level Security in Microsoft Dynamics CRM allows you to expand your security model beyond entities to include specific fields.You can use a field security profile to manage the permission of users and teams to read, create, or write in secured fields.
Routing Rule Sets:
Use routing rules in Microsoft Dynamics 365 to automatically route cases to the right people at the right time without any manual intervention.We can set up different queues based on different business scenarios and then define case routing rules to route cases to these queues .
Record Creation and Update Rules:
In Microsoft Dynamics 365, you can automatically create or update system or custom records from incoming Dynamics 365 activities, such as emails, social activities, or custom activities, without writing any code by using record creation and update rules. We can create multiple dynamics 365 record by setting up rule for conversion.Similarly to all other CRM components or Web resources, rules can be added to the CRM solution and can be exported and imported to other Dynamics 365 organizations.
Service Level Agreements (SLA):
Service Level Agreements offer an easy and convenient way to track the time taken by service representatives to solve support requests. It is possible to see them as timers on record forms, where they indicate remaining time until (or time passed since) or the prescribed time it takes to solve a support request.
Entities In Microsoft Dynamics CRM