
In Dynamics 365, you may need to display a dialog to a user in order to decide which piece of code to run next. We can do this using the command Xrm.Navigation.openConfirmDialog. Let’s look at how to do this from a model-driven Power App.
Go to the app and open the Console in your browser’s developer tools.
The function takes the following parameters:
Xrm.Navigation.openConfirmDialog(confirmStrings,confirmOptions).then(successCallback,errorCallback);
Let’s start with a simple example.
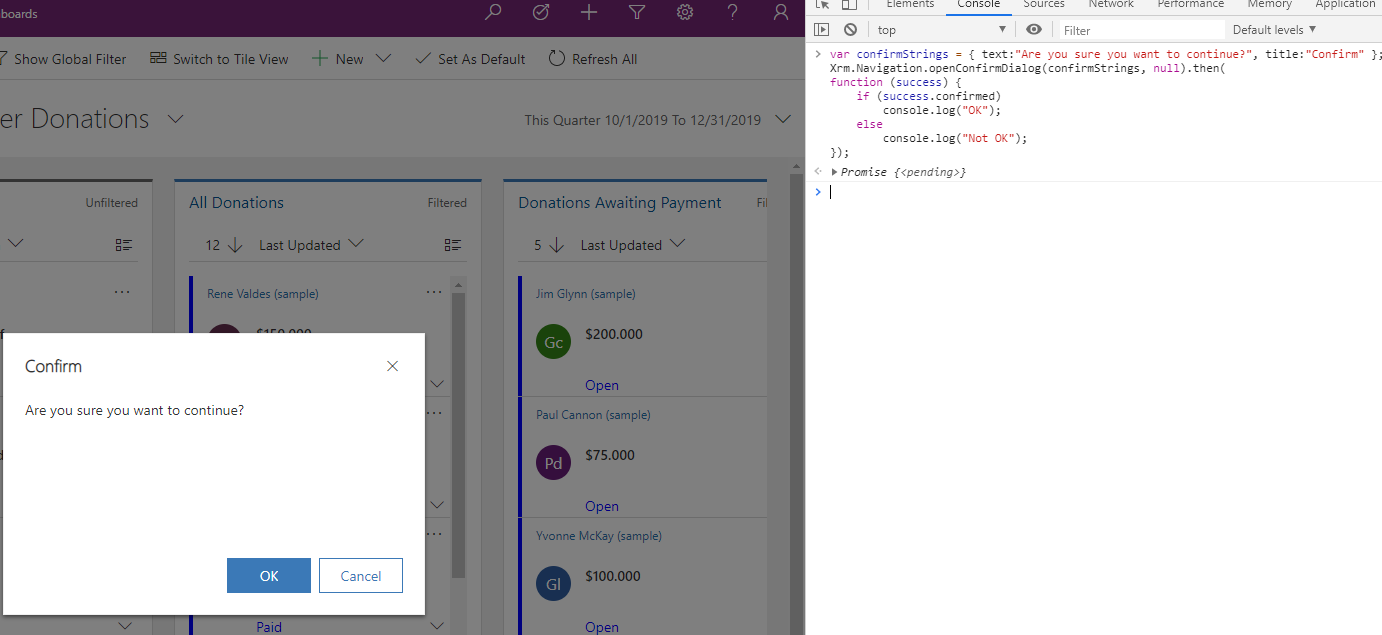
var confirmStrings = { text:"Are you sure you want to continue?", title:"Confirm" };
Xrm.Navigation.openConfirmDialog(confirmStrings, null).then(
function (success) {
    if (success.confirmed)
        console.log("OK");
    else
        console.log("Not OK");
});
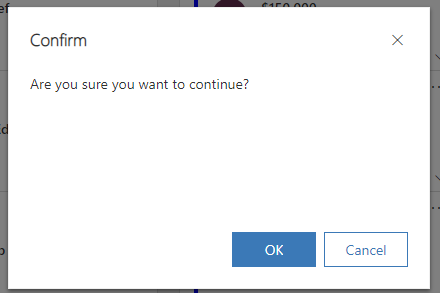
In this case, we are opening a Dialog with 2 buttons, OK and Cancel:
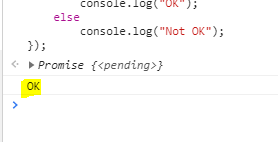
We also have a title, Confirm, and a message “Are you sure you want to continue?”. On clicking OK:
We see the code drops into the “success.confirmed”. In a real example we would write code to do something more meaningful rather than just write out to the console:
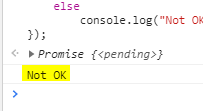
And on clicking either Cancel or the X button, we get the “else” run:
Let’s look at the other options we can provide from the Microsoft documentation:
| Name | Type | Required | Description |
|---|---|---|---|
| confirmStrings | Object | Yes | The strings to be used in the confirmation dialog. The object contains the following attributes: – cancelButtonLabel: (Optional) String. The cancel button label. If you do not specify the cancel button label, Cancel is used as the button label. – confirmButtonLabel: (Optional) String. The confirm button label. If you do not specify the confirm button label, OK is used as the button label. – subtitle: (Optional) String. The subtitle to be displayed in the confirmation dialog. – text: String. The message to be displayed in the confirmation dialog. – title: (Optional) String. The title to be displayed in the confirmation dialog. |
| confirmOptions | Object | No | The height and width options for confirmation dialog. The object contains the following attributes: – height: (Optional) Number. Height of the confirmation dialog in pixels. – width: (Optional) Number. Width of the confirmation dialog in pixels. |
| successCallback | function | No | A function to execute when the confirmation dialog is closed by clicking the confirm, cancel, or X in the top-right corner of the dialog. An object with the confirmed (Boolean) attribute is passed that indicates whether the confirm button was clicked to close the dialog. |
| errorCallback | function | No | A function to execute when the operation fails. |
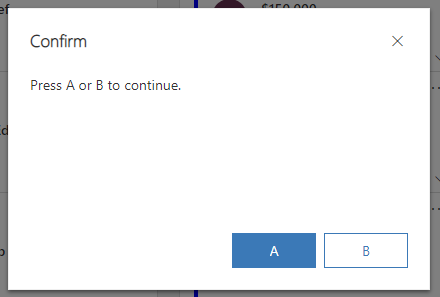
Let’s do another example, and change the Confirm and Cancel button text to A and B:
var confirmStrings = { text:"Press A or B to continue.", title:"Confirm", confirmButtonLabel:"A", cancelButtonLabel: "B" };
Xrm.Navigation.openConfirmDialog(confirmStrings, null).then(
function (success) {
    if (success.confirmed)
        console.log("A pressed");
    else
        console.log("B pressed");
});
Now we get A and B buttons, which we can program accordingly:
Let’s add a subtitle and change the size of the dialog.
var confirmStrings = { text:"Press A or B to continue.", title:"Confirm", confirmButtonLabel:"A", cancelButtonLabel: "B", subtitle: "This is a subtitle" };
var confirmOptions = { height: 500, width: 500 };
Xrm.Navigation.openConfirmDialog(confirmStrings, confirmOptions).then(
function (success) {
    if (success.confirmed)
        console.log("A pressed");
    else
        console.log("B pressed");
});
We can see the size has changed and we have a subtitle now as well:

There may be limitations around using this, but the functionality should be very useful if you need to use dialogs in Power Apps / D365.
No comments:
Post a Comment