
Business rule core function is to enable business analysts and power users to configure Microsoft Dynamics entity forms and perform actions without writing a single line of client-side code (JavaScript). Business Rules can be set up using the graphical interface, and in the back end Dynamics 365 automatically generates the client-script to perform the configured action. The automatically generated code is not available to users, so from their perspective, there are only point-and-click configurations.Business rule was introduced by Microsoft in CRM 2013. Dynamics 365 business rule UI will be different from previous version. In the UI component that can be dragged and dropped in the design area.
As we said business rule will perform the action like client side code. The action can be run only when the form loads and when field values change. They do not run when a record is saved, unless the scope for the rule is set at an entity level.
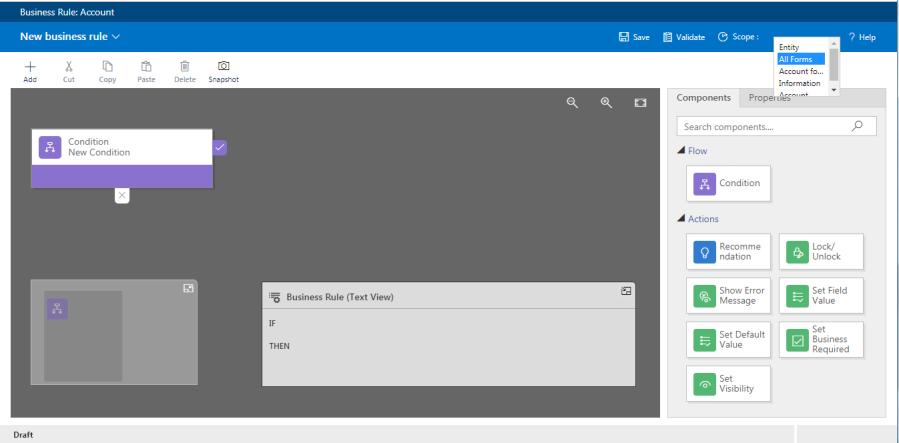
Actions Used In Business Rule:
- Show error message: This action will display an error message if the specified condition is not met. For example, if the data entered in a field does not meet certain validation criteria then Business Rules can be configured to display an error message to the user and restrict them from saving invalid data in CRM.
- Set field value: This action can be consumed to set a field’s value based on the condition. International business could use the country field value to automatically fill the country’s dialing code.
- Set business required: By choosing this action, the mandatory field can be marked as non-mandatory and vice versa.
- Set visibility: This action can hide and show fields on the entity forms. It enables the power users or customizers to change the visibility of the fields dynamically based on the specified condition.
- Lock or unlock field: This action can be consumed to lock or unlock (enable or disable) fields dynamically. Unlocked or Enabled fields are editable and Locked or Disabled fields are read-only.
- Set default value: Setting a default value should be used when you want a field to appear with a set value on load. Being able to set a default value is a standard feature for option sets. Using the Set default value feature allows you to set default values for numeric, text, and lookup fields as well. Set your condition and under actions select Set default value.
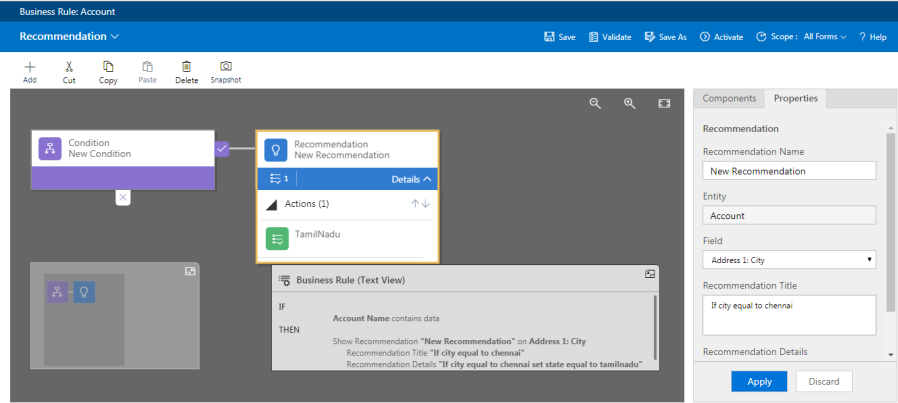
- Recommendation: This feature is added in dynamics 365 previous version will not have this feature.With this action, an icon will be added next to a field that will provide some information and show a message that the user can take action upon. During definition of the Show Recommendation action, you provide the message to display along with the action that will occur if the user clicks on “Accept” on the recommendation.Recommendation is an action added in Business rules in addition to existing actions like: set business required, clear field, set value, set visible etc.
Flow Used In Business Rule:
- Condition: This is used for checking condition to execute the action. We can create multi branching condition. Up to 10 conditional branch can be used for single business rule.
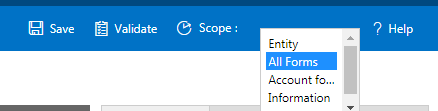
Scope Of Business Rule:
- Specific Form: Business rule will only work for selected form.
- All forms: Business rule will be applied to all the Main forms and the Quick Create form, as long as the form includes all the fields referenced by the rule.
- Entity:Business rule will work in all form and server side. Server side means while importing the data business rule will work.
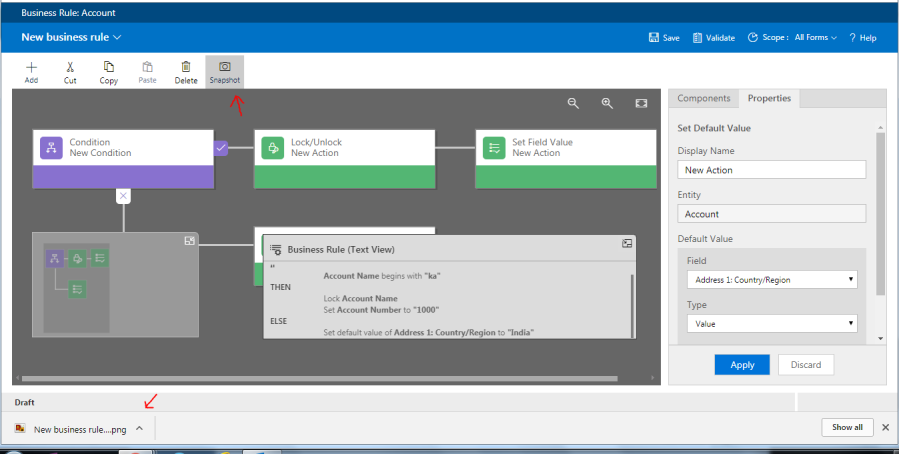
Minimap: Minimap can be used to navigate to the components of the business rule.It will show miniature model of the business rule.
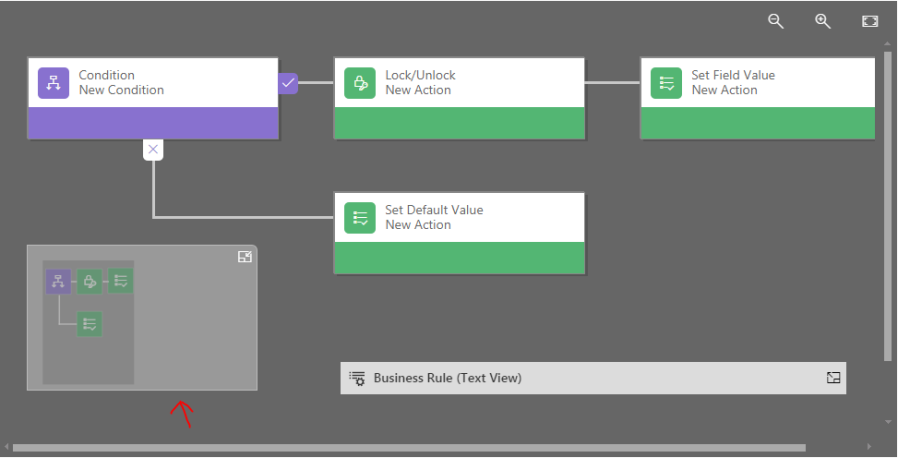
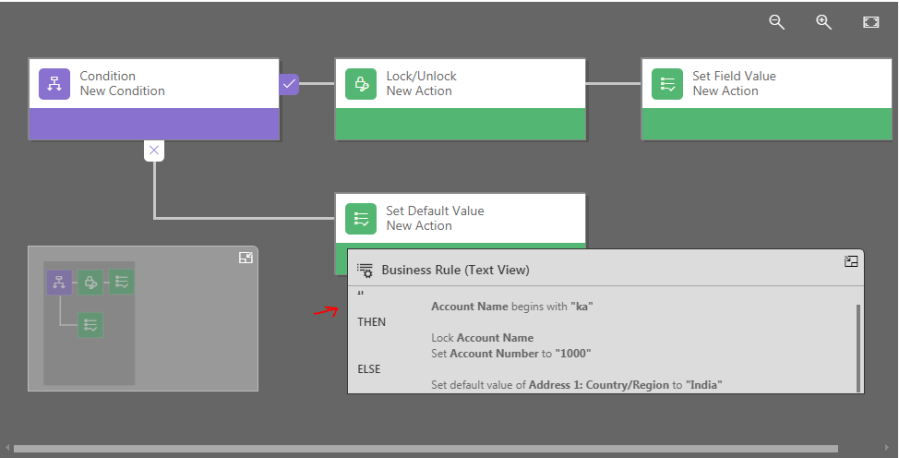
Business Rule (Text View): This will automatically build the code for the business rule based on the steps added. Text view is a quick and easy way to read through your business rule.
Snapshot: Snapshot is a great way to quickly take a picture of your Business Rule to review.Once the snapshot is clicked our business rule will be downloaded as image file with png format.\ to our lock system.
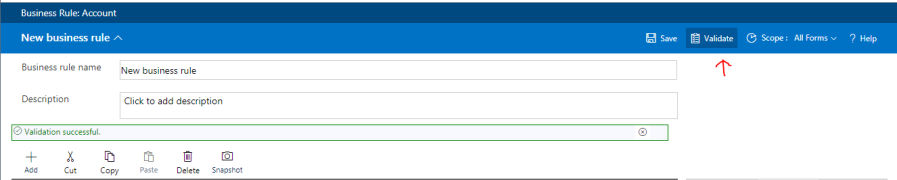
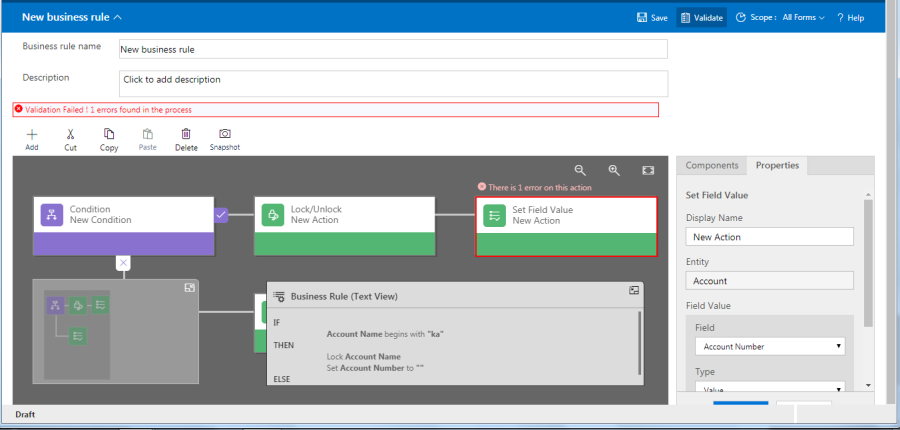
Validate:Validate feature will help you validate your business rule against any errors prior to activating the Business Rule and show where the error is occurred.If the business rule is success then success message will be displayed.
How To Create Business Rule:
To create user should have System Administrator or System Customizer security role or equivalent permissions.
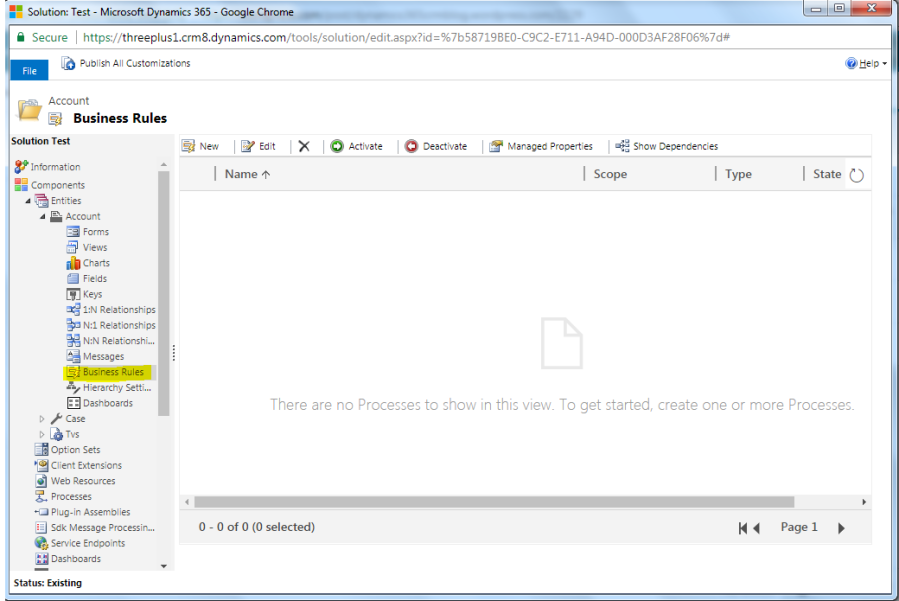
- Go to Settings>Customizations.
- Click Customize the System.
- Open the entity you want to create the business rule for (for example, open the Account entity), and then double-click Business Rules.
- Click NEW,this will take us to new business rule design window.By default one condition will be appear in the screen. business rule will not get created without even single condition. Based on the condition one or more action will be executed.
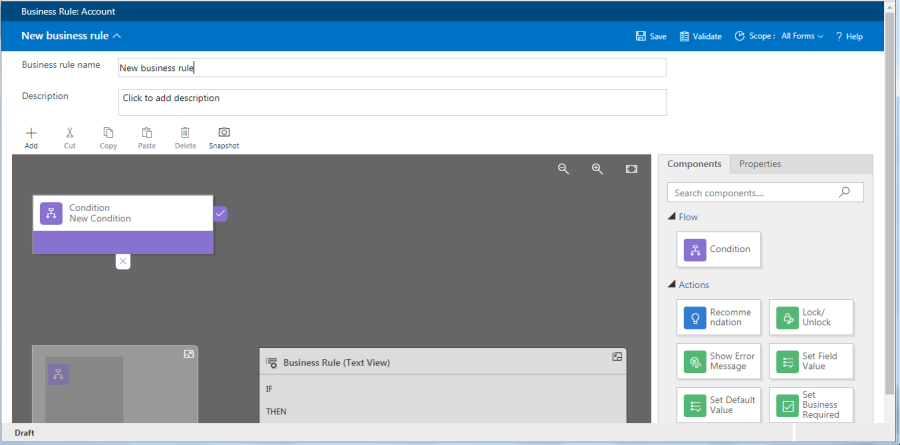
- Add name in the business rule name column.
- Add description about the business rule in description column.
- We can add more than on condition.
- Drag the Condition component from the Components tab to a plus sign in the designer.
- To set properties for condition by clicking the condition components in designer window properties tab will be visible on right side of the window and we can set conditions.
- We can add additional clause to the condition,click New in the Properties tab to create a new rule, and then set the properties for that rule. In the Rule Logic field, you can specify whether to add the new rule as an AND or an OR.


- Once the properties is set,user has to click apply button or else the properties wont set.
- Adding Actions,
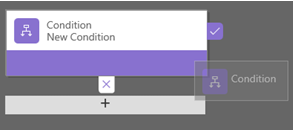
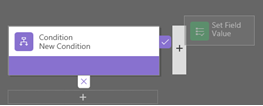
- Drag one of the action click components from the Components tab to a plus sign next to Condition component. Place the action next to the plus mark if the condition is true.If condition is false place the action next to the ‘X’ mark.
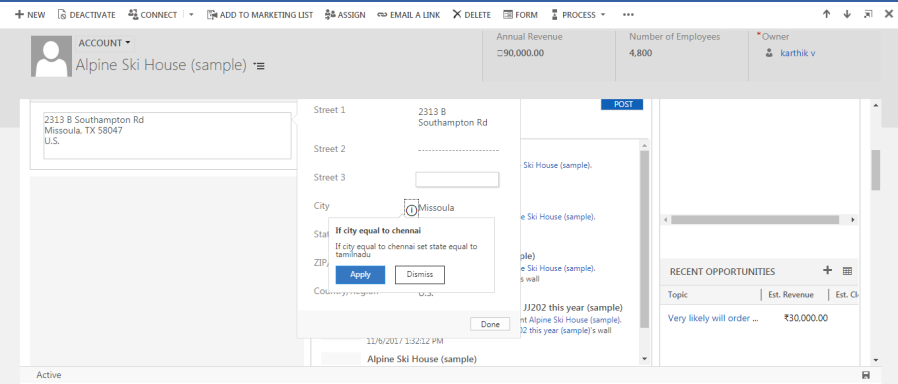
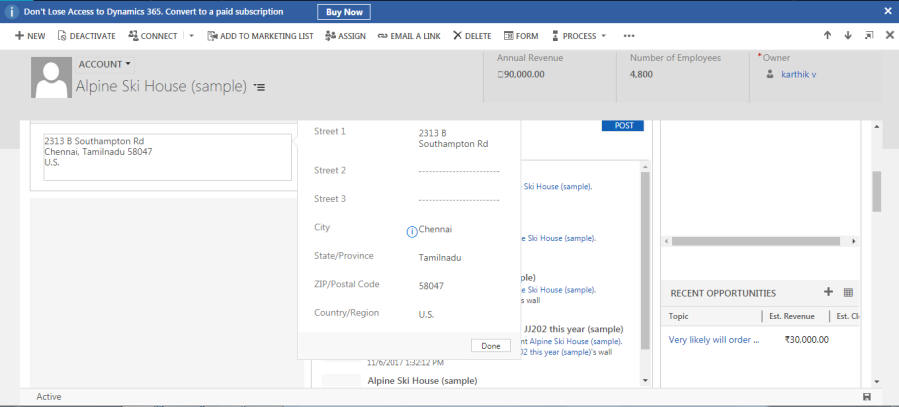
- Am Adding recommendation:
- In this example if account name contains data and if city equal to chennai set state equal to tamilnadu. This will show message “if city is equal to chennai” if user think it match then click apply state field value automatically get filled.
This feature is available only in dynamics 365.
- To validate the business rule, click Validate on the action bar.
- To save the business rule, click Save on the action bar.
- To activate the business rule, click the activate button.
Limitation:
- Business rules work only with fields. If you need to interact with other visible elements, such as tabs and sections, within the form you need use form scripts.
- When you set a field value by using a business rule, any OnChange event handlers for that field will not run. This is to reduce the potential for a circular reference, which could lead to an infinite loop.
- If a business rule references a field that is not present on a form, the rule will simply not run. There will be no error message.
- Whole Number fields that use the formats for TimeZone, Duration, or Language will not appear in the rule editor for the conditions or actions, so they cannot be used with business rules.
- You can’t add more than ten if-else conditions in a business rule.
- For Microsoft Dynamics 365 for tablets, the definition of the business rules are downloaded and cached when Dynamics 365 for tablets opens. Changes made to business rules are not applied until Dynamics 365 for tablets is closed and re-opened.
- When you set the value of a lookup field, the text of the primary field value that is set in the form will always match the text that is visible in the rule definition. If the text representing the primary field value of the record you are setting in the lookup changes, the value set by your rule will continue to use the text portion of the primary field value defined by the rule. To fix this, update the rule definition to use the current primary name field value.
No comments:
Post a Comment