
We should use Business Process Flows, if we want Users to follow same set of activities while executing a sales or service process (or may be a defined type of sales or service) while interacting with clients.
What’s new??
- Designer
- Trigger a workflow
Designer
Major UI Changes in the Business process flow designer. Much simpler, visio like experience and that’s why its lot easier for non-technical people to design and understand.

Finally, drag and drop is here in the process designer. It’s as quick as a MS Visio diagram; once you understand it J
You can drag & drop conditions, stages, steps and workflows
Take note of the points mentioned in the below URL, while designing:
https://technet.microsoft.com/en-us/library/dn887193.aspx?f=255&MSPPError=-2147217396#Points
You can connect a condition to a stage
You can take a screenshot by clicking on ‘snapshot’
You can cut, copy and paste; the steps, stages and conditions. how cool is that? J
A workflow can be triggered on entry or exit of any stage. The workflow must be on the entity, for which this stage is created.
Enough of blabbering, now let’s see how we can create a Business process flow, with all the above mentioned charms.
Scenario: We will create a flow for Sales Team; working on both Implementation and Support Projects. I am going to include 4 unique entities in my flow (max. limit is 5)
- 2 Stages on Lead
- 1 on Opportunity
- 1 on Quote
- 1 on Order
Go to settings>>Processes>>New

As you can see, it can also be run as a ‘Task flow’ for mobile clients. For more info, check this https://rajeevpentyala.com/2016/04/16/task-flow-crm-2016/
As soon as you hit ‘OK’, following screen will pop up:

On your right, you have drag & drop options:
As you can see in the screenshot below, there are four components-

Let’s start with adding stages, drag stage to the designer
Give it a name and click apply

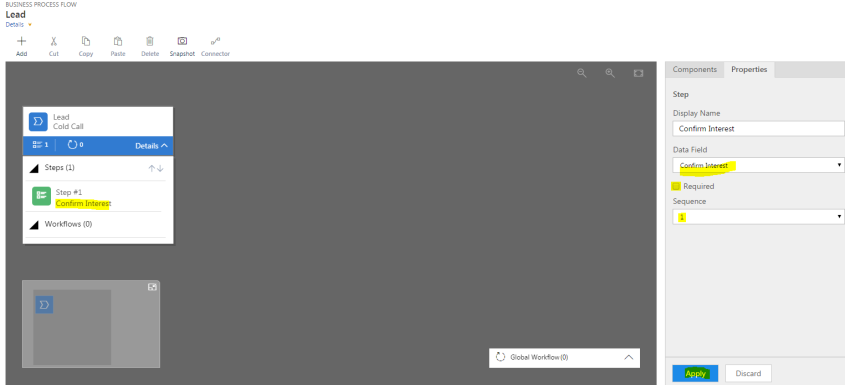
Add steps to this stage, by clicking either on ‘details’ or ‘+Add’ button


On your right, you will see filed options to select from (make them required on your wish)
you can also define the sequence, from the Properties panel on the right
Add the second stage of Lead, I have custom field on Lead, ‘Project type’ having options; Implementation and support

It is mandatory to have your condition field on the stage from where you want conditions to evolve.
So now, I am going to add conditions (You can add Yes/No conditions as well); these are very similar to ‘Branch’ which we used to have in the previous versions of CRM
If ‘Project Type’ equals Implementation

If ‘Project Type’ equals Support

What I want to achieve here is, If ‘Project type’ is implementation, next stage must be DEMO otherwise, it should be TAILOR SUPPORT PLAN

Adding another stage now and merging the two opportunity stages to the next one

Click on stage ‘Test Support Plan’ and then click on connector

Click on ‘connect’ to see first and second point of this condition

Now click on 2nd point, to establish a branch

Adding the last stage ‘Place Order’, my process flow looks like:
Workflows can be added at any stage entry or exit. Keep in mind that the workflow must be related to the stage entity and an on-demand workflow:

No comments:
Post a Comment