
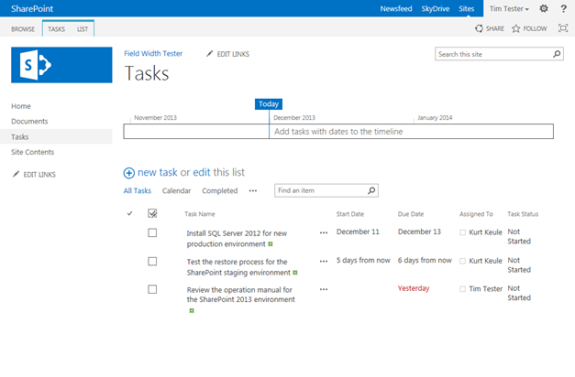
In a view, the content for one field (in this example the field “Task Name” in a task list) should be displayed with a fixed width. This is the view, as it comes without any modification:
In previous versions of SharePoint, this was done using SharePoint Designer, convert the view into an xslt view and modifying the xslt of this view.
With SharePoint 2013 this could be done with a little bit of jQuery. This step-by-step should show, how this could be done.
First of all, we need some information about the html- and css-code of the page, when it is displayed in the browser. This information will be available with the developer tools of Internet Explorer.
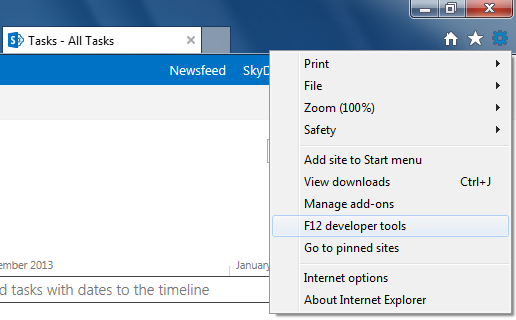
When you see the developer tools in your Internet Explorer window, first click the arrow symbol in the HTML tab of the developer tools, then click the title of the column in your view that should be changed.
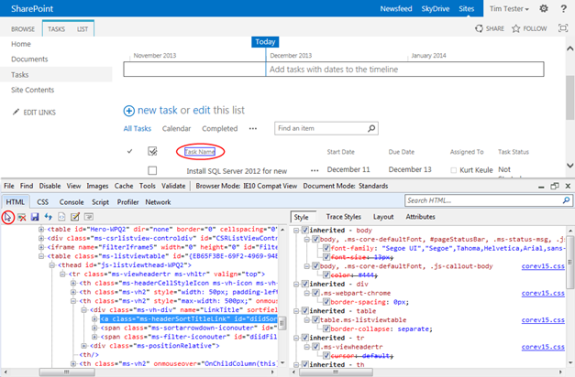
From here we will get some information that is necessary to change the width of the column.
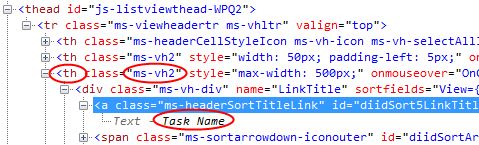
Because we need some jQuery, we need to know, what element should be changed by our jQuery code. Marked in the picture above is the html-tag for the header and the class that should be used for the header in this column. Additionally, the title of the column is marked.
Next, we need to write some JavaScript that is necessary to inject the view with our jQuery. The file with the JavaScript code needs to be stored in a library. Therefore, we create a new library and name the library simply “Scripts”.
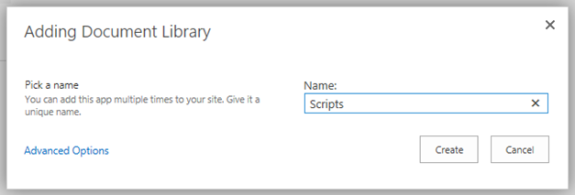
In this library we store a file named “TaskNameColumnWidth350.html” with this content:
1
2
3
4
5
6
7
8
9
10
11
| <!--ADJUST TABLE COLUMN WIDTH--><script src="http://ajax.googleapis.com/ajax/libs/jquery/1.2.6/jquery.min.js" type="text/javascript"></script> <script type="text/javascript"> $(function(){ $("th.ms-vh2:contains('Task Name')").css("width", "350px")}); </script> |
In this script we see two script tags. The first one is to add the necessary library to use jQuery, the second one is the code we use to modify the width of the column. If your environment is already prepared to use jQuery (often in branded environments, there is already a link to jQuery added in the masterpage), you can remove the first script-tag. In this case you only have this code in your file:
1
2
3
4
5
| <script type="text/javascript">$(function(){ $("th.ms-vh2:contains('Task Name')").css("width", "350px")});</script> |
What is done with this code in the file?

With the line with the underlines in the image above, the code searches for a th-tag with the class “ms-vh2”, where the inner text contains the string “Task Name”. The CSS for this element is changed and the width is set to 350px. Here we see the components again, we investigated with the developer tools.
Next, we need to combine the view with this script file that is stored in our Scripts library. Therefore we open the view in our browser and switch to the edit mode of the web part page.
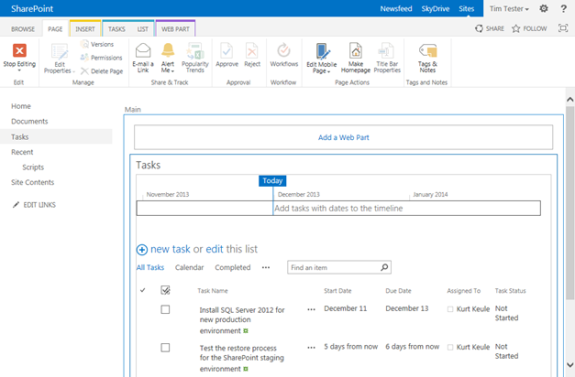
What we need to do at this point is to “Add a Web Part”. So, we click the link on this page.
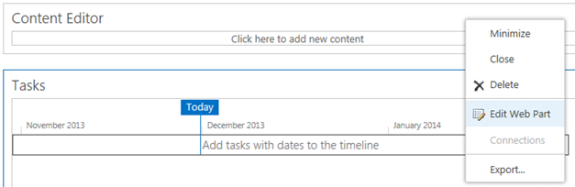
From the category “Media and Content” we select the “Content Editor” and click Add to insert the web part to the current page. Next we have to edit the properties of this web part.
In the Content Link field enter the relative path to the script file we have stored in the Scripts library.
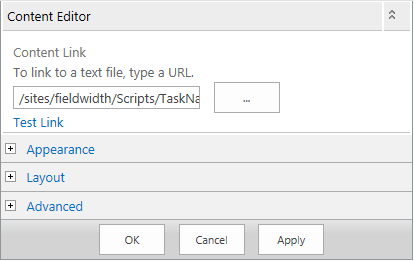
Click OK to save the properties of the web part to the web part page. Click “Stop Editing” in the ribbon and refresh the page.
No comments:
Post a Comment