
DevOps is very vast, we can perform n number of automation but today i will be focusing on import and export Dynamics 365 solution using Azure DevOps CI/CD Pipeline.This blog article is going to be bit longer because we have a lots of step, so guys bear with me and read it thoroughly you will get answer of your questions. We have lots of trigger where we can call our build and release, for your reference https://docs.microsoft.com/en-us/azure/devops/pipelines/build/triggers?view=azure-devops. Also you can call your Pipeline events from Power Automate. I would not go deep into it.
Prerequisite:
1.Azure Pipeline subscription.
2.Dynamics 365 Customer Engagement Online.
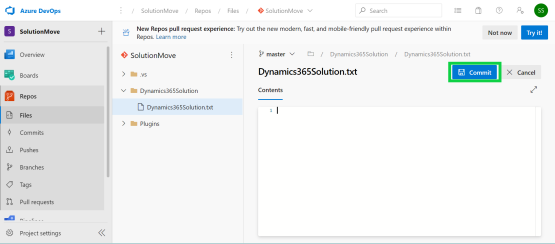
Create a folder inside your repository where you can keep solution after the solution is exported.

Give a proper name , I am using “Dynamics365Solution”. You can not create empty folder so i just created an text file with the same name.

Once file is created click on commit changes for saving the file in DevOps repository.
Once the folder added we are going create Variable groups for storing connection string(which will be used while make connection do Dynamics 365 CE Online for export and import of the solution).It is a good practice for storing connection string inside the Variable group. Go to Library then click on +Variable group.
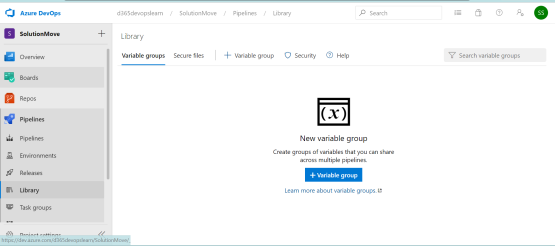
Now give variable group a name. I will assume you got a Dev and a UAT environment. The package from the build automation blog will be deployed to these environments.So, we will create two connection string for the Dev and UAT environments.
1.Connection String-AuthType=$(AuthType);Username=$(Username);Password=$(Password);Url=$(Url)
- URL- Enter your instance URL.
- Username – Enter the username of your instance
- Password – Enter the password of your instance
- Authtype – Office365
Below is the sample connection string details for your reference

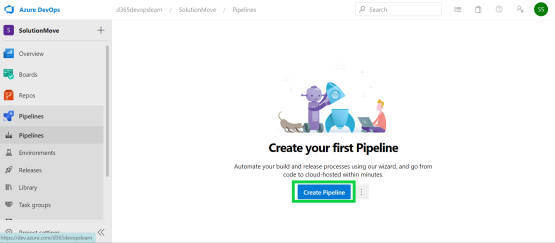
After that we need to create a build pipeline. Navigate to Pipeline->Create Pipeline.
We are using Azure Repos Git as a source , after that choose your Team project and repository where you want to perform your pipeline operation. Specify your branch for your build , using master for the demonstration.

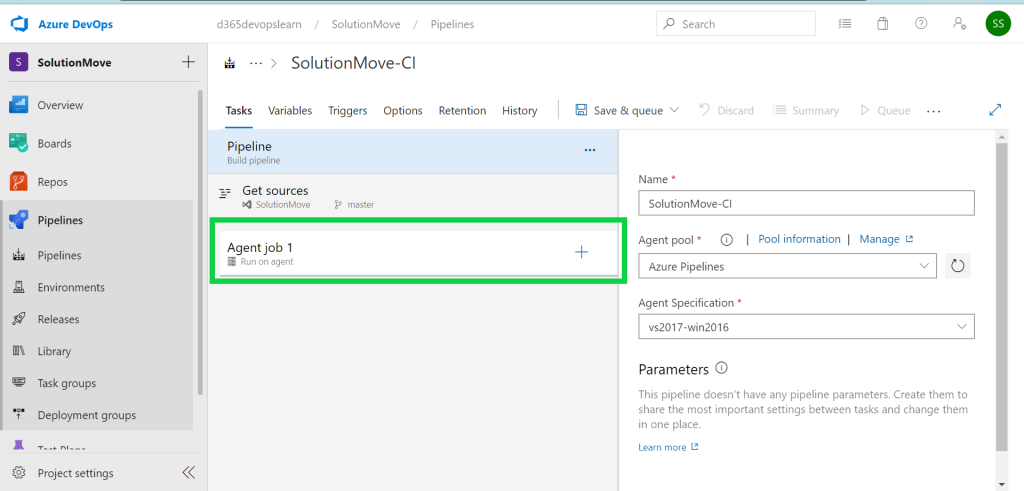
After that choose your template, but currently we do not have template for Dynamics 365 so we are going to use Empty job.

Microsoft provided job Agents which give you more control to install dependent software needed for your builds and deployment. For exporting solution we need to add three task.
First, search for the Power DevOps Tool Installer(it will copy all the tools to agent, optimize the process) by Wael Hamze.

Second, we are going to add Export Solution in similar way we added installer. Once it is added we need to specify three parameter. We already created in variable groups so lets utilize those connection string.

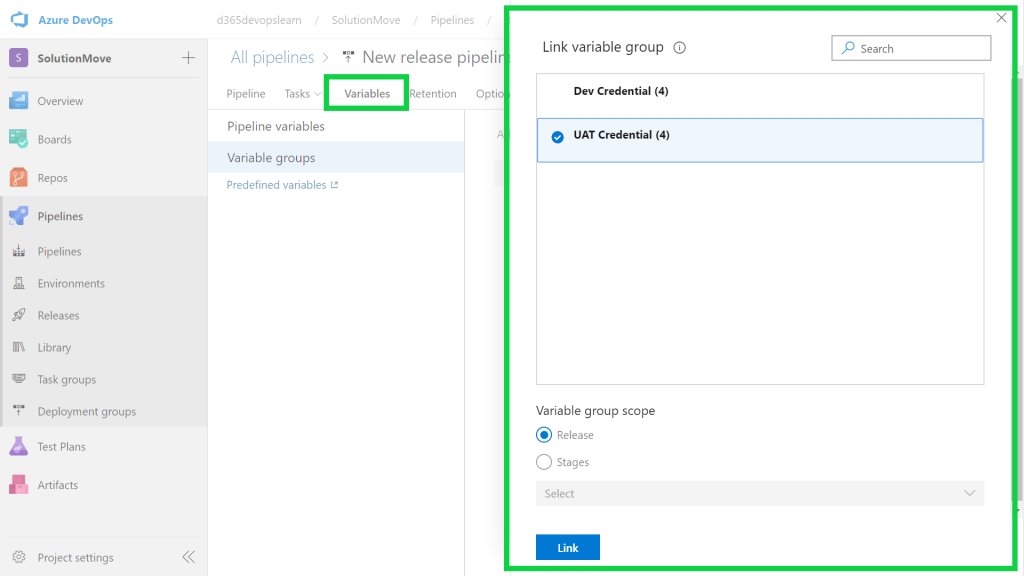
We need to link Variable group within pipeline, navigate to Variables click on link Variable group.

Choose your variable group, we are using “Dev Credential” here. Click on link. Because first we are going to export solution from our Dev environment.

Now First pass the Connection string. Second, the Name of your solution which you want to export, My solution Name is “DevopsExport”. Third you need to specify the output path.Click on … for browse and select the path which we created a folder inside the repository on start of our blog which was “Dynamics365Solution” .

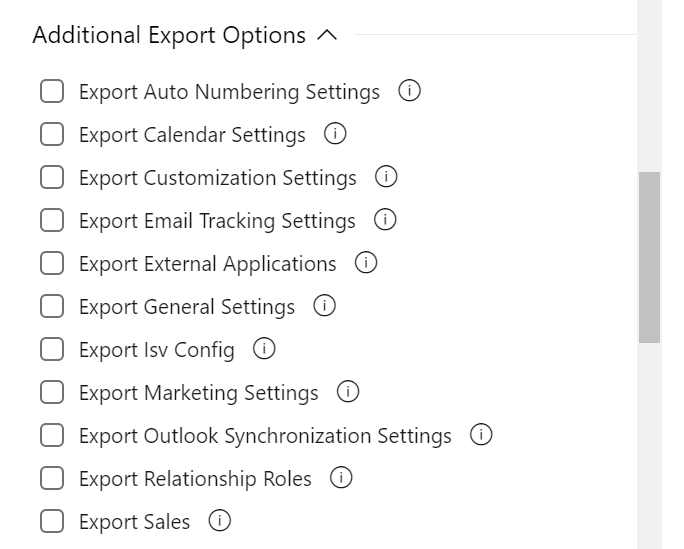
You have lots of option in Additional setting of the Export Solution. Which you can add based on your requirement.
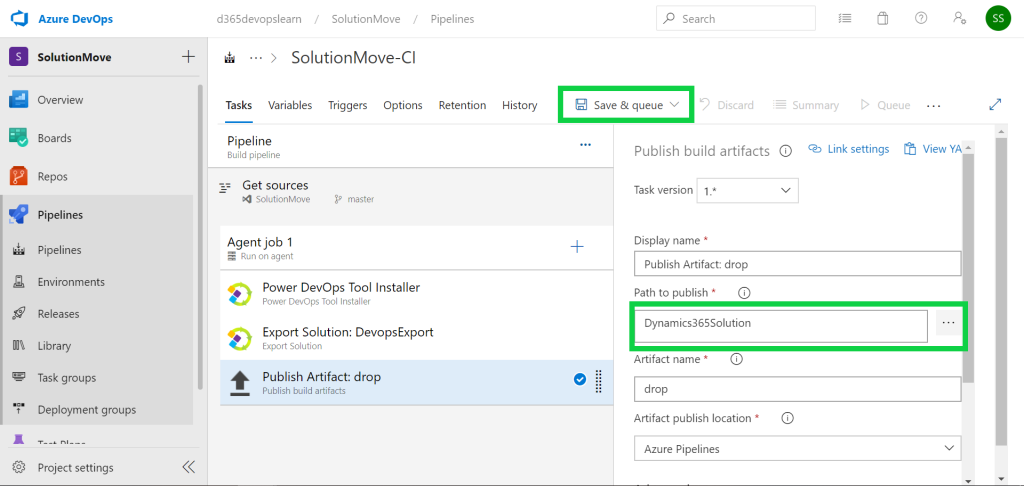
Once we exported the solution we need to publish it as an artifact. Add third task “Publish Artifact”. You can give a name to Artifact and need to specify the path same as your exported folder. After that click on Save & Queue.
it will open a window where you can give comments and other settings, Click on Save and Run.

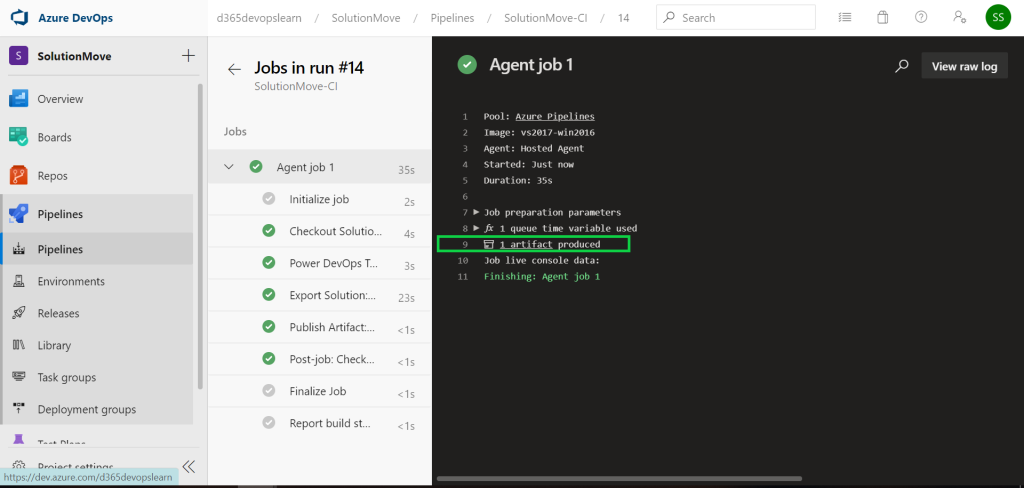
It will take some seconds or minute to export and publish artifact based on your solution size.As you can see in below image Agent job run successfully and it produced 1 artifact. you can click on that link and navigate to the exported solution.
Now we need create a release pipeline for importing the solution in UAT environment. Navigate to the Release click on New pipeline.

Click on Empty job template.

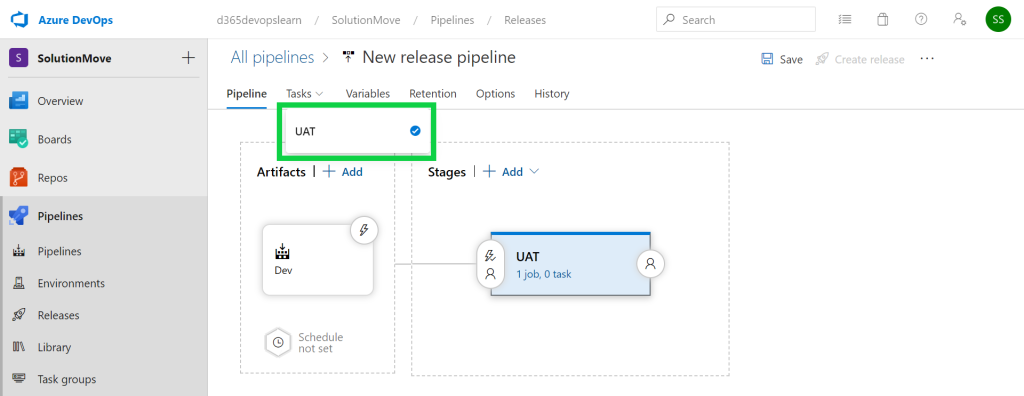
Here we can add multiple stages. But i am using only one stage for this demonstration which is UAT. After giving stage name close it from X on right corner.

Now we need to add Artifact which we produced in the last build pipeline. Choose Project, Source(from Build Pipeline which is SolutionMove-CI), Build Version(using the latest, you can have multiple build, but here you need to select which build you want use for the release),Source Alias(by default it will take based on source, renamed it as Dev)


Again link your UAT credential with your pipeline using Variable group.
After linking,Now we need to add Task(select your stage where you want to add task if you have multiple stages it will show you when you will click on Task button), so i have on one stage which is UAT so just click on it.
Add “Power DevOps Tool Installer” and “Import Solution“. Specify the connection string and solution file location(browse to artifact folder where the solution is exported and select the solution Zip File). Below you can see other operation which you can perform when import will take place. Just click on save. After that Create release button will not be read only.you can click on it.

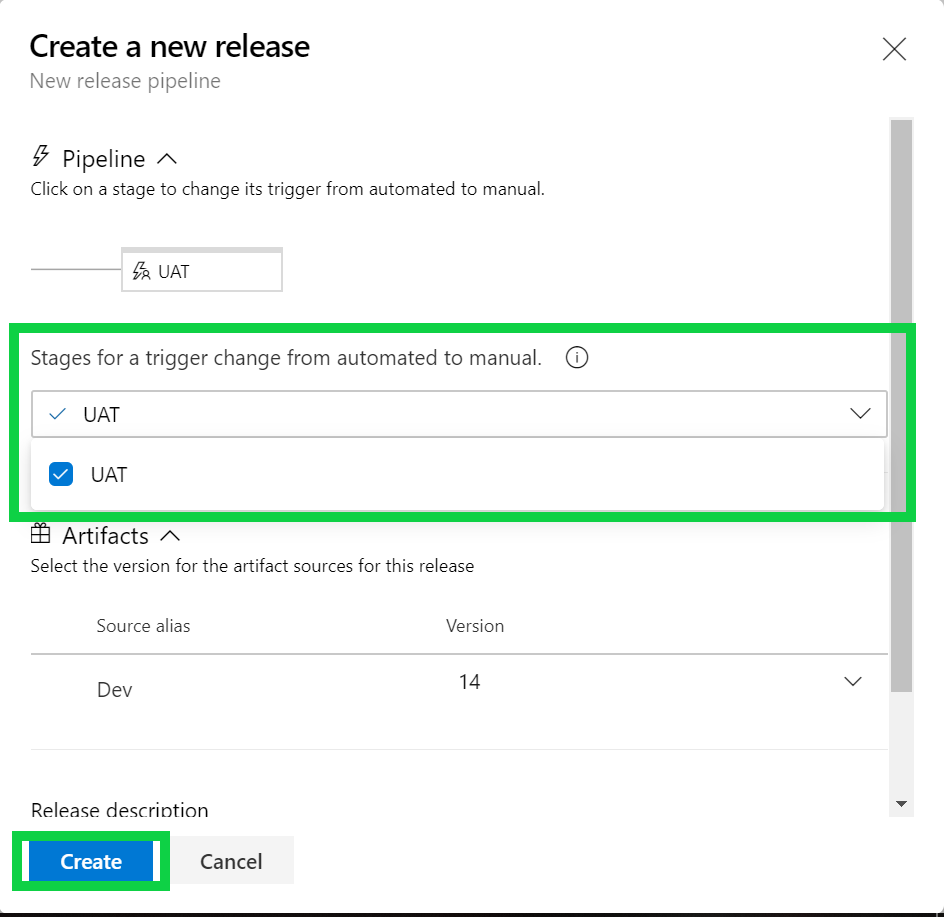
It will open window which is shown in below image. Select the stage and click on create.
Once release is created , we need to deploy it. Navigate to the +Deploy button, we can deploy current stage as well as multiple stage at a time. It will open one more window where you can give your comment and click on Deploy button.
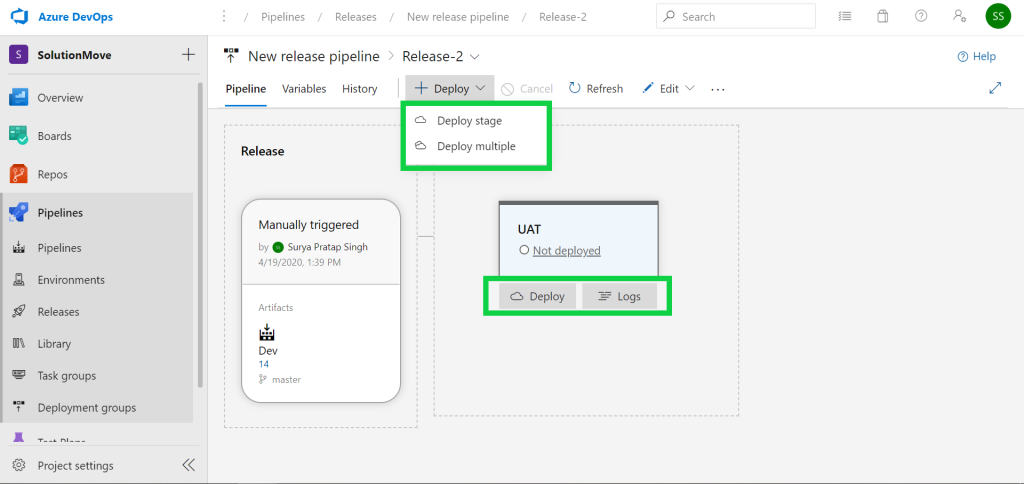
It will take few second to deploy your solution into UAT environment, on successful deployment it will show you a Succeeded status.

That’s it. Now you can go to the UAT environment and check your solution.
No comments:
Post a Comment