
What is custom API?
Custom API is an advanced version of custom actions. Custom actions were mostly used or treated as an API due to their behavior of accepting request parameters and returning response parameters.
Custom API is a new code-first approach that extends the concept of Custom Actions to provide capabilities that will enhance development activity. Custom Actions depend on workflow to allow anyone to compose a set of logic using a designer without writing code. This is a great capability, but developers have been leveraging Custom Actions to create new APIs and ignore the designer. Rather than implement their logic with the designer with workflow, they have been using this capability to create APIs and then register plug-ins to apply their logic in a way that is most productive for them. This enables them to do things workflow can’t do.
Custom API provides the capability to write and deploy API in the database independently. Apart from this custom actions had certain drawbacks which are now overcome by custom API. One major difference is the method to consume custom actions was always POST, but in custom API we can use GET in order to fetch data and not perform any action. This allows us to test the URL in the browser itself.
In today’s blog, I will create a custom API to create a contact record in CRM.
Let’s configure a custom API in the maker portal. Open https://make.powerapps.com .
Create a new solution. Here I have created a solution named custom API.

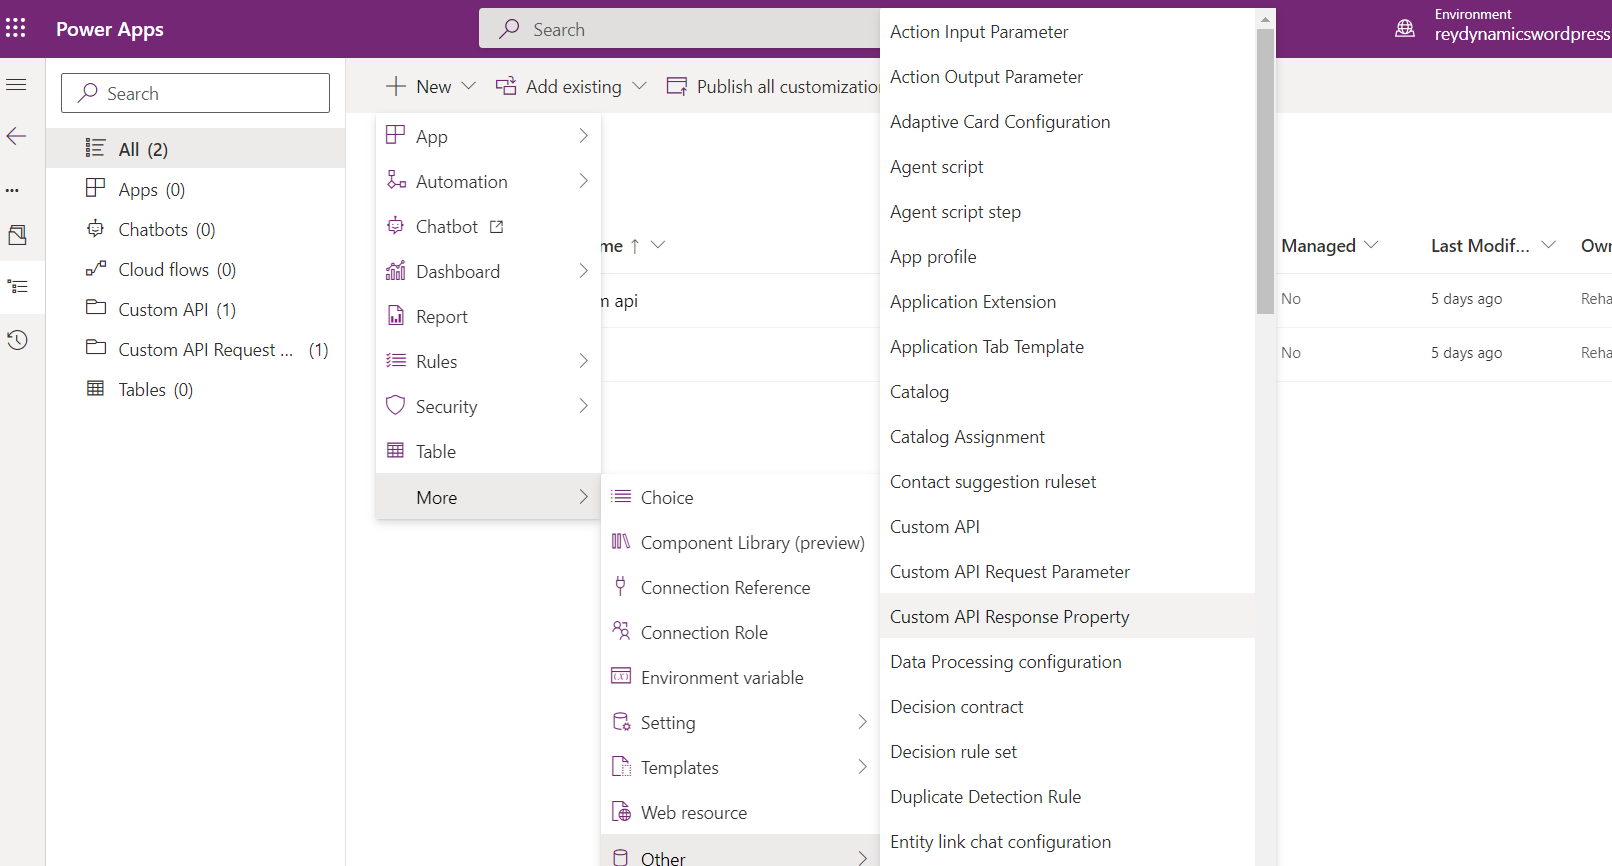
Click on the New button and add Select custom API . We are going to add 3 components to the solution custom API, custom API request parameter, and custom API response property.


Fill in the name of the custom API relevant to the API operation. It is a good practice to use prefixes while naming a component.
Binding type– Binding is an OData concept that associates an operation to a specific table. The following table describes the Custom API Binding Type (BindingType) you should use.
| Option | When to use |
|---|---|
| Global | When the operation does not apply to a specific table. |
| Entity | When the operation accepts a single record of a specific table as a parameter. |
| EntityCollection | When the operation applies changes to, or returns a collection of a specific table. |
Selecting Entity or EntityCollection will require that you use the fully qualified name of the Function or Action when you use the Web API. The fully qualified name is Microsoft.Dynamics.CRM.<UniqueName of the Custom API>.
When you select Entity, a request parameter named Target with the type EntityReference is created automatically. You do not need to create it. This value will be passed to any plug-ins registered for this message.
When you select EntityCollection, no parameter or response property representing the entity collection is included. Setting this binding simply adds the requirement that the operation is invoked appended to the entity set when using the Web API.
Boundentitylogicalname – The logical name of the entity bound to the custom API.
Here in this example, I am selecting global, please note you can compose all your Custom API as Global and add whichever request parameters or response properties you need to achieve the same functionality as a bound Function or Action.
Isfunction – The Custom API Is Function property controls whether the Custom API will be a Function or Action. In OData a Function is an operation called using HTTP GET request which returns data without making any changes. With a GET request, all the parameters are passed as parameters in the URL when invoking the function.
IsPrivate – The Is Private property will block the Custom API from appearing within the $metadata service document and prevent Dataverse code generation tools from creating classes to use the messages for your Custom API. Please note if other developers are aware about the custom API name and parameters they can still consume the API.
Enabled for workflow – Set the Custom API Enabled for Workflow (WorkflowSdkStepEnabled) to true when you need to enable calling a Custom API as a workflow action.
Allowed custom processing -The following table describes which Custom API Custom Processing Step Type (AllowedCustomProcessingStepType) you should use.
| Option | When to use |
|---|---|
| None | When the plug-in typeset for this Custom API will be the only logic that occurs when this operation executes. You will not allow another developer to register any additional steps that may trigger additional logic, modify the behavior of this operation, or cancel the operation. Use this when the Custom API provides some capability that should not be customizable. |
| Async Only | When you want to allow other developers to detect when this operation occurs, but you do not want them to be able to cancel the operation or customize the behavior of the operation. Other developers can register asynchronous steps to detect that this operation occurred and respond to it after it has been completed. This is the option recommended if you are using the business events pattern. A business event will create a trigger in Power Automate to you can use when this event occurs. More information: Microsoft Dataverse business events |
| Sync and Async | When you want to allow other developers to have the ability to change the behavior of the operation and even cancel it if their business logic dictates. If the operation succeeds, other developers can also detect this and add logic to run asynchronously. Most Dataverse messages enable the extension in this manner. Use this when your message represents a business process that should be customizable. |
Execute Privilege Name – Execute privilege name field can be used to leverage the privilege name which will be required while accessing the custom API. The application user registered will require the mentioned privilege in order to execute the custom API.
I have created a custom API with default values selected.

The next step is to add a custom API request parameter.


As seen in the above screenshot I have added a custom API lookup reference First custom API which we created earlier. I will pass the first name of the customer in this input. We can also pass JSON requests here to use this as an HTTP API.
The next step is to add the response parameter.
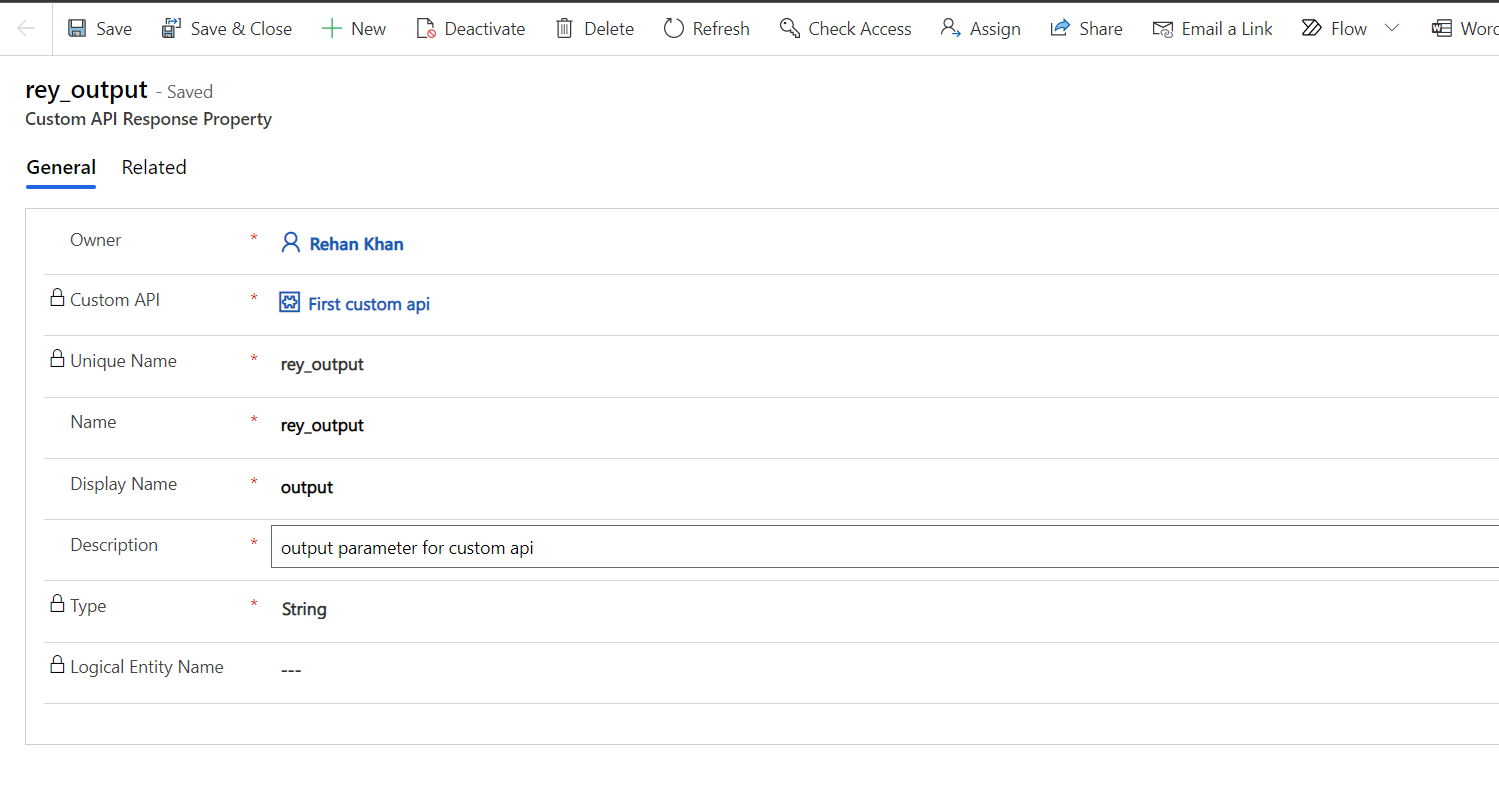
Here I have added a string field as a response parameter. The next step is to write and register a plugin.
Plugin code
using Microsoft.Xrm.Sdk;
using System;


namespace FirstCustomAPIplugin
{
    public class Createcontact : IPlugin
    {
        public void Execute(IServiceProvider serviceProvider)
        {
            // Initiate tracing service
            ITracingService tracingService = (ITracingService)serviceProvider.GetService(typeof(ITracingService));
            // Initiate the execution context from the serviceprovider.
            IPluginExecutionContext context = (IPluginExecutionContext)serviceProvider.GetService(typeof(IPluginExecutionContext));
            string firstname = string.Empty;
            if (context.InputParameters.Contains("rey_fname"))
            {
                firstname = (string)context.InputParameters["rey_fname"];
            }

            IOrganizationServiceFactory serviceFactory = (IOrganizationServiceFactory)serviceProvider.GetService(typeof(IOrganizationServiceFactory));
            IOrganizationService service = serviceFactory.CreateOrganizationService(context.UserId);

            try
            {
                Entity contact = new Entity("contact");

                contact.Attributes["firstname"] = firstname; // Assign firstname to contact entity
                var contactid = service.Create(contact); // Create a contact record

                context.OutputParameters["rey_output"] ="New contact Created with ID : "+contactid;
                tracingService.Trace("New contact Created with ID : " + contactid);

            }

            catch (Exception ex)
            {
                tracingService.Trace("Create contact Exception: {0}", ex.ToString());
                throw;
            }
        }
    }
}
Sign and register the assembly under the plugin registration tool.

Now we will link this plugin with our custom API record.

Now we can test the custom API in postman. Please note we are using OOB WEB API registered in AZURE. To know how to register dynamics 365 WEB API on azure you can refer to my blog How to register D365 WEB API.

As we can see custom API responded successfully with the contact ID created in CRM.
Let’s check the record created in CRM.

Contact record with the first name is created in the system.
No comments:
Post a Comment