
ACCESS LEVELS IN DYNAMICS 365
There are 5 different types of access levels in Dynamics.
- Global: allows access to all of an organization’s records.
- Deep: allows access to all records in their business unit andin subordinate units.
- Local: allows access to all records in their business unit.
- Basic: allows access to records they own or that are shared with them or their teams.
- None: allows no access to records.
These access levels are given to users to perform their respective functionalities. In this blog, we’ll be looking at implementing RLS on roles which have Global, Local and Basic access levels. For more information on Dynamics’ Privileges, Access levels and Security, click here.
SECURITY IMPLEMENTATION IN POWER BI
In this blog, I will be focusing on the read privilege of Opportunity entity only as every entity has different read/write/update/delete privileges.
GETTING D365 ACCESS LEVELS USING FETCHXML
In a simple RLS scenario, we would be sourcing our data using OFeed but in order to get Access Levels from Dynamics we are going to use FetchXML. To see how to use FetchXML, click here.
I have used the following FetchXML snippet to get Access Levels data of users. To see how to implement it using Power Query, please refer to the link given earlier.
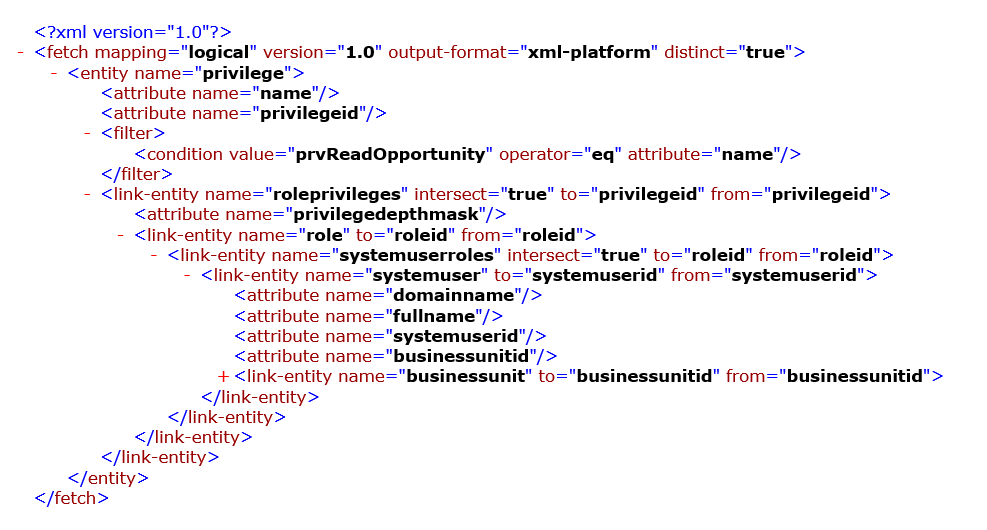
The result gives us a table like the one shown below.

- Domainname: The email of the user associated with the business unit.
- Business Unit: Name of the business unit
- User: Full name of the user
- PrvReadOpportunity: Option set for Read Privileges associated with the user. In this case,
- 1 is for User-only access
- 4 is for Business unit level access
- 8 is for Organization level access
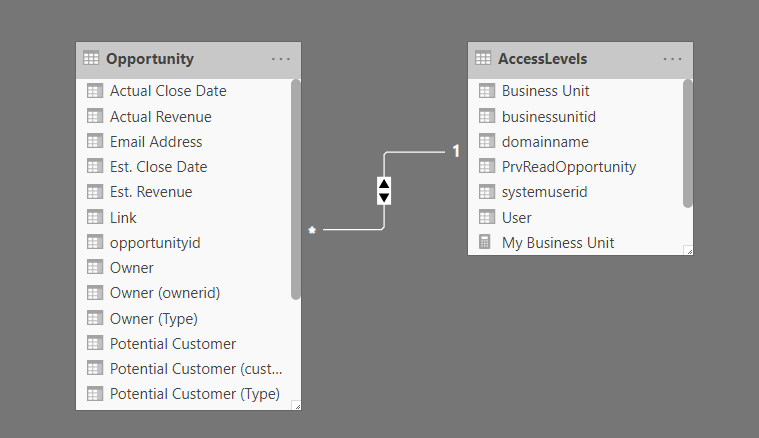
DATA MODEL
I’m using opportunity entity only for demonstration purposes and the security roles later defined will be featuring security on Opportunity entity only to keep things simple.
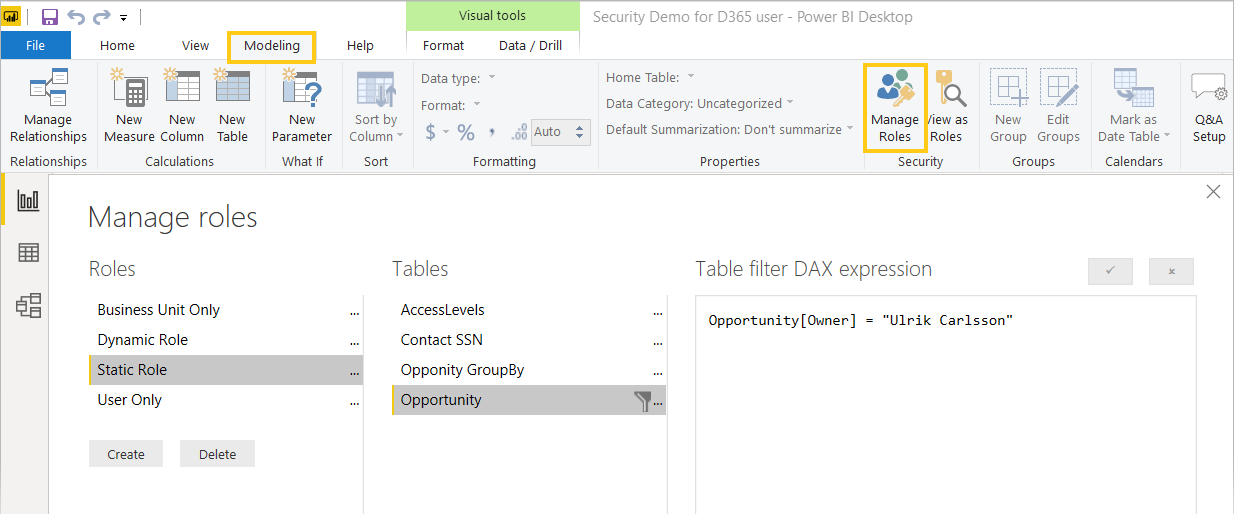
CONFIGURATION IN POWER BI DESKTOP
DEFINING SECURITY ROLES:
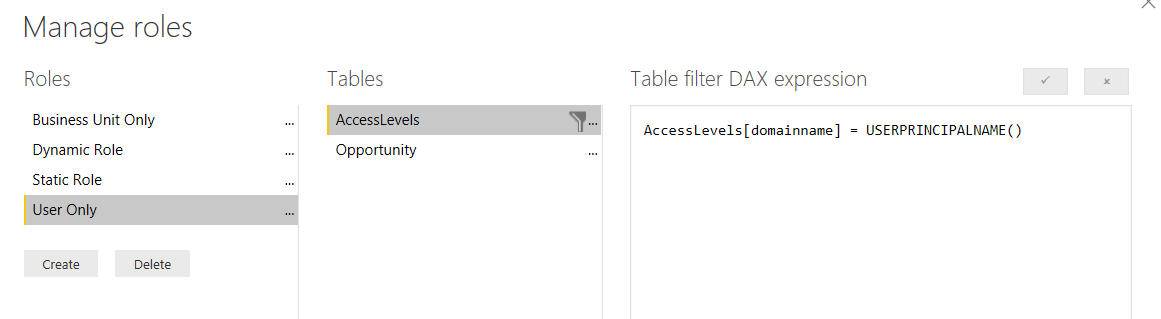
Here I have defined four different user roles in Power BI Desktop as listed below:
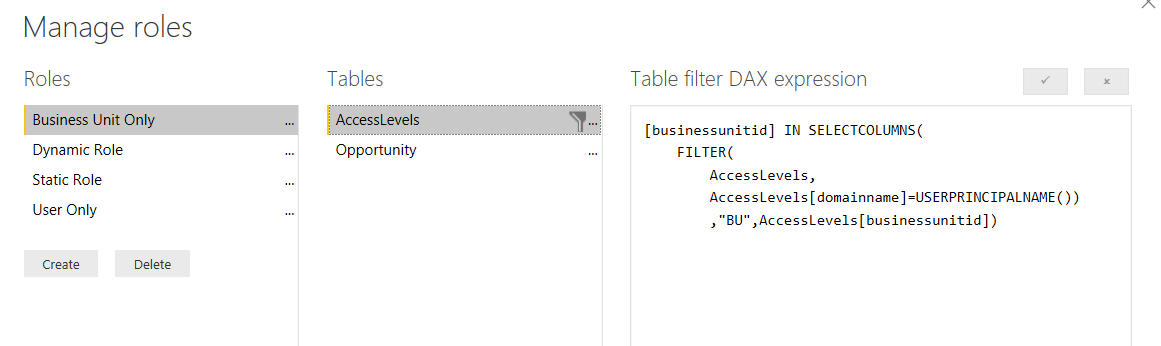
- Static role: where the users can only view data with pre-defined filters placed on it. The data will be shown irrespective of the logged-in user.
- Go to Modeling -> Manage Roles
- User-only role: where the logged in user can see their corresponding opportunities data.
- Business unit only role: where the logged-in user can see opportunities data of any user sharing the same business unit. E.g. User A has access to Business Units B1 & B2, the resulting report will be showing opportunities data related to the units B1 & B2 of all users, so that the data would be specific to these two business units.
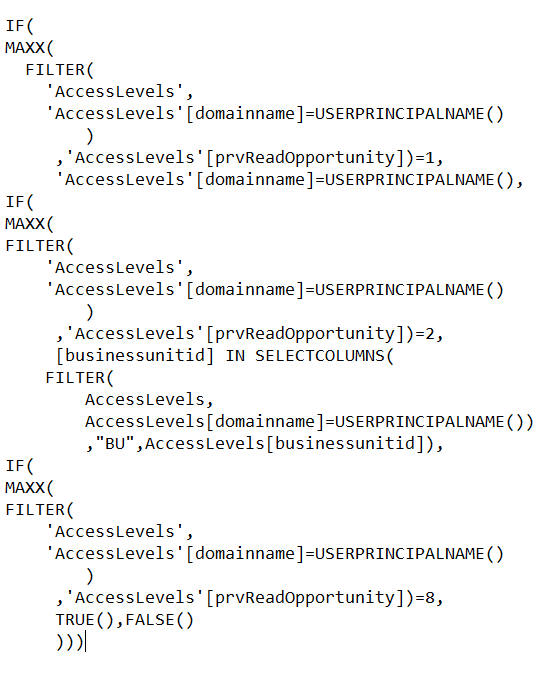
- Dynamic role: where the logged-in user will be dynamically shown the data according to the security role assigned on CRM.
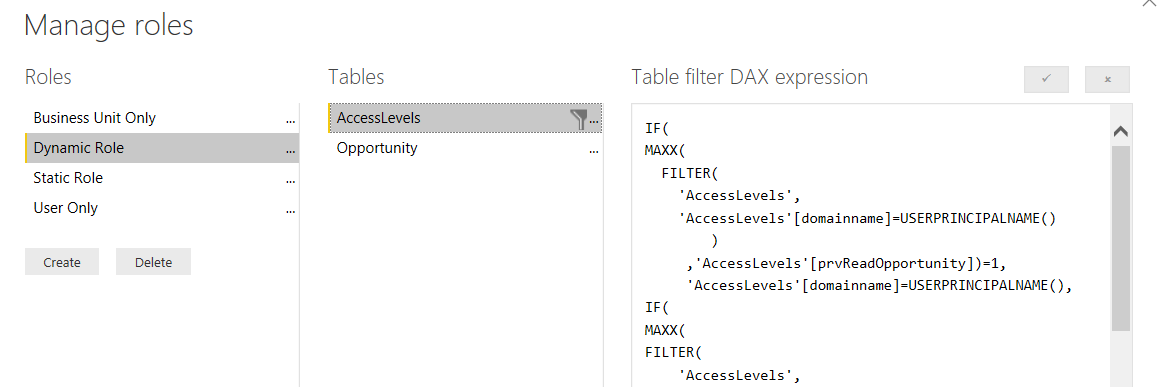
As the DAX for the Dynamic role is a bit lengthy, I’ll list it out here to help you out.
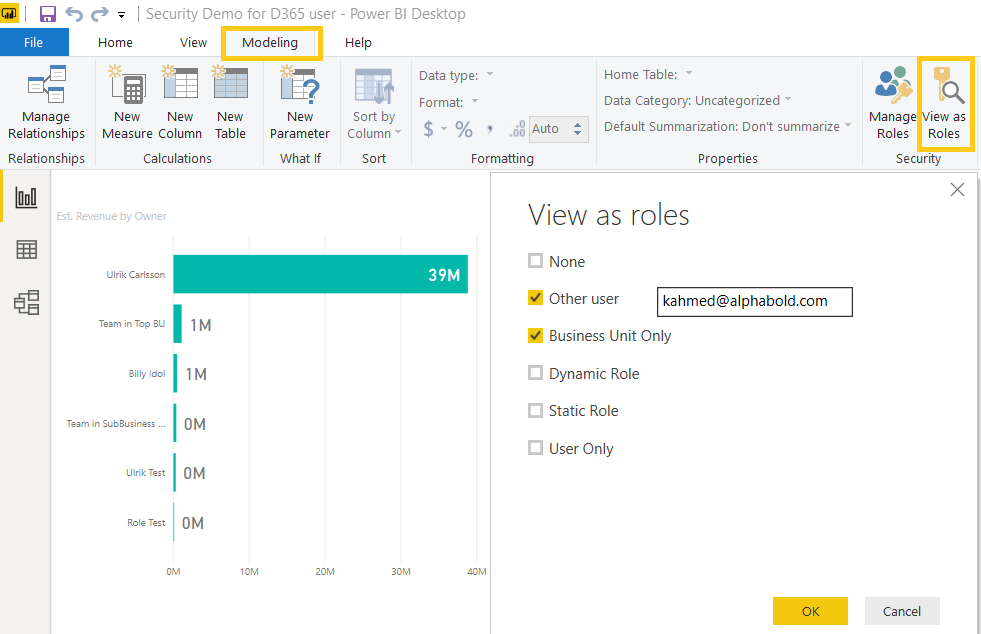
TESTING SECURITY ROLES ON POWER BI DESKTOP
You can test the roles you have created in Power BI Desktop.
- Click on Modeling -> View as Roles
DEPLOYMENT AND ROLE ASSIGNMENT ON POWER BI SERVICE
- Publish the report using Publish icon in Home
- Upon success, go to Power BI service and navigate to the workspace you have published it in.
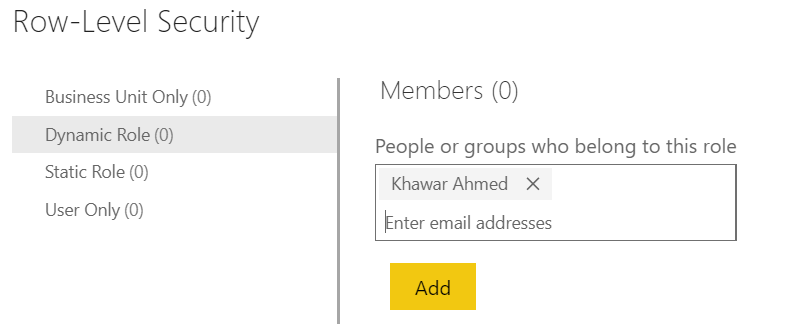
- Go to Datasets -> (Your Published report) -> Security and add the users in their specific roles. Note that you can’t add users from outside of your organization.
Remember: RLS only works for users with Viewer role of the workspace your report has been published in. Find out more on Power BI Workspace related user roles over here.
CONCLUSION
Power BI eases our job of maintaining the same security across platforms. Using RLS, we can keep data from being exposed to unauthorized users and can inherit security privileges already created on Dynamics 365.
No comments:
Post a Comment