
The first step is to create a new web part project using Visual Studio 2008. To do this, open Visual Studio 2008, and choose New – Project from the file menu. Select Visual C# - SharePoint from the Project Type list, and select the Web Part template from the list on the right. Enter ContactFormWebPart as the name and the solution name, and choose a directory where you want the solution files to be saved. When you click OK, an empty web part project will be created and opened in Visual Studio.
The empty project has one web part, called WebPart1, but this isn’t what we want to call our web part, so the first step is to delete WebPart1 from the project by right clicking on the WebPart1 folder in the Solution Explorer in Visual Studio and choosing Delete.
Next, let's add a new web part to the project, called ContactForm. Right click on the ContactFormWebPart project in the Solution Explorer, and choose Add – New Item from the context menu. Select SharePoint from the categories list, and Web Part from the templates list. Enter ContactForm for the name, and click Add.

This gives you a new source file called ContactForm.cs that has an empty class inheriting from
WebPart, with some TODO comments. In the next section, we are going to replace the CreateChildControls() function and add some additional code to this class.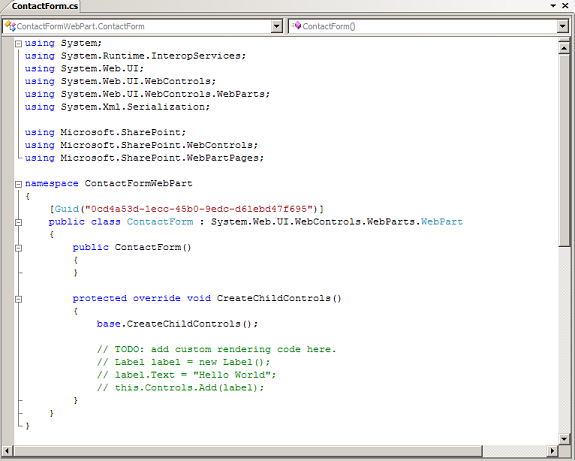
Adding Code to Create the Controls
Now, we are ready to begin writing code that will display the web part. Open ContactForm.cs, and you will see a function called
CreateChildControls(). This function is where we will add labels, textboxes, and a button to allow the user to interact with our web part.
But first, let's create some class-level variables for the controls that we will create. Declaring them at the class level as opposed to within the
CreateChildControls() function will allow us to reference these controls from the button event handler later on.TextBox txtContactName;
TextBox txtEmailAddress;
TextBox txtPhone;
TextBox txtMessage;
Button btnSendMessage;
Label lblMessageSent;
Now, let's add the code to
CreateChildControls to build the display. In order to keep it simple, an HTML table will be used to align the controls in a consistent manner. Each table row will have two cells: one for the field label, and the other for the text boxes. Controls are created one at a time and added to a table cell, which is then added to a table row.protected override void CreateChildControls()
{
base.CreateChildControls();
Table t;
TableRow tr;
TableCell tc;
// A table that is used to layout the controls
t = new Table();
// Label with instructions for the user
tr = new TableRow();
tc = new TableCell();
tc.ColumnSpan = 2;
tc.VerticalAlign = VerticalAlign.Top;
Label lblInstructions = new Label();
lblInstructions.Text = "Please enter your contact" +
" information and message below.";
tc.Controls.Add(lblInstructions);
tr.Controls.Add(tc);
t.Controls.Add(tr);
// Contact Name label
tr = new TableRow();
tc = new TableCell();
tc.Style["padding-top"] = "7px";
tc.VerticalAlign = VerticalAlign.Top;
Label lblContactName = new Label();
lblContactName.Text = "Name:";
tc.Controls.Add(lblContactName);
tr.Controls.Add(tc);
// Contact Name textbox
tc = new TableCell();
tc.VerticalAlign = VerticalAlign.Top;
txtContactName = new TextBox();
txtContactName.ID = "txtContactName";
txtContactName.Width = Unit.Pixel(300);
tc.Controls.Add(txtContactName);
tr.Controls.Add(tc);
t.Controls.Add(tr);
// Email Address label
tr = new TableRow();
tc = new TableCell();
tc.Style["padding-top"] = "7px";
tc.VerticalAlign = VerticalAlign.Top;
Label lblEmailAddress = new Label();
lblEmailAddress.Text = "Email Address:";
tc.Controls.Add(lblEmailAddress);
tr.Controls.Add(tc);
// Email Address textbox
tc = new TableCell();
tc.VerticalAlign = VerticalAlign.Top;
txtEmailAddress = new TextBox();
txtEmailAddress.ID = "txtEmailAddress";
txtEmailAddress.Width = Unit.Pixel(300);
tc.Controls.Add(txtEmailAddress);
tr.Controls.Add(tc);
t.Controls.Add(tr);
// Phone Number label
tr = new TableRow();
tc = new TableCell();
tc.Style["padding-top"] = "7px";
tc.VerticalAlign = VerticalAlign.Top;
Label lblPhone = new Label();
lblPhone.Text = "Phone Number:";
tc.Controls.Add(lblPhone);
tr.Controls.Add(tc);
// Phone Number textbox
tc = new TableCell();
tc.VerticalAlign = VerticalAlign.Top;
txtPhone = new TextBox();
txtPhone.ID = "txtPhone";
txtPhone.Width = Unit.Pixel(300);
tc.Controls.Add(txtPhone);
tr.Controls.Add(tc);
t.Controls.Add(tr);
// Message label
tr = new TableRow();
tc = new TableCell();
tc.Style["padding-top"] = "7px";
tc.VerticalAlign = VerticalAlign.Top;
Label lblMessage = new Label();
lblMessage.Text = "Message:";
tc.Controls.Add(lblMessage);
tr.Controls.Add(tc);
// Message textbox
tc = new TableCell();
tc.VerticalAlign = VerticalAlign.Top;
txtMessage = new TextBox();
txtMessage.ID = "txtMessage";
txtMessage.Height = Unit.Pixel(100);
txtMessage.Width = Unit.Pixel(400);
txtMessage.TextMode = TextBoxMode.MultiLine;
txtMessage.Wrap = true;
tc.Controls.Add(txtMessage);
tr.Controls.Add(tc);
t.Controls.Add(tr);
// Empty table cell
tr = new TableRow();
tc = new TableCell();
tr.Controls.Add(tc);
// Label for telling the user the message was sent
tc = new TableCell();
tc.VerticalAlign = VerticalAlign.Top;
lblMessageSent = new Label();
lblMessageSent.Text = "Your message has been sent. Thank you.";
lblMessageSent.Font.Bold = true;
lblMessageSent.Visible = false;
tc.Controls.Add(lblMessageSent);
tr.Controls.Add(tc);
t.Controls.Add(tr);
// Empty table cell
tr = new TableRow();
tc = new TableCell();
tr.Controls.Add(tc);
// Send Message button
tc = new TableCell();
btnSendMessage = new Button();
btnSendMessage.Text = "Send Message";
btnSendMessage.Click += new EventHandler(btnSendMessage_Click);
tc.Controls.Add(btnSendMessage);
tr.Controls.Add(tc);
t.Controls.Add(tr);
this.Controls.Add(t);
}
Finally, we need to add an event handler to send the message as an email when the Send Message button is clicked by the user. In the code above, the event handler was already wired up with the line
btnSendMessage.Click += new EventHandler btnSendMessage_Click);, so now we just need to create the btnSendMessage_Click function. This function simply builds an email message using text that was entered into the text boxes, and sends the email using SharePoint's SPUtility.SendEmail() function.
You will need to change the "to" and "from" fields in the message header for your specific situation. The "to" field specifies where the email will be sent, and the "from" field is the email address that the email should appear to be from. The "from" field isn't too important, but some mail servers may require this to be a valid email address.
protected void btnSendMessage_Click(object sender, EventArgs e)
{
    // Build the email subject string
    System.Text.StringBuilder subject = new System.Text.StringBuilder();
    subject.Append("Contact Form Message from ");
    subject.Append(txtContactName.Text);

    // Build the email message string
    System.Text.StringBuilder message = new System.Text.StringBuilder();
    message.Append("Contact Name: ");
    message.AppendLine(txtContactName.Text);
    message.Append("Email Address: ");
    message.AppendLine(txtEmailAddress.Text);
    message.Append("Phone: ");
    message.AppendLine(txtPhone.Text);
    message.AppendLine();
    message.AppendLine("Message:");
    message.AppendLine(txtMessage.Text);

    // Construct the message header
    System.Collections.Specialized.StringDictionary messageHeader =
    new System.Collections.Specialized.StringDictionary();
    // TODO: Where to send the email
    messageHeader.Add("to", "CustomerService@example.com");
    // TODO: Who the email should be "from"
    messageHeader.Add("from", "ContactForm@example.com");
    messageHeader.Add("subject", subject.ToString());
    messageHeader.Add("content-type", "text/plain");

    // Send the email
    Microsoft.SharePoint.Utilities.SPUtility.SendEmail(
    SPContext.Current.Web, messageHeader, message.ToString());

    // Let the user know the message was sent
    lblMessageSent.Visible = true;

    // Clear out the input fields
    txtContactName.Text = "";
    txtEmailAddress.Text = "";
    txtPhone.Text = "";
    txtMessage.Text = "";
}
No comments:
Post a Comment