WSP-Builder is a tool to make life more easy.
The advantage of the WSP-Builder is that this tool will create a lot of xml for you.
In this scenario I will create a webpart with feature build via the WSP-Builder and the VSeWSS.
First I will start a new project for creating the webpart.
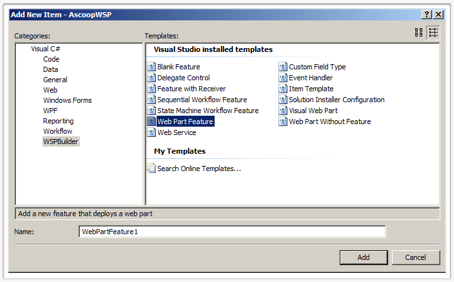
In the WSP-Builder there is a template where the webpart is already provisioned with a feature. The first advantage of the WSP-Builder is that you have more templates in the WSP-Builder than in the VSeWSS (for example the webpart without feature).
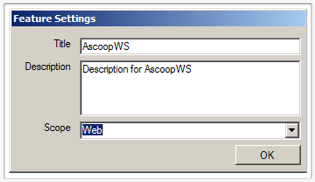
When creating the webpart, WSP-Builder will ask for the scope of the feature. This all shown in a user friendly dialog.
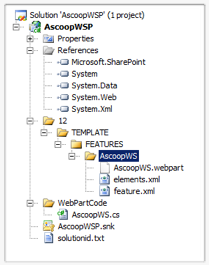
After setting the title and the description the starting point is fully created. As you can see in the image below there is a copy of the structure of the 12 hive.
Also in the project the is a solution.txt created. This text file will contain a guid that will be used on the wsp package.
Another positive thing about the WSP-Builder is that the project is already singed with a strong-key.
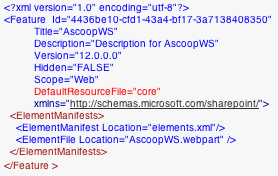
There is already a feature.xml and elements.xml created.
The feature.xml will look like this:
The only thing I need to do is write some custom code in the .cs file and I am good to go and build and deploy my webpart with the feature.
Deploying the feature in the WSP-Builder is peace of cake.
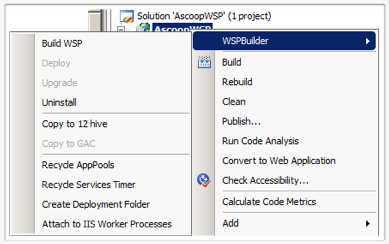
In the right click menu of the project you will see an item called WSP.
In this item you will see a button “Build WSP” that will build the project and make a .wsp package of it.
The deploy button will only be available when the .wsp package is created.
To provide a new version of the assembly you can “upgrade” the project.
If you change something in the .cs file you can build the project (on the traditional way) and then click the “Copy to 12 hive” or “Copy to GAC” button. This will copy the latest assembly into the right folder. After copying the assembly you need to do an iisreset but the normal iisreset will restart all the application pools and other iis processes. It takes less time when you use the “Recycle AppPools” button.
Now I will try and do the same with the VSeWSS. VSeWSS is a Visual Studio plugin that will provide Visual Studio with some SharePoint project templates.
First I will create a new project.
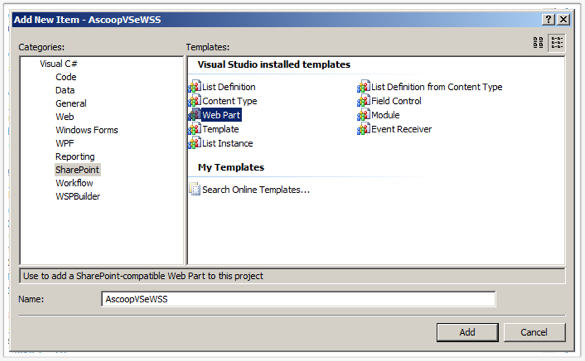
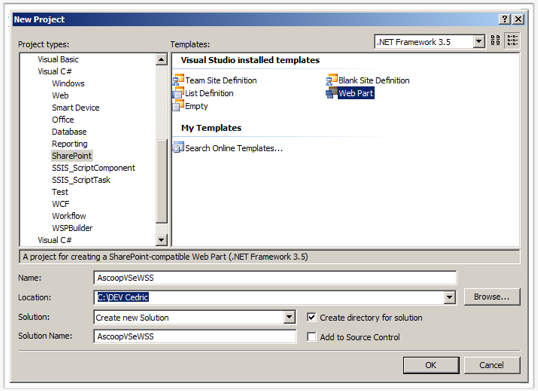 After creating the project I can add a webpart. Other posible SharePoint parts can be seen in the following image:
Automatically there will be a feature.xml to add the webpart. This project will automatically be signed with a strong-key.
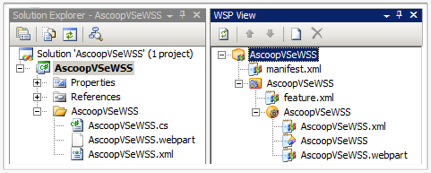
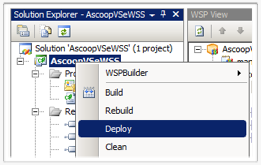
In the solution explorer you can’t see a manifest.xml file. You can only see the manifest file by using the WSP View.
The deployment is also – just like with the WSP-Builder - a peace of cake. There will be a feature installed in your site collection.
Take in mind that your feature will automatically be activated.
The biggest difference between the WSP-Builder and the VSeWSS is that the WSP-Builder solution is actually a normal class-library. This makes it possible to open the solution also if you don’t have the WSP-Builder installed.
I am now trying to use the VSeWSS because of the fact that the VSeWSS in Visual Studio 2010 is more advanced and from then I will use the default installed VSeWSS.
So if you use now the VSeWSS I think it will be easier to convert you SharePoint project into Visual Studio 2010 projects.



No comments:
Post a Comment