
Introduction
There are two ways of creating a Workflow:
- Using SharePoint Designer
- Using Visual Studio
In this article we can experiment with creating a Workflow using SharePoint Designer 2010.
Types of Workflow in SharePoint Designer
We can create three types of Workflows using SharePoint Designer. They are the following:
- List Workflow
- Reusable Workflow
- Site Workflow
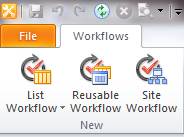
List Workflow can be associated with a list. Reusable Workflow can be associated in more general ways like a Content Type. Site Workflow is associated with a site item.
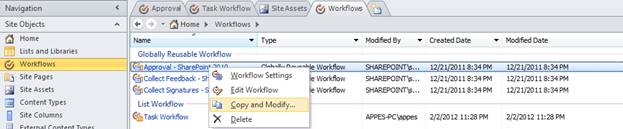
Inbuilt Workflow
Inside the Designer we can see the Globally Reusable Workflows which can be globally used inside the site collection. We can copy and modify them instead of modifying directly.
Creating a Workflow
Now we can experiment with creating a Workflow using SharePoint Designer. Following are the steps involved.
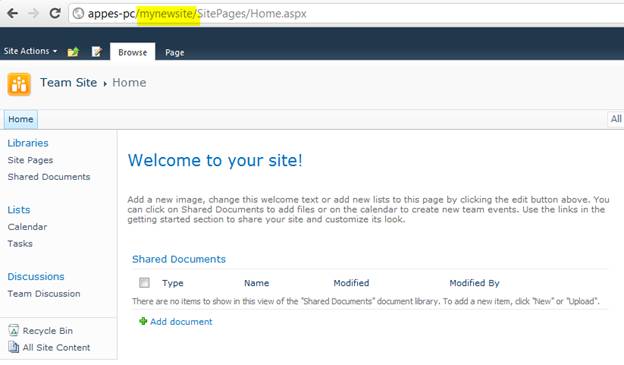
Step 1: Create a Team Site
Open SharePoint Designer from the Start menu. Click on the Team Site button and enter the name of the new web site (mynewsite) as shown below.
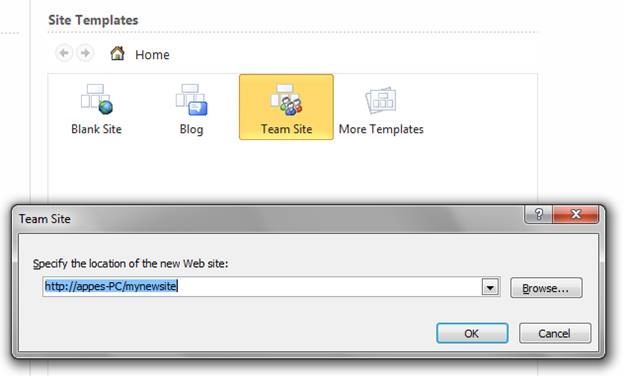
This step will create a new site with a Tasks list.
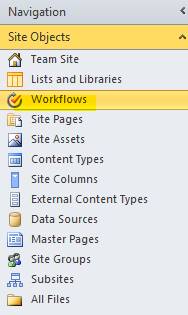
Step 2: Create the Workflow
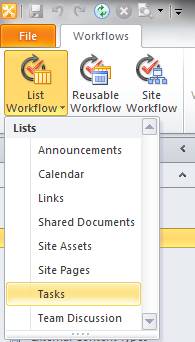
Select the Workflows item from the left side Navigation pane.
Click on the List Workflow button from the ribbon and click the Tasks item.
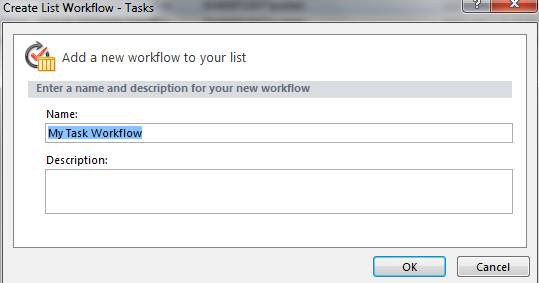
In the appearing dialog, enter the name of the new Workflow as shown below.
Step 3: Create Condition and Action
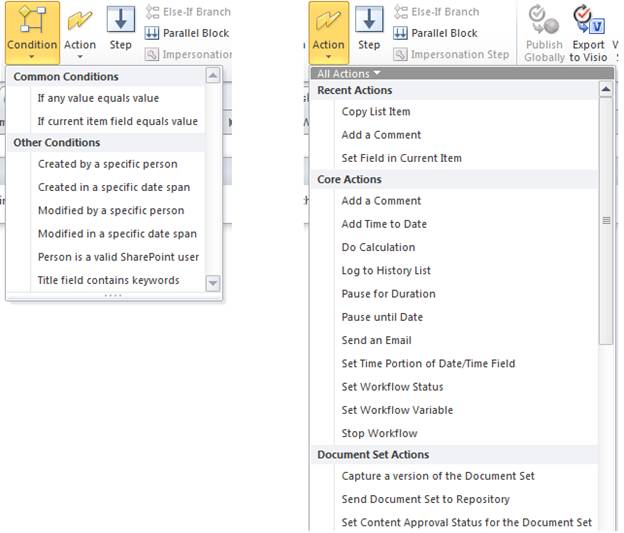
Now we need to specify the Condition and Action of the item. Each Condition will have one or more Action items associated with it.
The Condition will be evaluated and the corresponding Actions will be executed. The Condition could be like checking a field property of the list or library, checking the user name, etc.
The Action is the actual performing item. The Action could be like updating a field of the current item, moving the list item to another list, emailing a user, adding a comment, checking out a document, invoking another workflow, etc.
You can create a Condition and Action using the ribbon items.
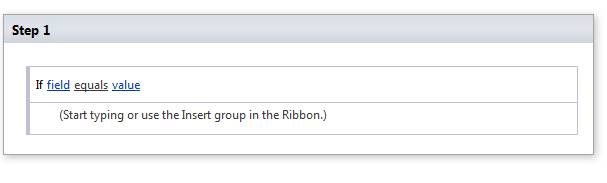
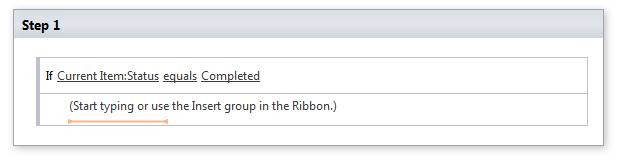
For creating the Condition, use Insert > Condition > If current item field equals value. Your Workflow will look like below. The links field and value has to be specified.
Click on the links above and set the links as shown below:
Now click Insert > Actions > Set field in current item. Modify the comment as Good Job Dude!, as shown below.
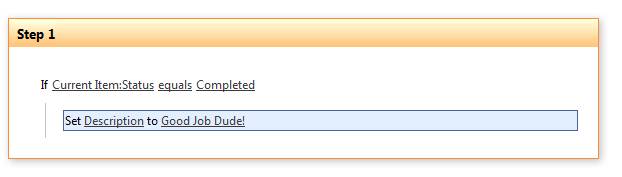
Click on the Save button and we are ready with the Condition and Action. The Condition and Action checks the item of the Task and if the Status is Completed, the Description column is set to a message.
Step 4: Change Workflow Settings
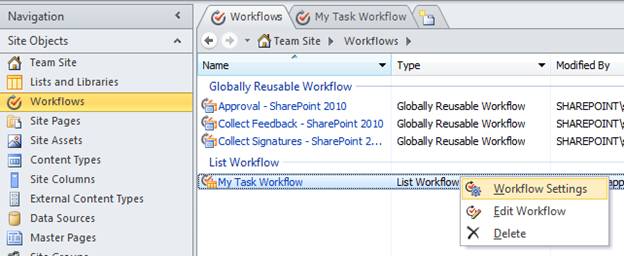
Go to the Navigation > Workflows list and use the Workflow Settings menu item.
In the Start Options section on the right, do the following:
- Uncheck the Allow this workflow to be manually started item
- Check the other two items for ensuring automatic execution of the Workflow
This ensures that our workflow will be automatically executed on insert/update of the Task item in the Task List.
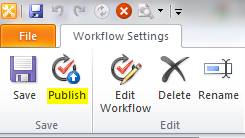
Click on the Save button and then click on the Publish button.
Now our Workflow is ready and deployed to the SharePoint site named mynewsite.
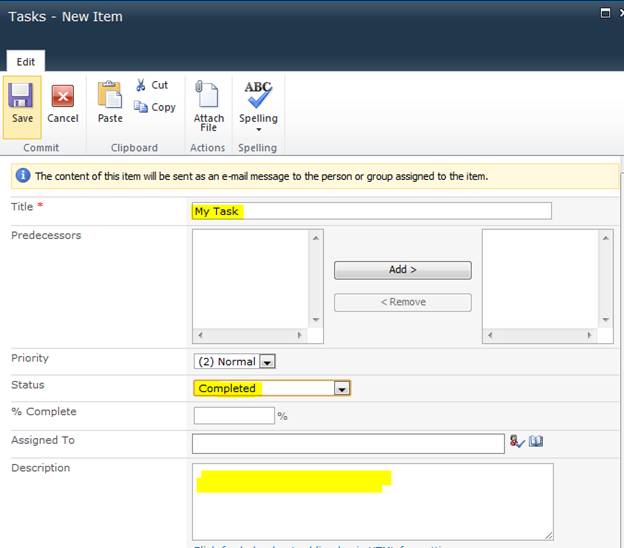
Step 4: Test the Workflow
We can test the workflow by opening the above site in browser.
Click on the Tasks list and create a new item. Set the Status of the Task to Completed. Leave the Description field as empty as shown below. Click on the Save button.
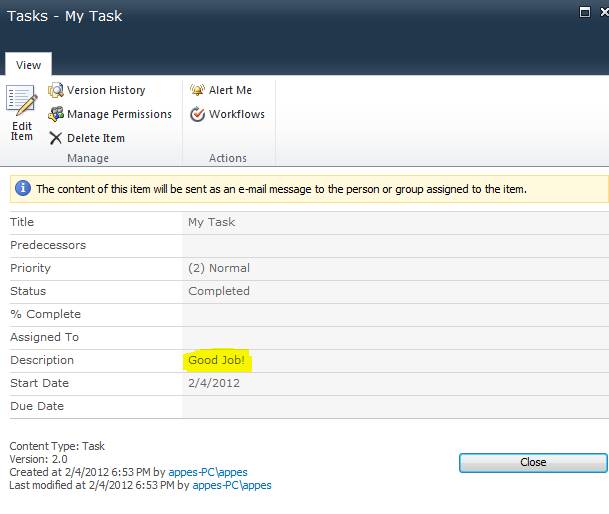
You can see that a new column for the Workflow appears for the above task item. Workflows will be adding their own columns to the context list. Refresh the page and wait until the Workflow status is Completed.

Now try viewing the item again and you can see that the Description has changed to our message.
No comments:
Post a Comment