
Introduction
In this article we will explore the three-state workflow of SharePoint 2010. Please note that this is an out-of-the-box workflow also known as built-in workflow.
Pre-Requisite
For viewing the email notifications generated by the workflow, you need to configure the Development Machine with an SMTP receiver tool. You can view the Real World Scenarios on configuring this.
What is the purpose of the Three-state workflow?
The three-state workflow can be used to track the status of list items. For each status change there will be an email notification performed by this workflow.
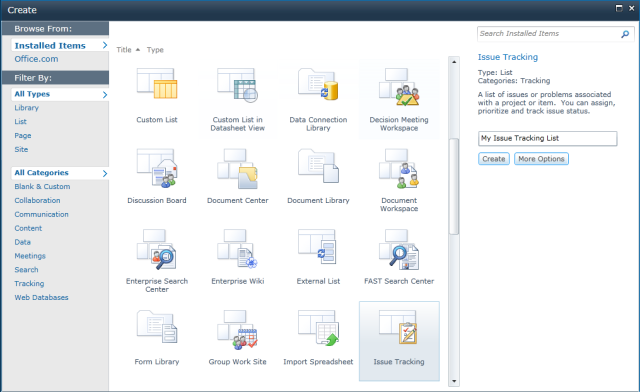
The Issue Tracking template is built to work with this workflow as it contains a Choice column with three different states.
Exploring the Workflow
For starting with create a new list using the Issue Tracking template as shown below:
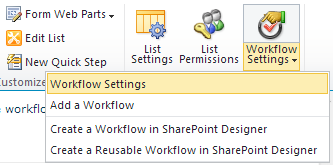
After creating the list we need to Associate the workflow with the list using the List tab > Workflow Settings > Add a Workflow.

A wizard page will be started as shown below.
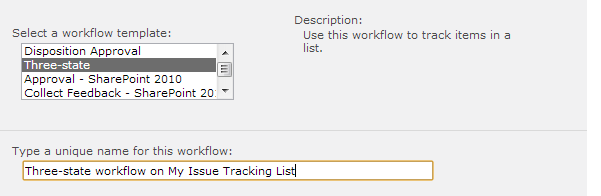
Select the Three-state workflow and enter a unique name for the workflow. In the bottom of the page, you can see the Start Options. Check the Start this workflow when an item is created check box.
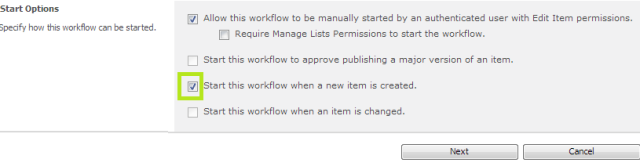
Click the Next button to continue.
Now you will be prompted with the second page of the Workflow as shown below:
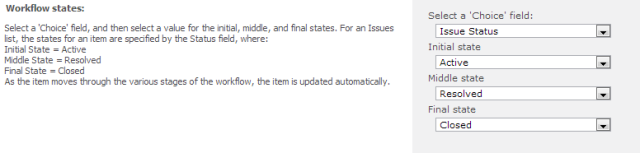
Please note that the Three-state workflow requires a column with three0 states as the ‘Choice’ field. In this list theIssue Status column is selected as the ‘Choice’ field. The rest of the three drop down lists show the three different value selections for the Issue Status to set the Active / Resolved / Closed states.
Coming down to the page you can set Emailing options like Task Information, Email Subject and Body, etc. Email Notifications are sent to the involved persons.
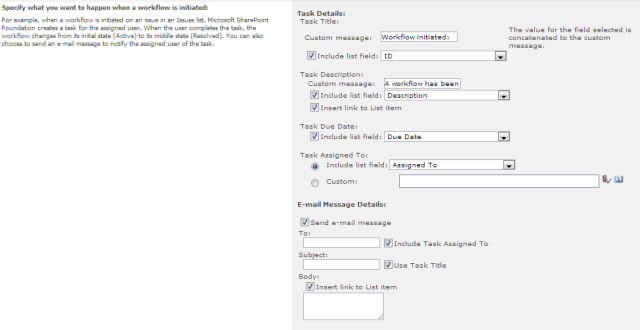
Leave the default options and click the OK button. Now your workflow is ready to send email notifications on task creation.
Email Notification
For viewing the emails generated by the workflow, you need to have:
- Email server configured in Central Administration
- E-mail property set in User Profile
- Smtp4dev tool running
Please view the Real World Scenarios section of the book to enable this.
- Configuring Email for Development Server
Testing Workflow
Now let us test the workflow by creating a task. Create a Task and make sure you select a valid user having email for the Assigned To column.
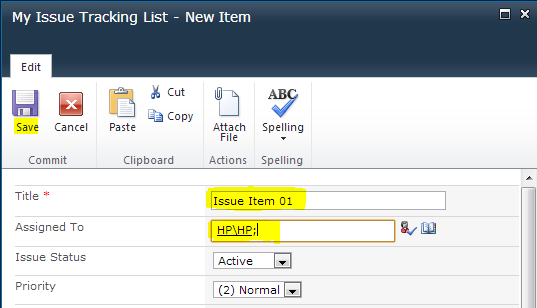
Save the changes and you should see the smtp4dev tool catches the email as shown below.
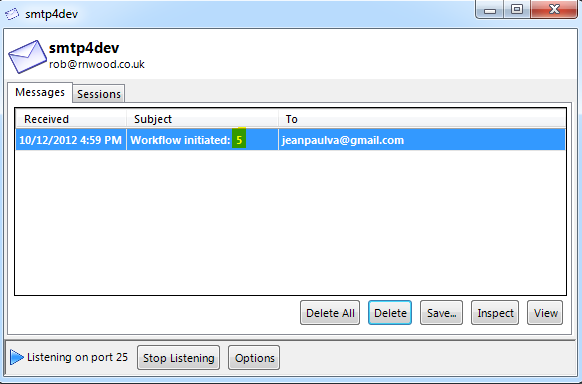
You can see that the ID value is being highlighted. This concludes our experiment with the Three-state workflow.
Editing the Workflow
We can associate multiple workflows with a list or library. To edit an existing association use the Workflow Settings > Workflow Settings menu item.
In the appearing page you can view the existing workflows associated and edit the settings.
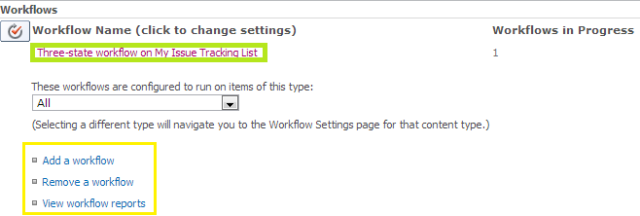
The Workflows in Progress column displays the number of workflow instances currently active.
There are additional links to Add / Remove workflows, View workflow reports, too.
Where should I apply this Workflow?
We can use this workflow for the following requirement scenarios:
- Product or Project approval process where a new product idea can be traversed through different stages of approval before acceptance.
- Issue tracking system where a customer can create an issue item, the support team updates it to resolved, customer can change the status to Closed or Active again.
- Bug tracking system where the QA can create a task item, developer can change it to Resolved, QA can reopen it.
The effective use of Three-state workflow should decrease the delivery time for a tracking system with email notifications. We can also use custom lists with transition properties for using the Three-state workflow.
No comments:
Post a Comment