In this article we explore the Event Handling features of a list through code. Using the SPList in Server Object Model we can access event handling for a list.
We can use the event to perform the following activities:
We can use the event to perform the following activities:
- Validate the Item
- Log the information
- Create associated items
There are multiple Event Types for a List:
- List Events
- List Item Events (Add, Edit, Delete)
- Web Events
- Feature Events
- Workflow Events
Create Event Receiver Project
To begin, create an Event Receiver project in Visual Studio.
To begin, create an Event Receiver project in Visual Studio.
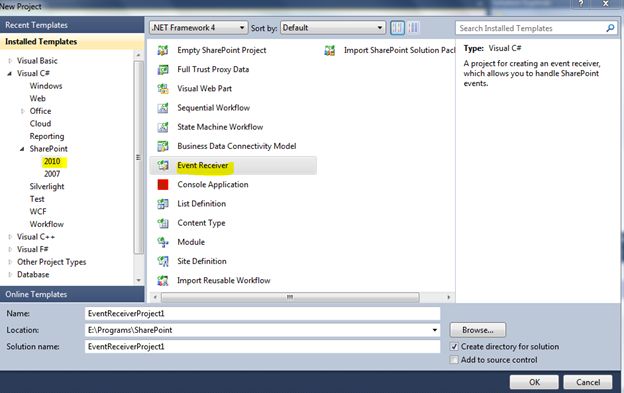
You will be prompted for the site:
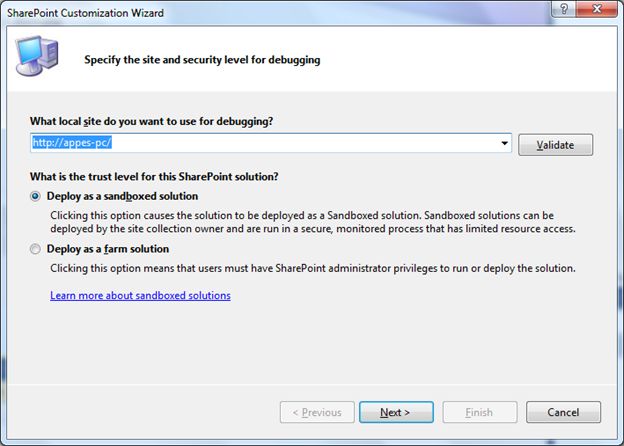
By default the machine site will be shown in the dialog box. Leave the default option of the Sandboxed solution and click the "Next" button.
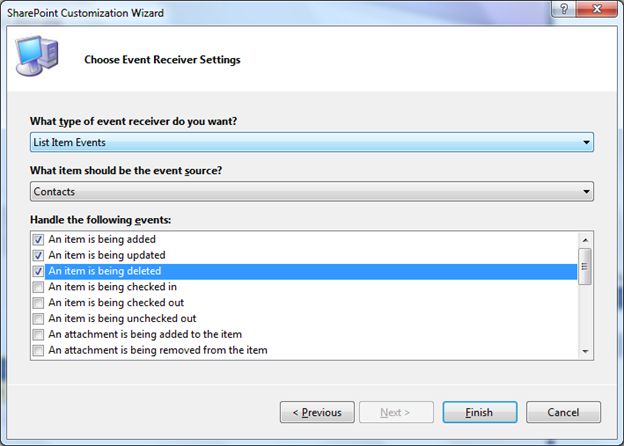
Select the List Item Events and use the event source Contacts. Check the check boxes for added, updated and deleted events and click the "Finish" button.
Note: The site URL can be changed later. For the time being we are using hard-coded URLs.
On clicking the Finish button, the code will be generated for the "List Event Receiver" and you can place a breakpoint in the "ItemAdding" event as in the following.

Now execute the application and your event will be added and activated.
Try adding a new contact inside SharePoint:
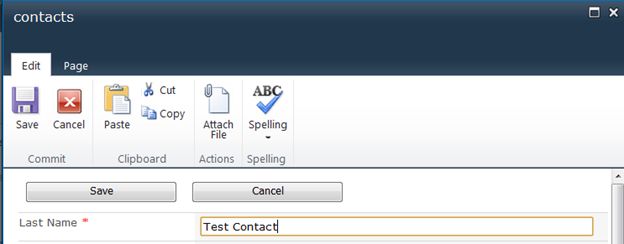
On clicking the "Save" button, the breakpoint inside Visual Studio will be hit:

SPItemEventProperties
You can cancel the operation by using the Cancel property.
You can report an error message using the ErrorMessage property.
Cancel for Delete
You can cancel an item delete by setting the properties.Cancel = true:
public override void ItemDeleting(SPItemEventProperties properties)
{
properties.ErrorMessage = "Deleting Item is not permitted!";
properties.Cancel = true;
}
Try deleting an item from the Contacts inside SharePoint:
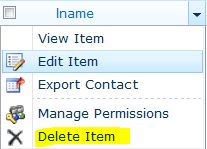
You will get the following message prompted:
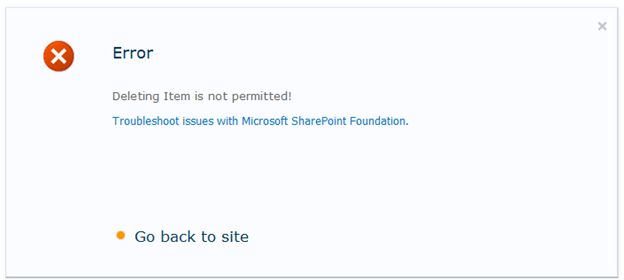
Deploying the Event Receiver
You can use a note that, while you stop Visual Studio, the item deletion is allowed inside SharePoint. To make the event receiver permanent, use the project Deploy option.

Now try deleting an item without Visual Studio Debugging. You will get the same Error Message Dialog and this concludes the Event Creation and Deployment to a SharePoint site.
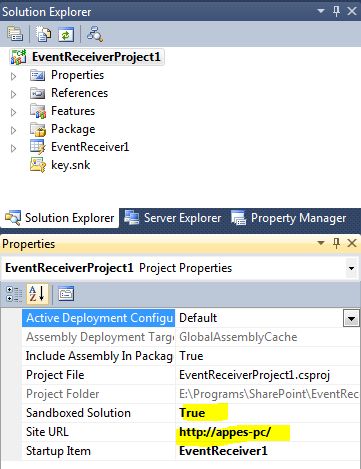
Properties of Project
You can change the URL and other properties created through the Wizard. Use "Project" > "Properties" to access/modify these properties.
Features
The event receiver is actually deployed as a feature inside SharePoint. You can view the Feature properties and the associated XML file under the Features special folder as in the following.

The Event code and Elements.xml reside inside the EvntReceiver1 group as in the following.


No comments:
Post a Comment