In this article we can explore more features regarding Web Parts programming.
Images Mapped Folder
In a real-world scenario we need to locate an image file from the server web folder. We can use the Server.MapPath() pointing to the root (~). But this is not that easy with web parts as the web parts are not always deployed into the bin folder.
(During development the web part assembly is not placed inside the inetput folder)
We can deploy the web part to the Solution Gallery, Global Assembly Cache and the web application bin directory. For simplicity we can use the Images Mapped Folder to place the image files needed by the web part.
Creating Image File Loading Project
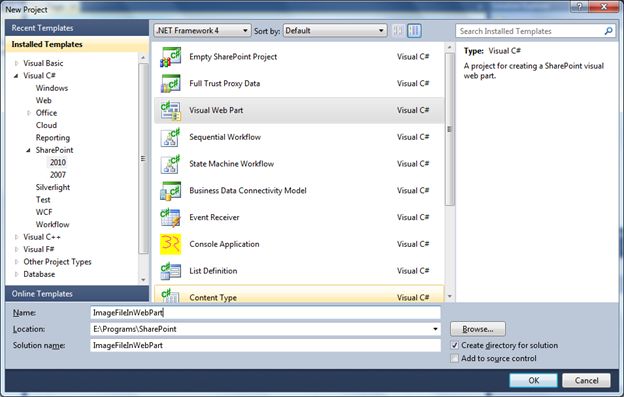
Now we can create a web part and experiment with the image loading functionality. Create a new SharePoint > 2010 > Visual Web Part project.

Select the SharePoint default web site in the next dialog.
Create Images Mapped Folder
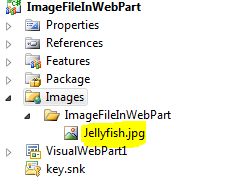
For adding image files we need to use a special mapped folder. Right-click on the project and use the SharePoint Images Mapped Folder from the Add menu.

Copy an Image File inside the Folder
Now create an image file and paste it inside the folder.

Create Image control to load the Image File
Double-click to open the VisualWebPart1UserControl.asx.

Now place a button and image control on the web part user control.
On the button click event place the following code:protected void Button1_Click(object sender, EventArgs e)
{
Image1.ImageUrl = "/_layouts/images/ImageFileInWebPart/Jellyfish.jpg";
}
Please note that the url starts with _layouts folder.
Execute the Web Part
Now you can execute the web part and it will be deployed to the site. Open a page in edit mode and use the Add Web Part option. Locate our new web part and add it to the page.
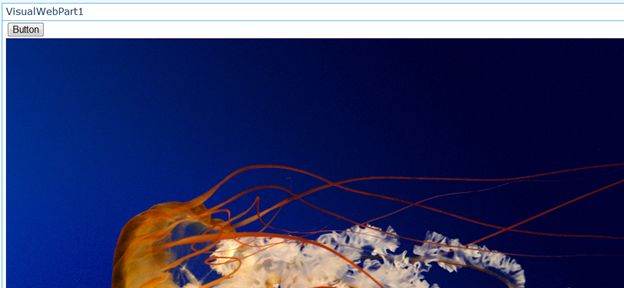
Try playing with the button click and you will be getting the image file displayed as shown below:

Images Mapped Folder
In a real-world scenario we need to locate an image file from the server web folder. We can use the Server.MapPath() pointing to the root (~). But this is not that easy with web parts as the web parts are not always deployed into the bin folder.
(During development the web part assembly is not placed inside the inetput folder)
We can deploy the web part to the Solution Gallery, Global Assembly Cache and the web application bin directory. For simplicity we can use the Images Mapped Folder to place the image files needed by the web part.
Creating Image File Loading Project
Now we can create a web part and experiment with the image loading functionality. Create a new SharePoint > 2010 > Visual Web Part project.

Select the SharePoint default web site in the next dialog.
Create Images Mapped Folder
For adding image files we need to use a special mapped folder. Right-click on the project and use the SharePoint Images Mapped Folder from the Add menu.

Copy an Image File inside the Folder
Now create an image file and paste it inside the folder.

Create Image control to load the Image File
Double-click to open the VisualWebPart1UserControl.asx.

Now place a button and image control on the web part user control.
On the button click event place the following code:protected void Button1_Click(object sender, EventArgs e)
{
Image1.ImageUrl = "/_layouts/images/ImageFileInWebPart/Jellyfish.jpg";
}
Please note that the url starts with _layouts folder.
Execute the Web Part
Now you can execute the web part and it will be deployed to the site. Open a page in edit mode and use the Add Web Part option. Locate our new web part and add it to the page.
Try playing with the button click and you will be getting the image file displayed as shown below:


No comments:
Post a Comment