4.2 Leave Default Master Pages in Peace
SharePoint 2010 comes with three out-of-box Master Pages – v4.master (the default SP2010 design), is the default.master In this tutorial we will create a new masterpage using the v4.master as a template and then connect the newly created custom Master Page to our site. It is a good idea to leave the default Master Pages untouched (at least for the examples in this post).
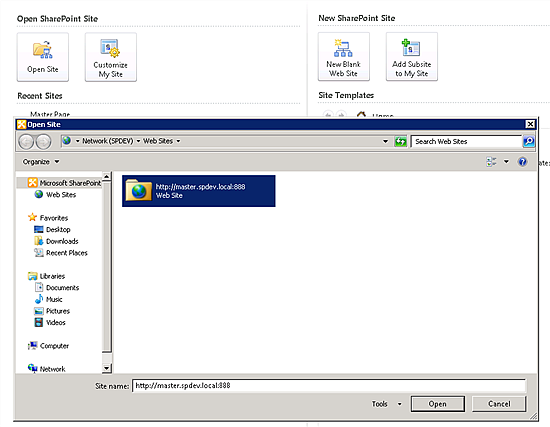
First we need to clone the v4.master file. Open SharePoint Designer 2010, and from theSites tab select the Open Site icon and enter your site URL.
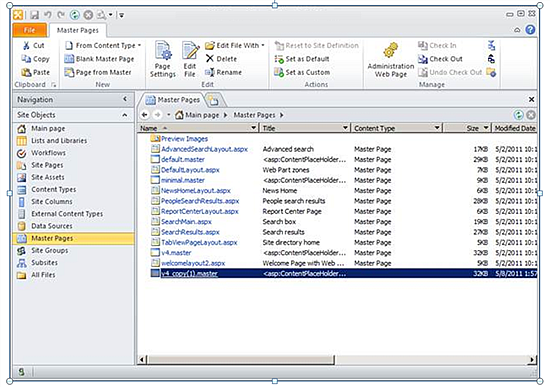
The site root will be opened in SharePoint Designer 2010. Now select Master Pages from the left menu, click on the v4.master file and press CTRL+C and CTRL+V to create a copy of the .master file.
Name your master page – click on the Rename icon in the ribbon and enter your custom name (for example myCustom.master).
Using the newly created master page we are now ready to make the modifications. Users of your SharePoint site will not notice that we are changing anything, and if you break something – it will be the custom master page, not the one users are seeing.
4.3 Create a Custom CSS to Add Branding
Next we need a CSS file which overrides the default core4.css style definitions. To see some changes to our customizations, we will include the fixed width style for our new master page.
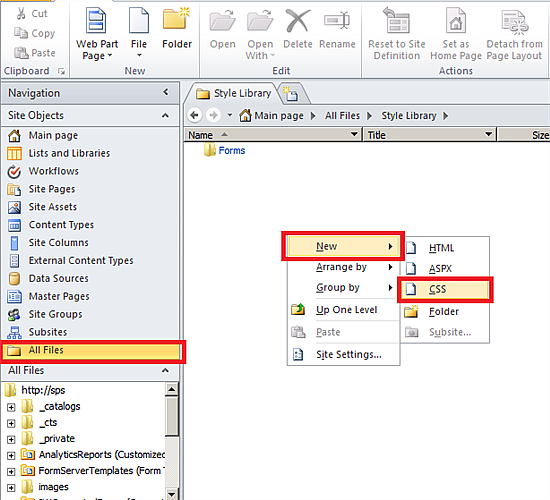
Open SharePoint Designer 2010, select All files from the left menu and then enter theStyle library.
To create a new css file, right click on the Style Library and select New > CSS from menu.
Name this file myCustom.css, just to keep the naming schema consistent with our custom Master Page.
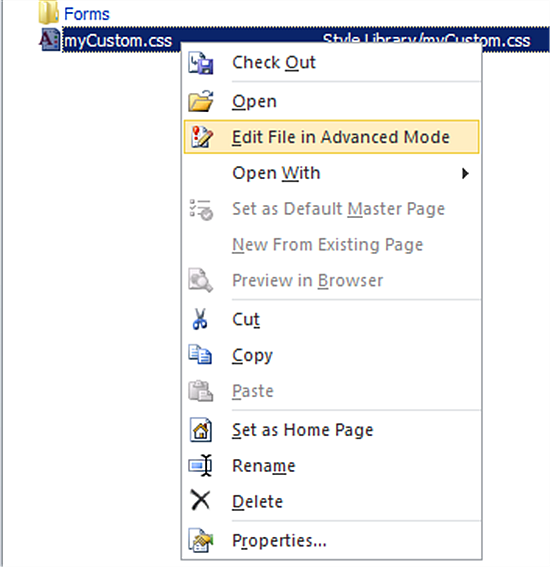
Right click the newly created .css file and select the Edit file in Advanced Mode option.
Now enter some code in the css file. One thing we will do in this tutorial is to render the SharePoint site with a fixed width of 1024 pixels (making a site fixed width is actually a very difficult task using just SharePoint 2010). Additionally, we will also change the ribbon background color and the site background color.
Enter the following code in your css file:
#s4-bodyContainer {
                width: 1024px !important;
                margin-left:auto;
                margin-right:auto;
}
body #s4-ribbonrow {
                background-color:#865102;
}
body.v4master {
                overflow: visible;
                background-color:black;
}
.ms-cui-ribbonTopBars {
                width: 1024px !important;
                margin-left:auto;
                margin-right:auto;
}
.ms-cui-ribbonTopBars > div {
                border-bottom:1px solid transparent !important;
}
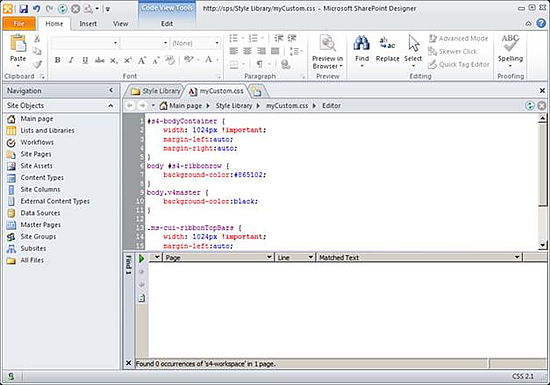
We now have a custom CSS in the Style Library and a custom Master Page. Now we need to associate the css file with the custom Master Page.
Open the myCustom.master file with SharePoint Designer (in advanced editing mode). You will see the site preview, because by default it will open your Master Page on theDesign tab.
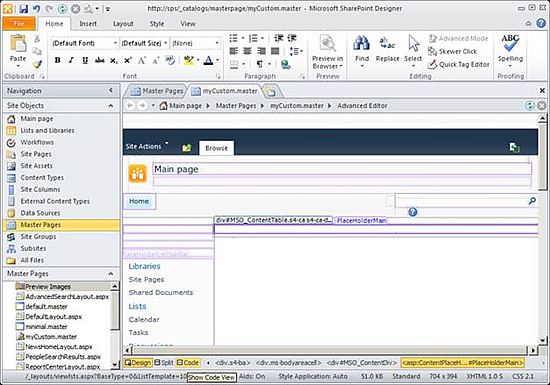
Click the Code tab on the bottom of the editor. You will see the entire Master Page code and content, with many placeholders, Server Ribbon code etc. Fortunately, you don’t have to learn all of these to do some serious branding and modification.
First, we need to connect our Master Page with the css file. Within the <head> tag, we need to add a link to our custom CSS file:
<link href=”/Style%20Library/myCustom.css” rel=”stylesheet” type=”text/css” />
Now modify the s4-workspace area so it will read our css file properly:
Find the line:
<div id=”s4-workspace”>
and replace it with:
<DIV id=”s4-workspace” class=”s4-nosetwidth”>
This will add the class attribute to s4-workspace tag. Without this, our fixed size setting in the CSS file will be overridden by the default inline CSS.
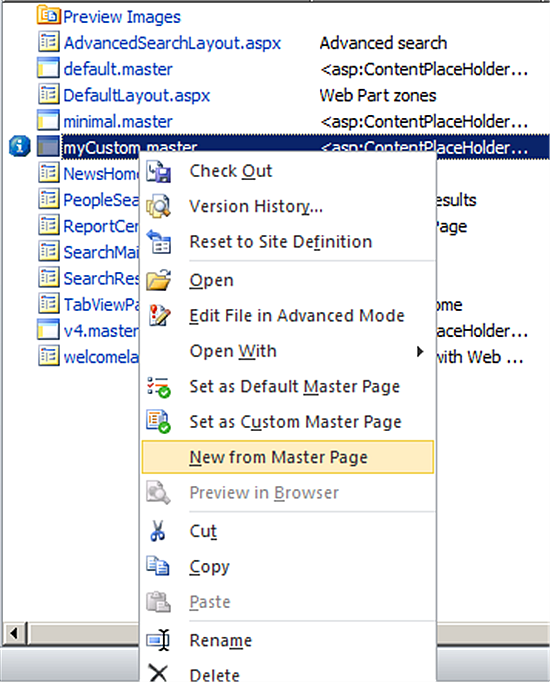
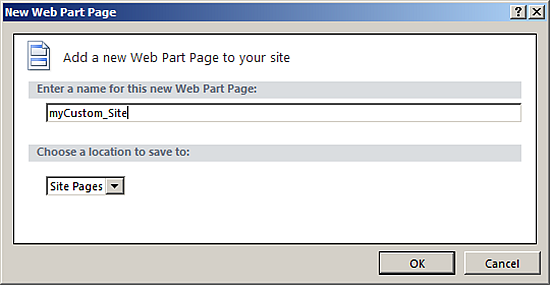
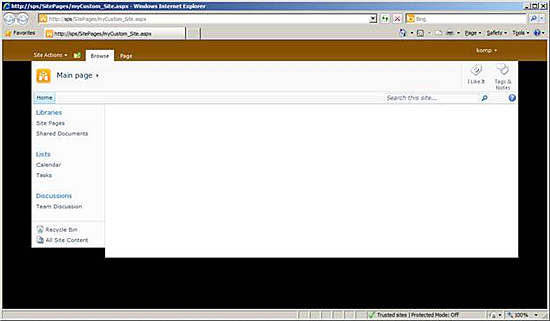
Now we can test our Master Page, before we link it to our production site. The best way is to create a new test page from the selected Master Page. Go back to the Master Pages item in the left menu, and right-click our myCustom.master file, then select the New from Master Page option.
Give the site a name such as myCustom_Site and select where it should be created – the default Site Pages is fine.
After a while a new page will be created and SharePoint Designer will open it for editing (in code view). Click the Preview icon on the ribbon to see your changes.
4.4 Going Live with Your Custom SharePoint Master Page
If we have ensured that the newly created Master Page looks fine we can now connect it with our live production SharePoint site.
Open SharePoint Designer 2010, navigate to the Master Pages option in the left menu, right click the myCustom.master file and select Set as default Master Page.
Now, if you go to your main site (in my SP farm it’s http://master.spdev.local:888/) you should see the changed layout

No comments:
Post a Comment